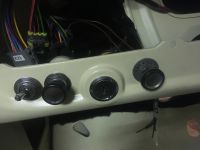
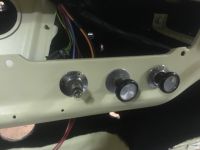
68 F250 "special" Camper Special Project
Moderator: FORDification
-
- New Member
- Posts: 100
- Joined: Thu Mar 26, 2020 3:02 pm
- Location: Germany
Re: 68 F250 "special" Camper Special Project
yes, I keep moving along:
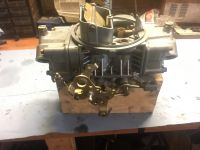
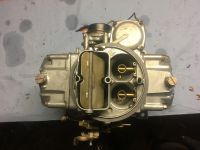
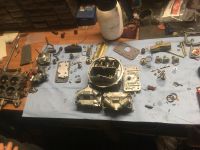
had my carb Holley 750 cleaned and rebuild:
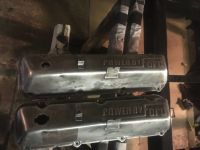
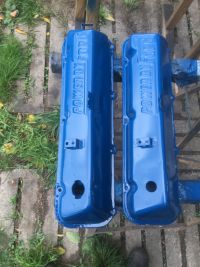
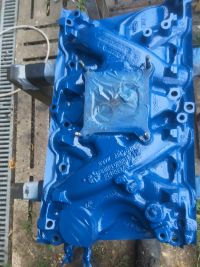
I also removed old paint front the last engine Parts and painted them new:
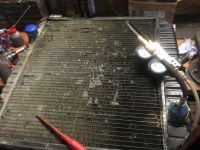
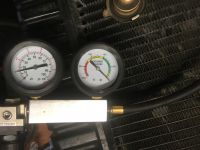
And another topic this weekend was cleaning and inspecting the radiator. Did a pressure test and found 2 little holes. After soldering everything was sealed and holds up to 20PSI pressure with no leaking:
Tomorrow I´ll get my new Hedman headers and hopefully my new clutch disc to move along with engine and transmission.
Cheers
Chris
1968 Mercury Cougar 302
1968 Ford F250 Camper Special 429
- hfdco4
- Blue Oval Guru
- Posts: 1314
- Joined: Mon Apr 01, 2013 1:45 pm
Re: 68 F250 "special" Camper Special Project
Looks good
Paul
FE390PC
1970 F250 4x4
2016 F150 4x4 2.7 ECO
Gone 1997, 1999 & 2003 F150 4x4s
Gone 1988, 1989 & 1991 Broncs
FE390PC
1970 F250 4x4
2016 F150 4x4 2.7 ECO
Gone 1997, 1999 & 2003 F150 4x4s
Gone 1988, 1989 & 1991 Broncs
-
- New Member
- Posts: 100
- Joined: Thu Mar 26, 2020 3:02 pm
- Location: Germany
Re: 68 F250 "special" Camper Special Project
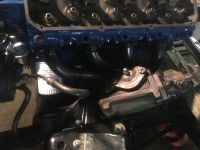
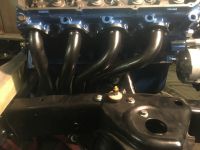
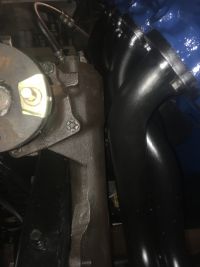
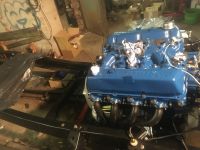
got my hedman 89140 headers yesterday and did a test fit. I´m impressed they fit with no issues on my 460 in a 68 frame.
Just around the starter it´s a bit tight but will work.
just to make it sure: you´ll need to have the saginaw power steering gearbox - the bendix style gearbox won´t fit.
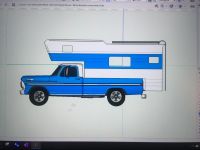
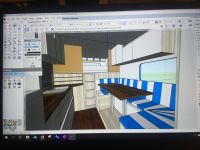
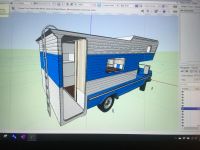
Since I´m planing to build my own slide in camper for that truck - here are the visualisations:
I thougt of the battery charging system for the camper battery. You can use a (expensive) highpower alternator to charge both batteries, but therefore you need heavy rectifier diodes to prevent the camper battery discharging your starter battery.
OR - I´ll try to have 2 independent charging system, more or less 2 independent 12V power systems. So the trucks charging system stays as it is and I add a second alternator to the engine. to disable the second alternator when no camper is there I plan to have a switch in the field circuit. With this switch in off position the alternator won´t produce any voltage and don´t put much load on the engine...it´s just force to turn the pulley in it´s bearings.
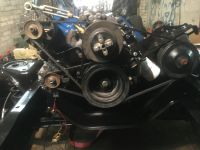
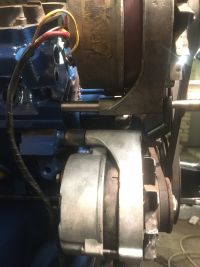
Lucky me has a 460 alternator bracket with the smog pump mounting hole. I put the second alternator in place where the smog pump should be.
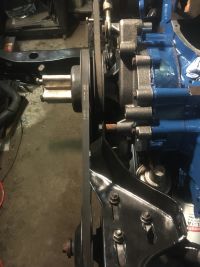
This forces the second alternator a bit forward and it perfectly alignes with the second belt groove. This groove is normally used for the power steering pump and therefore I moved the power steering pump bracket about 1" forward to align it with the most forward groove.
I used a standard ford 65A alternator which was laying around. The biggest challenge on that is: the smog pump has a 3/8" mounting hole and so the bracket and the head aswell, but the alternator needs a 7/16" mounting bolt. I made a bushing with ID 3/8 and OD 12mm and drilles the hole in the alternator to 12mm to get the bushing in. Now it sits tight on the 3/8 bolt.
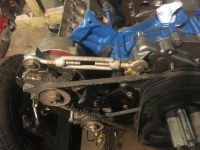
I also need something to tighten the belt and therfore I used an adjustment rod laying around (it´s something to thighten steel ropes in this picture - will be replaced by a serious adjustment rod). Works pretty good!
I´m pretty happy with this at the moment. We will see how it all end´s up in real life...
Cheers
Chris
1968 Mercury Cougar 302
1968 Ford F250 Camper Special 429
-
- New Member
- Posts: 85
- Joined: Tue Oct 15, 2019 1:59 pm
- Location: Arkansas
Re: 68 F250 "special" Camper Special Project
Very good work Chris, you do keep chugging along! Appreciate all of the problems solved and the documentation, well done!
1970 F100 302 C-4 factory air
-
- New Member
- Posts: 100
- Joined: Thu Mar 26, 2020 3:02 pm
- Location: Germany
Re: 68 F250 "special" Camper Special Project
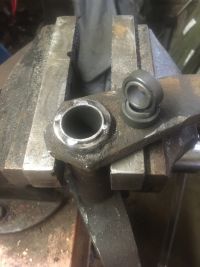
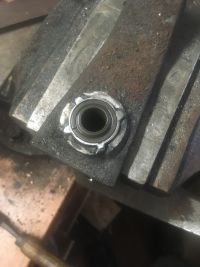
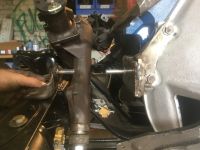
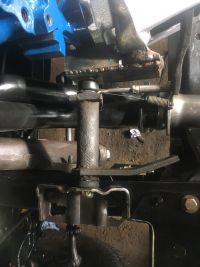
I worked on the clutch linkage and got it aligned properly. Had to built a new mount on the transmission side. For the equalizer bar I used ball bearings:
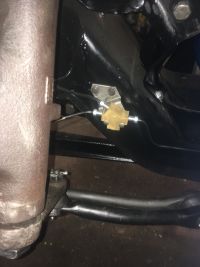
got my new brakelines installed. Did all the bending by myself:
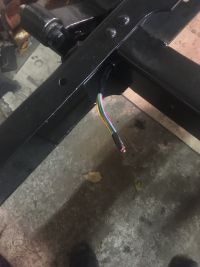
I`ll also do complete new wiring by myself- the first harness is installed and waiting to get plugs crimped on:
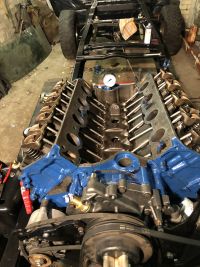
I assembeled the heads and put them on the block. Did a oil pressure test with a drill:
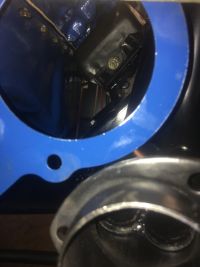
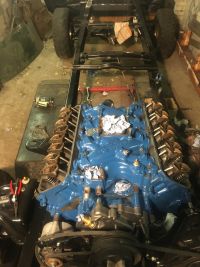
After oil pressure was good I mounted the intake, flywheel and bellhousing with starter. Did another test fit with the hedmans and everything keeps fitting well. I used the starter to turn the engine several times to do a compression test on all 8 cylinders.
Got readings from 152-160PSI which is actually good I think.
When the engine had run the first 100 Miles I´ll do that again and I think I will have even higher readings then.
Cheers
Chris
1968 Mercury Cougar 302
1968 Ford F250 Camper Special 429
-
- Blue Oval Fan
- Posts: 561
- Joined: Tue Jul 15, 2014 10:28 pm
- Location: Colorado Springs, CO
Re: 68 F250 "special" Camper Special Project
Making great progress!!
1972 F250 Sports Custom 390 FE C6 2WD Dana 60 4:10 gears
-
- New Member
- Posts: 100
- Joined: Thu Mar 26, 2020 3:02 pm
- Location: Germany
Re: 68 F250 "special" Camper Special Project
https://vimeo.com/466693436
It´s alive
started with no issues and all parameters looking good
Cheers
Chris
It´s alive
started with no issues and all parameters looking good
Cheers
Chris
1968 Mercury Cougar 302
1968 Ford F250 Camper Special 429
-
- Blue Oval Guru
- Posts: 1471
- Joined: Tue Apr 05, 2011 3:30 pm
- Location: Southeastern Massachusetts
Re: 68 F250 "special" Camper Special Project
Awesome sounds great.
- sargentrs
- 100% FORDified!
- Posts: 9866
- Joined: Fri Jun 22, 2007 9:30 am
- Location: Georgia, Jasper
Re: 68 F250 "special" Camper Special Project
Congratulations!
Randy
1970 F100 Sport Custom Limited LWB, 302cid, 3 on the tree. NO A/C, NO P/S, NO P/B. Currently in 1000 pcs while rebuilding. Project thread: http://www.fordification.com/forum/view ... 22&t=59995 Plan: 351w, C4, LSD, pwr front disc, p/s, a/c, bucket seats, new interior and paint.
1987 F-150 XLT Lariat, 5.0/C6 auto.
-
- New Member
- Posts: 100
- Joined: Thu Mar 26, 2020 3:02 pm
- Location: Germany
Re: 68 F250 "special" Camper Special Project
Thanks guys, I´m really happy with the engine for the moment.
But the last days I spend some tome on other topics:
I rebuild my F600 instrument panel and changed the ammeter with 2 Alt idiot lights for my dual alternator setup.
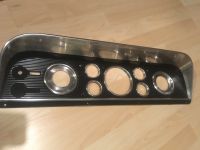
For the first time I´ll put some cheap 52mm gauges in the existing holes left, Volts and Tach. When more money is available I´ll convert these gauges to a custom set of speedhut 3-3/8 gauges:
I also relocated the emergency flasher unit into the instrument Panel:
On Thursday I got my cab and some other parts back from sandblasting and priming. The paint surface covering worked well and just the surfaces I want where blasted. Very happy with this work!
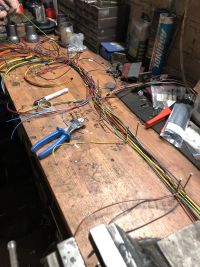
With the cab back I started to build my underdash wiring harness. Therefore I started with kind of a "map" drawn on a plate of wood. To fix the bendings and junctions I used some nails:
That done I run the wires, each at a time. Double and triple checked with the schematics, leave the ends longer at this time:
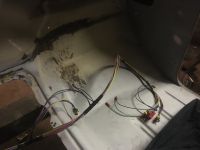
When I had all wires in I fixed the harness with some cable ties just for testing. Put it in the cab for proper fitment and marked all splices to cut them on their needed length:
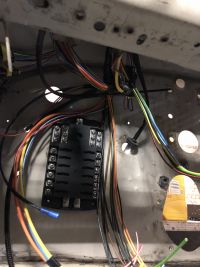
And I´ll use a complete new Fusepanel with 12 standard car fuses:
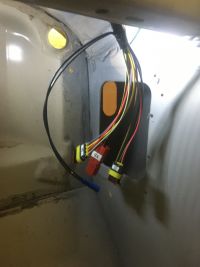
After everything was marked the harness has to come back out to cut the splices and apply the connectors. Each connector is marked in reference to the wiring diagram:
Put it back in for a final check with the important devices (switches, Instrument Panel,...).
Since I need to paint my cab the harness needs to come out one more time.
Hopefully I can paint it this week, need the cab sealed first and I´ll apply some coating on the underside. The seam sealer and the coating will be overpainted.
Cheers
Chris
But the last days I spend some tome on other topics:
I rebuild my F600 instrument panel and changed the ammeter with 2 Alt idiot lights for my dual alternator setup.
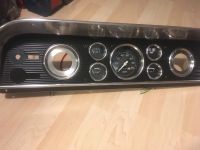
For the first time I´ll put some cheap 52mm gauges in the existing holes left, Volts and Tach. When more money is available I´ll convert these gauges to a custom set of speedhut 3-3/8 gauges:
I also relocated the emergency flasher unit into the instrument Panel:
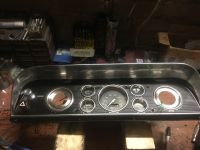
On Thursday I got my cab and some other parts back from sandblasting and priming. The paint surface covering worked well and just the surfaces I want where blasted. Very happy with this work!
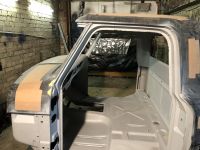
With the cab back I started to build my underdash wiring harness. Therefore I started with kind of a "map" drawn on a plate of wood. To fix the bendings and junctions I used some nails:
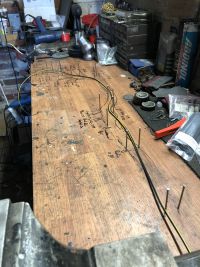
That done I run the wires, each at a time. Double and triple checked with the schematics, leave the ends longer at this time:
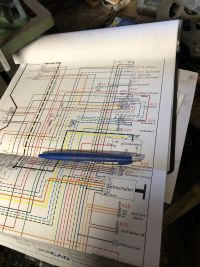
When I had all wires in I fixed the harness with some cable ties just for testing. Put it in the cab for proper fitment and marked all splices to cut them on their needed length:
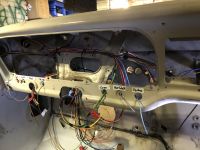
And I´ll use a complete new Fusepanel with 12 standard car fuses:
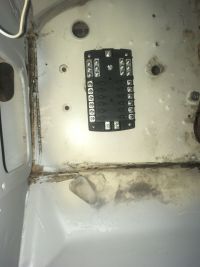
After everything was marked the harness has to come back out to cut the splices and apply the connectors. Each connector is marked in reference to the wiring diagram:
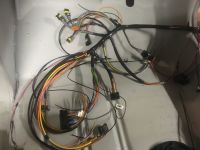
Put it back in for a final check with the important devices (switches, Instrument Panel,...).
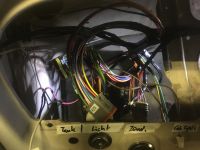
Since I need to paint my cab the harness needs to come out one more time.
Hopefully I can paint it this week, need the cab sealed first and I´ll apply some coating on the underside. The seam sealer and the coating will be overpainted.
Cheers
Chris
1968 Mercury Cougar 302
1968 Ford F250 Camper Special 429
- hfdco4
- Blue Oval Guru
- Posts: 1314
- Joined: Mon Apr 01, 2013 1:45 pm
Re: 68 F250 "special" Camper Special Project
Wow, great progress. Props for making your own harness as well!
Paul
FE390PC
1970 F250 4x4
2016 F150 4x4 2.7 ECO
Gone 1997, 1999 & 2003 F150 4x4s
Gone 1988, 1989 & 1991 Broncs
FE390PC
1970 F250 4x4
2016 F150 4x4 2.7 ECO
Gone 1997, 1999 & 2003 F150 4x4s
Gone 1988, 1989 & 1991 Broncs
-
- New Member
- Posts: 100
- Joined: Thu Mar 26, 2020 3:02 pm
- Location: Germany
Re: 68 F250 "special" Camper Special Project
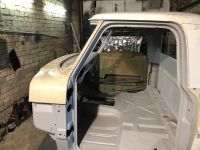
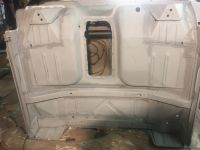
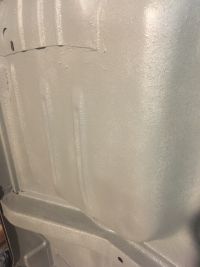
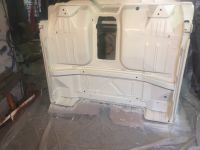
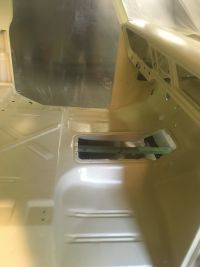
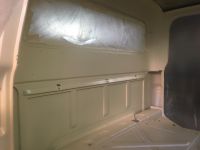
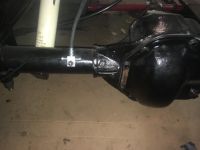
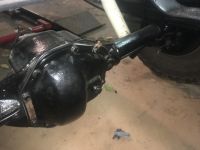
Cab is sealed, got protection coating underneeth and is painted. I mixed 2 RAL colours to hit more or less the original pebble beige outside paint tone.
It´s of course not a perfect match but since there are no direct transitions to the outside paint it´ll be ok.
I did the inner front fenders and the inner hood as well. Now waiting for the box back from sandblasting.
Cheers
Chris
It´s of course not a perfect match but since there are no direct transitions to the outside paint it´ll be ok.
I did the inner front fenders and the inner hood as well. Now waiting for the box back from sandblasting.
Cheers
Chris
1968 Mercury Cougar 302
1968 Ford F250 Camper Special 429
- JWW
- Blue Oval Fanatic
- Posts: 793
- Joined: Wed Apr 11, 2007 7:57 pm
- Location: Tennessee
Re: 68 F250 "special" Camper Special Project
Looking good!
JWW
1967 F100 Ranger, Auto, 240ci
2004 F150 Crew Cab
My project: http://www.fordification.com/forum/view ... &sk=t&sd=a
1967 F100 Ranger, Auto, 240ci
2004 F150 Crew Cab
My project: http://www.fordification.com/forum/view ... &sk=t&sd=a
- sargentrs
- 100% FORDified!
- Posts: 9866
- Joined: Fri Jun 22, 2007 9:30 am
- Location: Georgia, Jasper
Re: 68 F250 "special" Camper Special Project
Great work! Looking good and excellent work on the wiring.
Randy
1970 F100 Sport Custom Limited LWB, 302cid, 3 on the tree. NO A/C, NO P/S, NO P/B. Currently in 1000 pcs while rebuilding. Project thread: http://www.fordification.com/forum/view ... 22&t=59995 Plan: 351w, C4, LSD, pwr front disc, p/s, a/c, bucket seats, new interior and paint.
1987 F-150 XLT Lariat, 5.0/C6 auto.
1970 F100 Sport Custom Limited LWB, 302cid, 3 on the tree. NO A/C, NO P/S, NO P/B. Currently in 1000 pcs while rebuilding. Project thread: http://www.fordification.com/forum/view ... 22&t=59995 Plan: 351w, C4, LSD, pwr front disc, p/s, a/c, bucket seats, new interior and paint.
1987 F-150 XLT Lariat, 5.0/C6 auto.
-
- New Member
- Posts: 100
- Joined: Thu Mar 26, 2020 3:02 pm
- Location: Germany
Re: 68 F250 "special" Camper Special Project
Thanks guys!
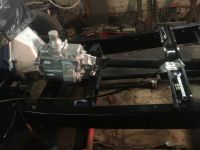
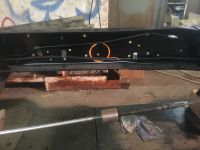
I finished my clutch and transmission topic yesterday:
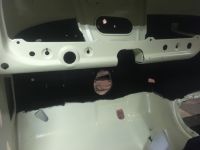
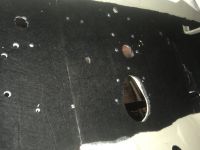
today I installed a new selfmade firewall insulation;
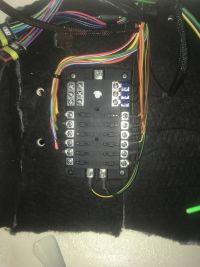
and with it in place I was able to final install my new wiring harness and hook it up to the fusepanel:
also installed all switches and made new labels for the add on switches to look more or less like factory:
I´m curently wainting for exhaust parts to make my own new 2.5" exhaust system...
Cheers
Chris
1968 Mercury Cougar 302
1968 Ford F250 Camper Special 429