Hackster's F100 #2 CV Swap 6 speed manual and Coyote
Moderator: FORDification
- SATURN5
- New Member

- Posts: 157
- Joined: Tue Oct 02, 2012 1:08 pm
- Location: Kettering, Oh
Re: Hackster's F100 #2 CV Swap 6 speed manual and Coyote
Nice battery box. I've got the same battery in the SVO, which.. I need to replace after 6 years. 
Bob
68 F100 Flareside, CVIFS, Cobra IRS, DOHC, M122, MS3, T45, 4.10, Cobra brakes
84 Mustang SVO, B234F, HE351, Full Cobra spec suspension and brakes including IRS, T-tops
96 Mark VIII, Complete chassis bracing, 03 Cobra wheels, Maruader converter, built trans.
68 F100 Flareside, CVIFS, Cobra IRS, DOHC, M122, MS3, T45, 4.10, Cobra brakes
84 Mustang SVO, B234F, HE351, Full Cobra spec suspension and brakes including IRS, T-tops
96 Mark VIII, Complete chassis bracing, 03 Cobra wheels, Maruader converter, built trans.
-
Ozblitz
- New Member

- Posts: 44
- Joined: Wed Nov 11, 2015 8:57 am
Re: Hackster's F100 #2 CV Swap 6 speed manual and Coyote
Man your work is amazing! I wish i could do a tenth of what you can do!
I gotta ask, what kind of wheels are those? I also love the wheels on the white truck.
I just picked up a 68 and Im really debating doing the crown vic suspension, just so I can get wheels like that!
I gotta ask, what kind of wheels are those? I also love the wheels on the white truck.
I just picked up a 68 and Im really debating doing the crown vic suspension, just so I can get wheels like that!
-
hackster
- Preferred User

- Posts: 317
- Joined: Fri Oct 18, 2013 11:21 am
Re: Hackster's F100 #2 CV Swap 6 speed manual and Coyote
Thanks, its taken a lot of building to get just to where I am and still have a long ways to go....I am young still =)Ozblitz wrote:Man your work is amazing! I wish i could do a tenth of what you can do!
I gotta ask, what kind of wheels are those? I also love the wheels on the white truck.
I just picked up a 68 and Im really debating doing the crown vic suspension, just so I can get wheels like that!
the wheels are Iforged on this build and Rushforths on the ls truck.
Don't do the swap just for wheels...do it because it makes the truck unbelievable to drive. I cannot speak highly enough about this swap, truck drives like a brand new vehicle and I mean that, especially with a late model motor and tranny.
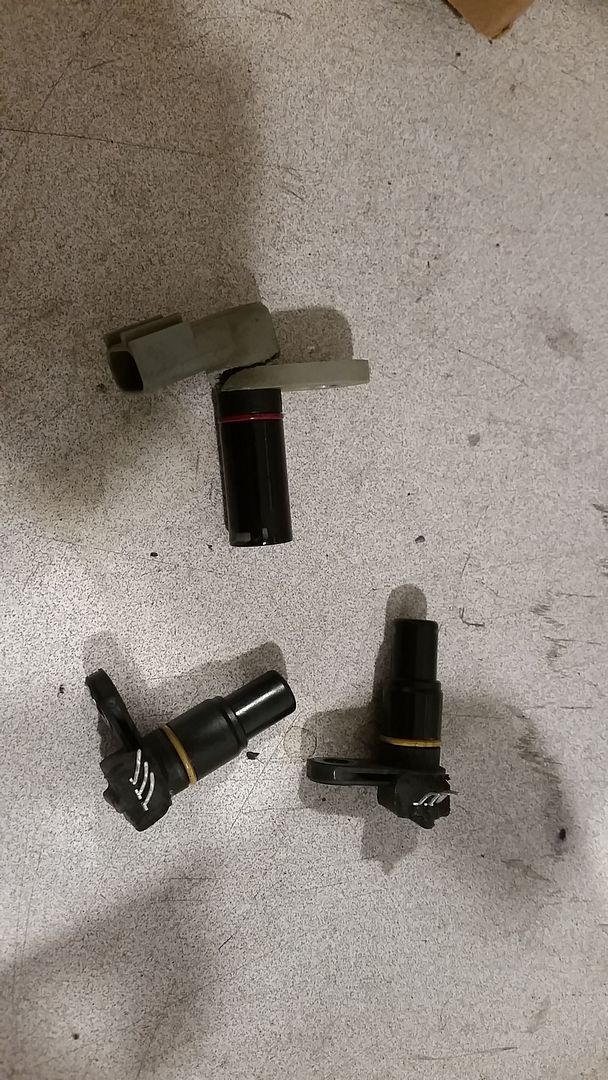
New harness showed up at Ford today so I stopped on my way home and snagged it. It was an exact match for the factory one, I was pretty happy with that. You can see that there was lots of damage on the old harness. The main connectors were cut off by the previous owner. The connectors for the solenoids were broken as well as the cam sensors were as well.
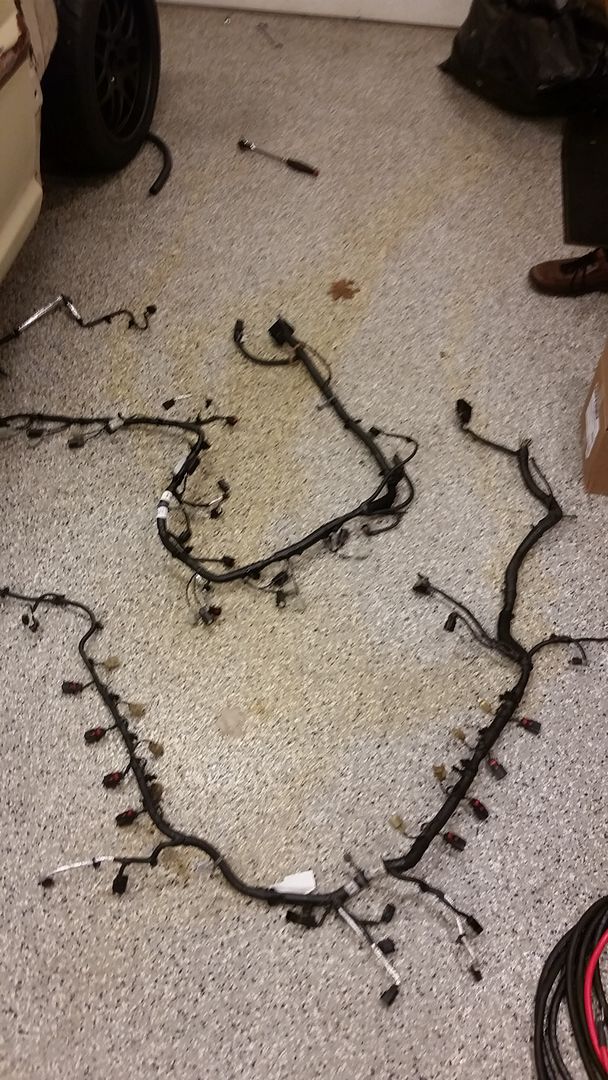
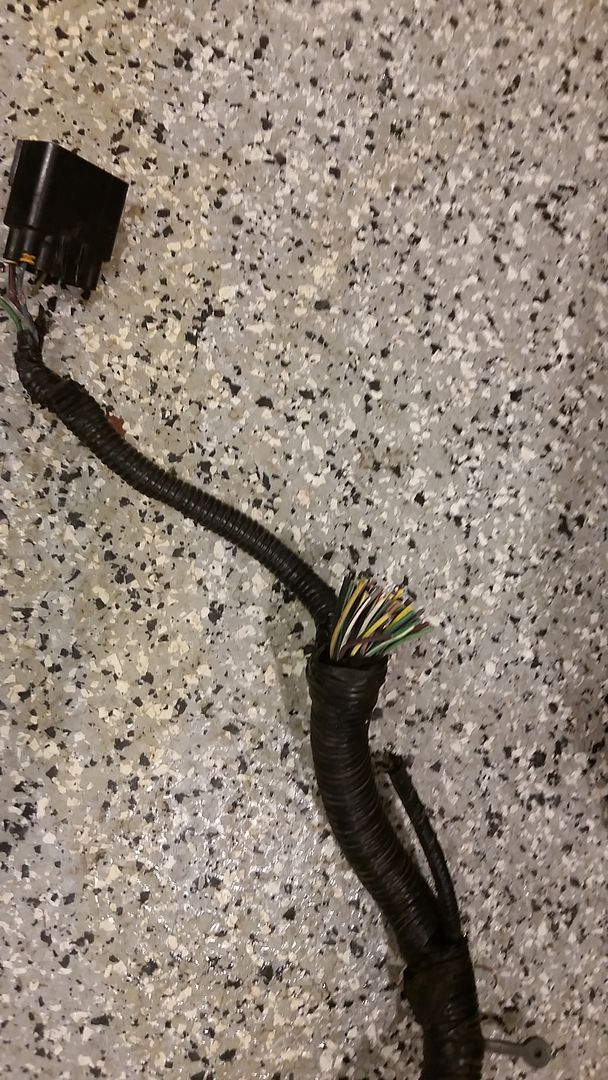
I figured while I had this out I would take the opportunity to do a deep clean on the old girl, she was looking a bit ratty.
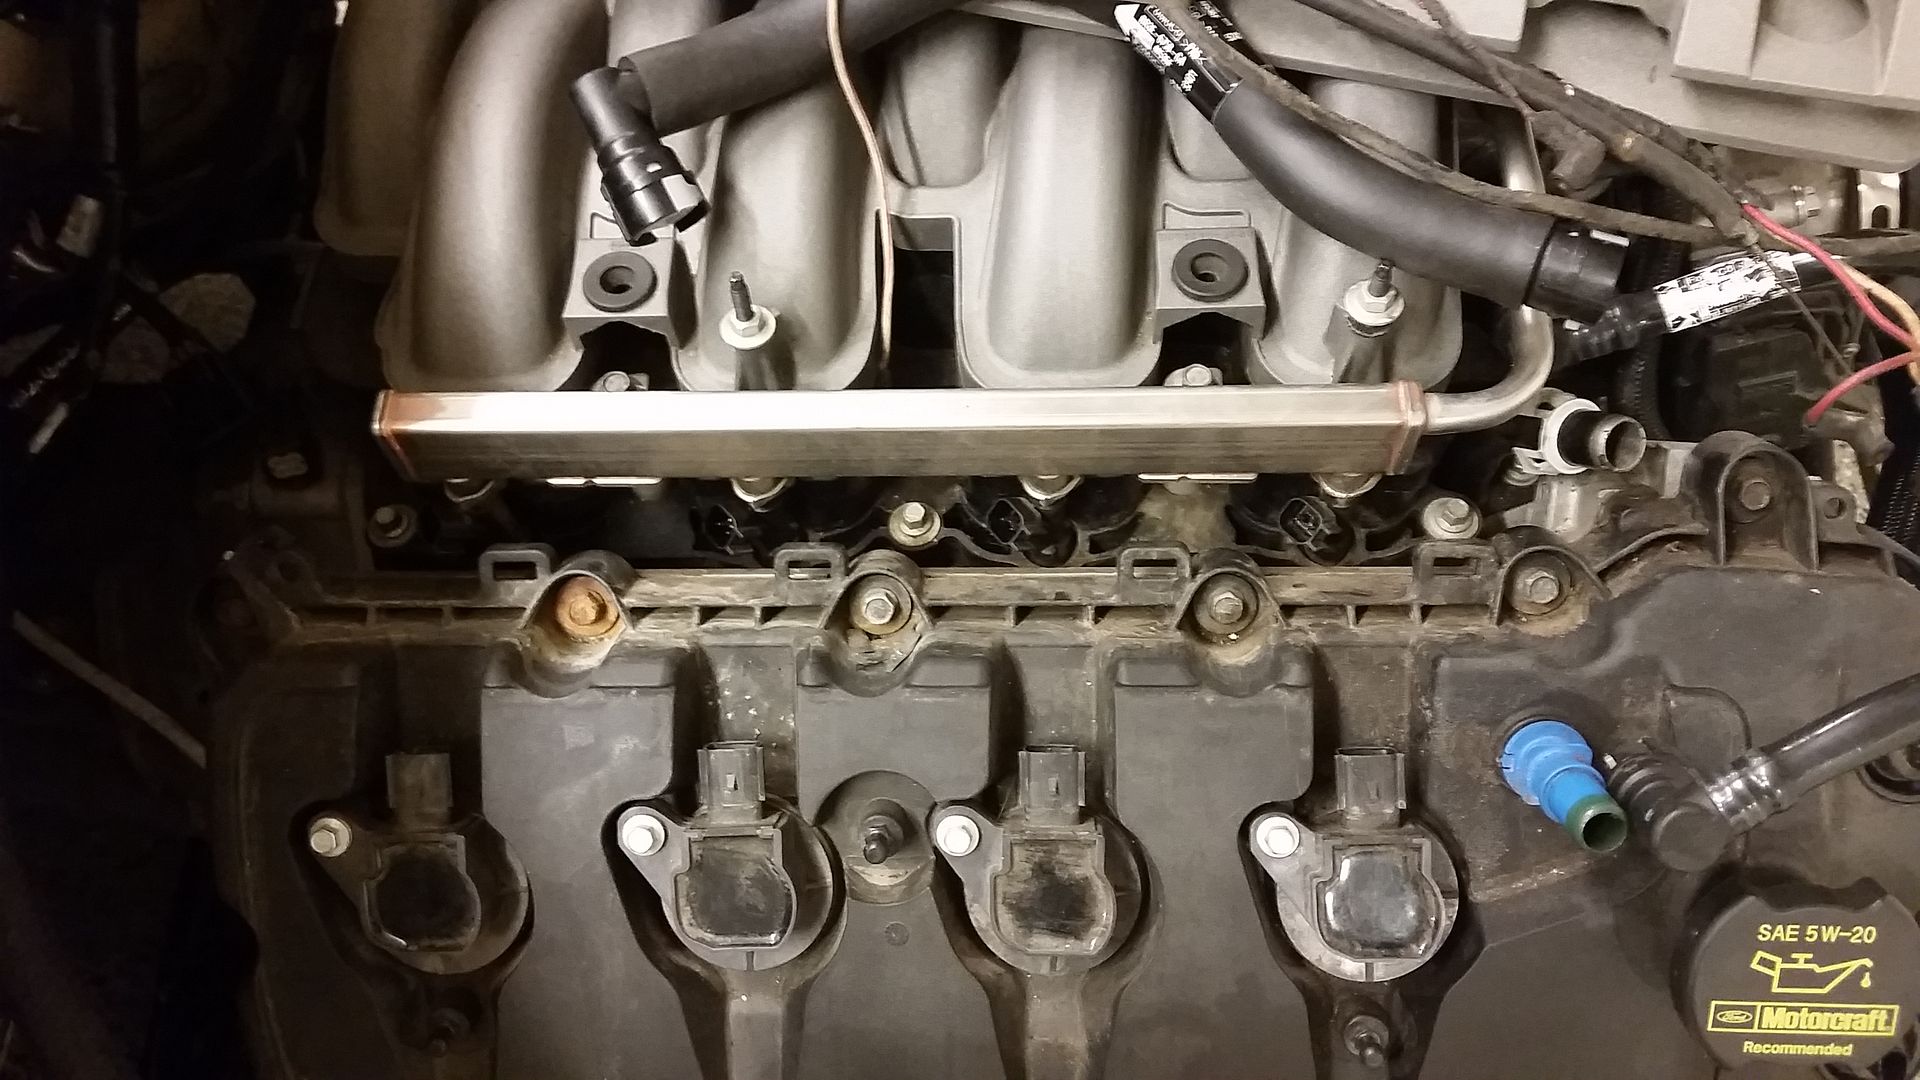
Oh that is soo much better =).....yes I am super OCD.
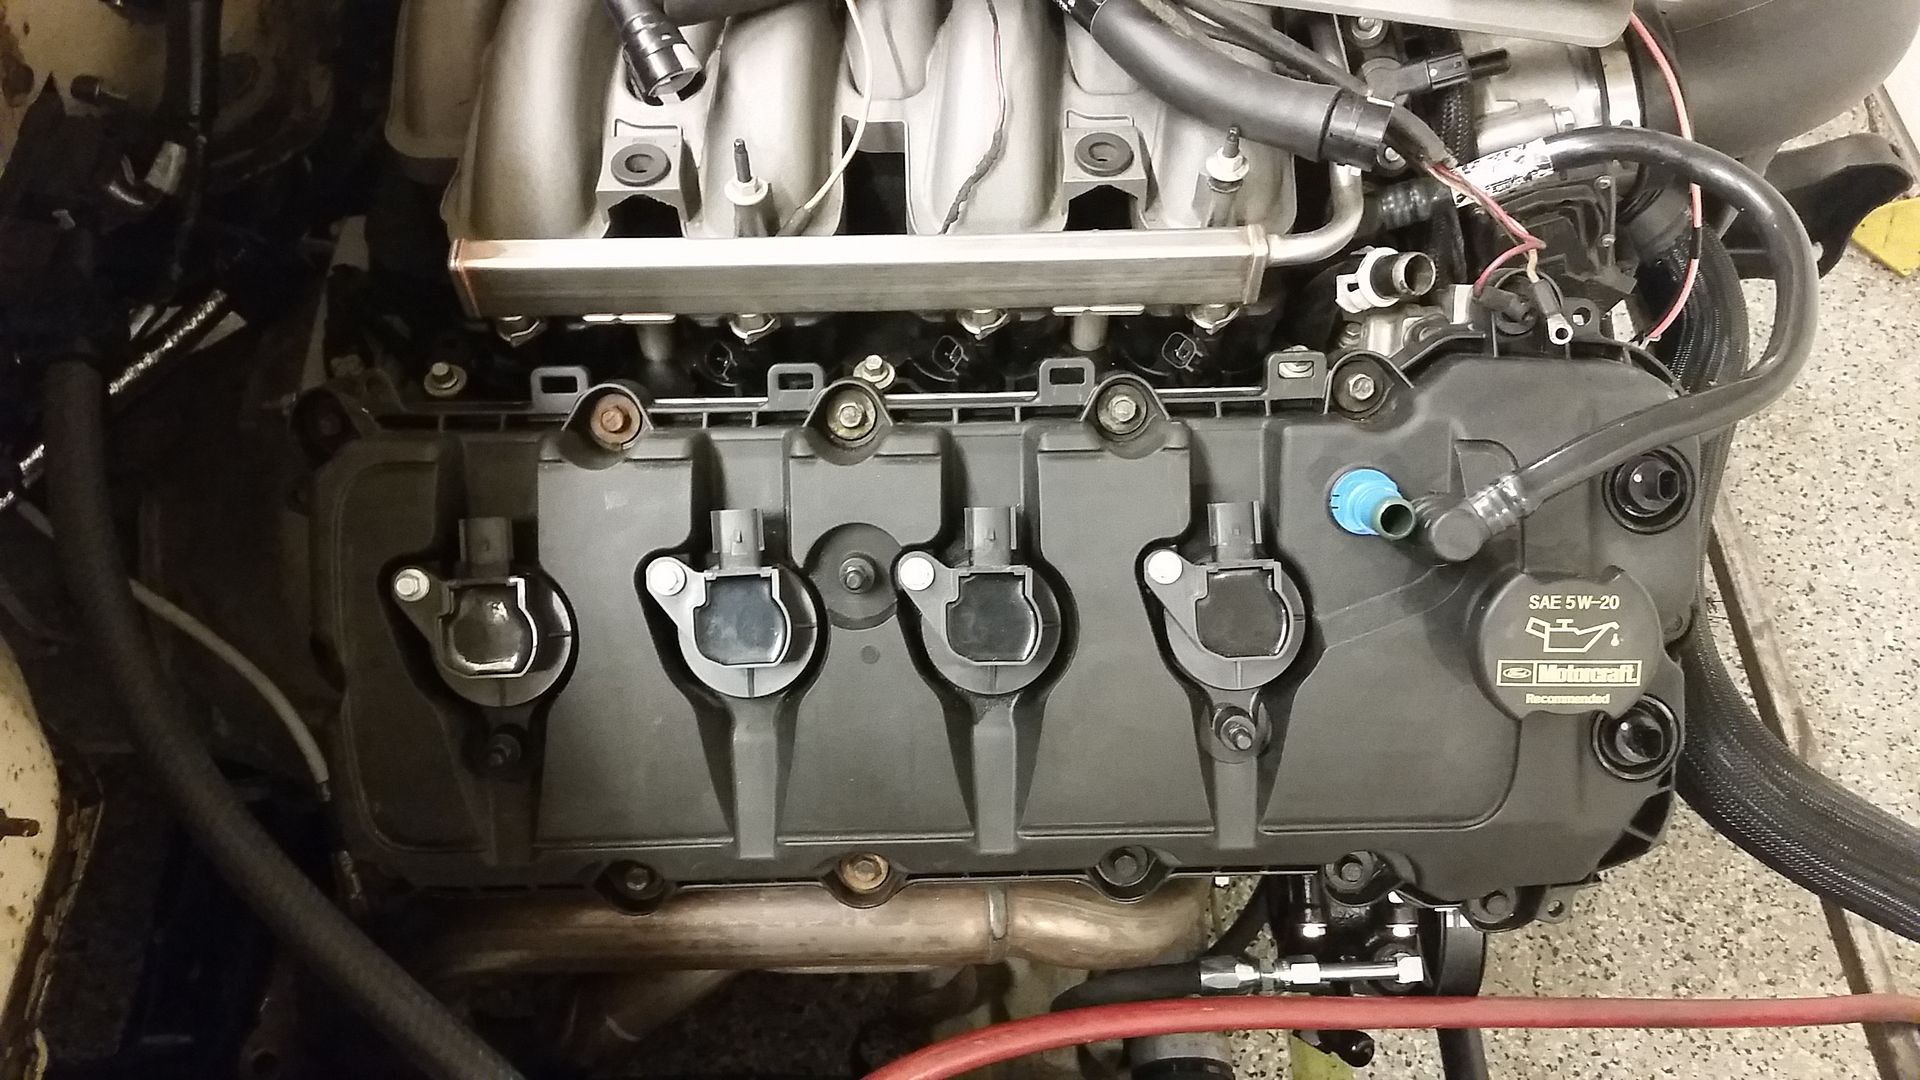
While I was at it, I went ahead and swapped out these broken sensors on the back of the heads. They smacked the firewall in the crash.
Knowing what I know now, I would have just bought a crate motor. I dont think I ended up much ahead of the game doing what I did as I ended up replacing a lot....oil pan, main harness, cam sensors. I think I have about $700.00 into just those parts and pieces.
This side was already messed up from something, not sure what, looked like welding or something like that. So I cleaned it up a little bit and shot it with some rattle can that is almost a dead match for the stock color. I think I like it. Not too much and doesnt look like I am trying too hard.
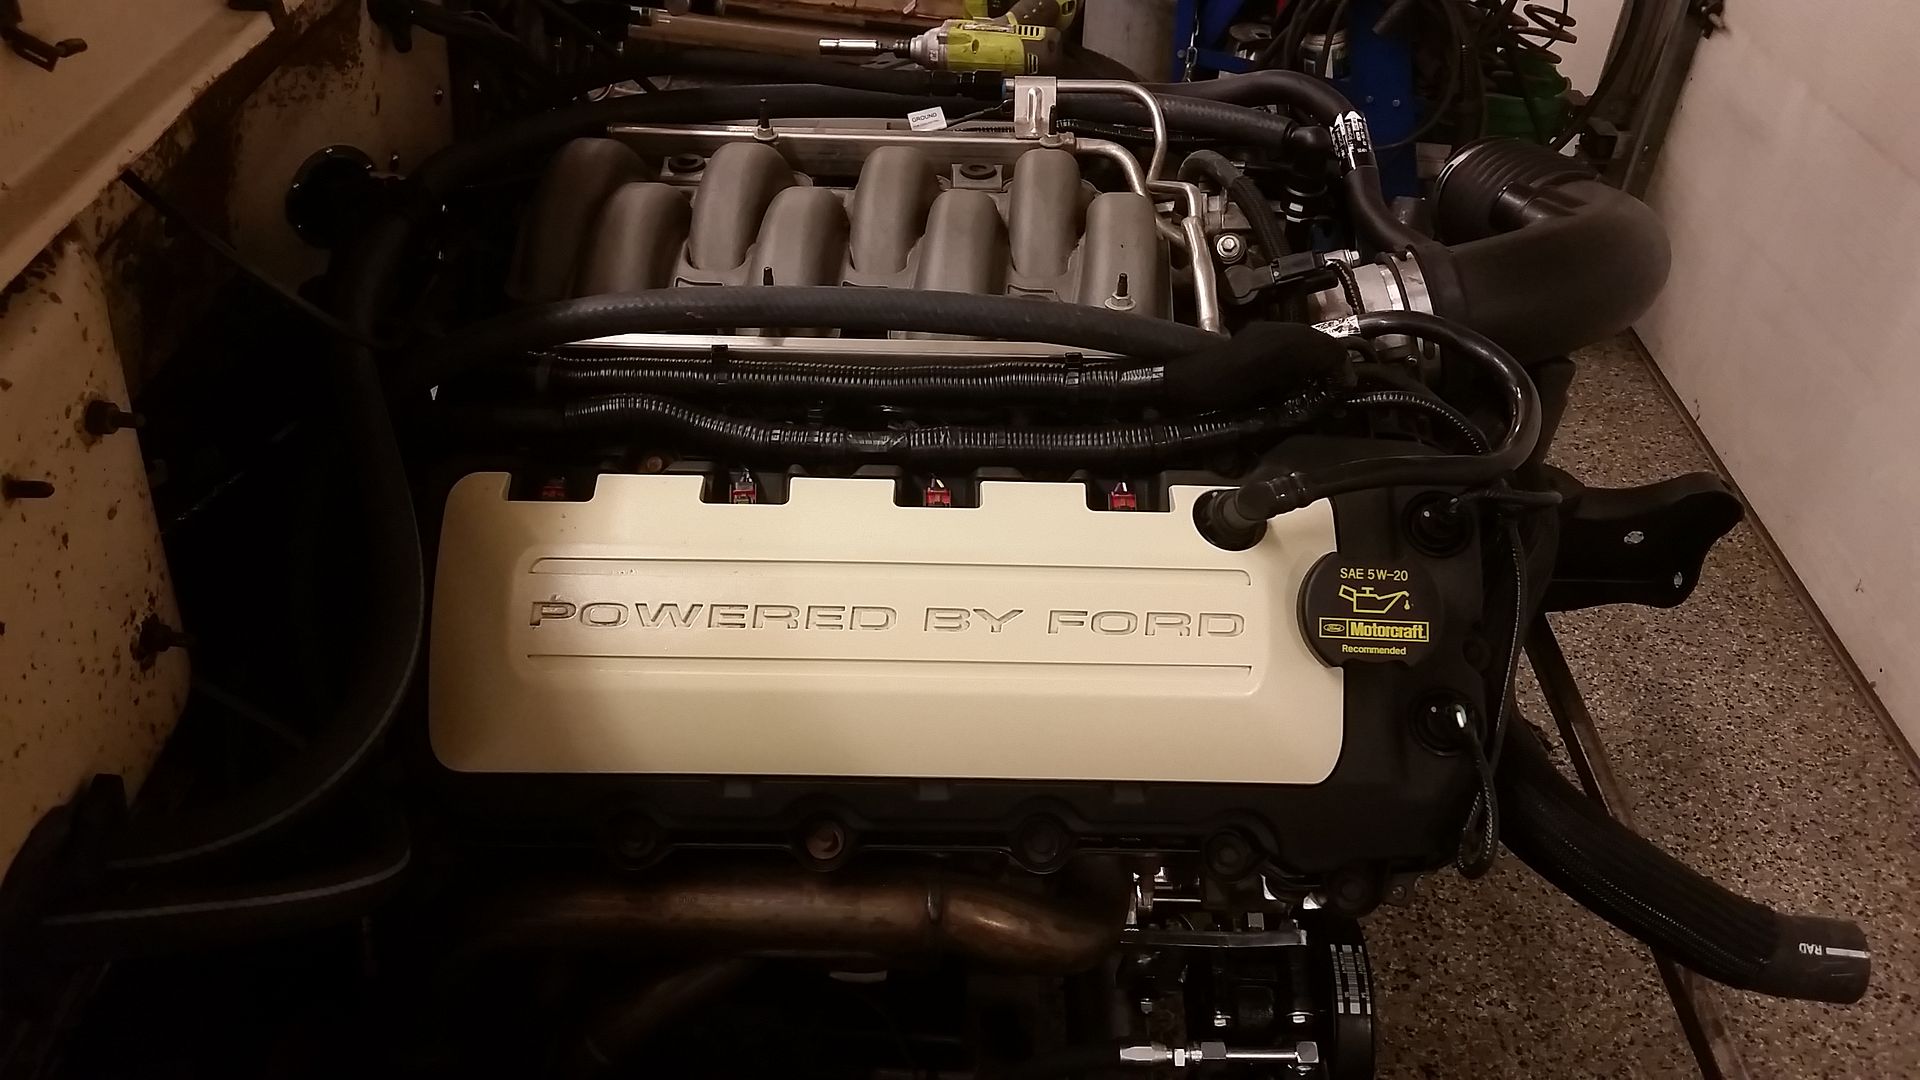
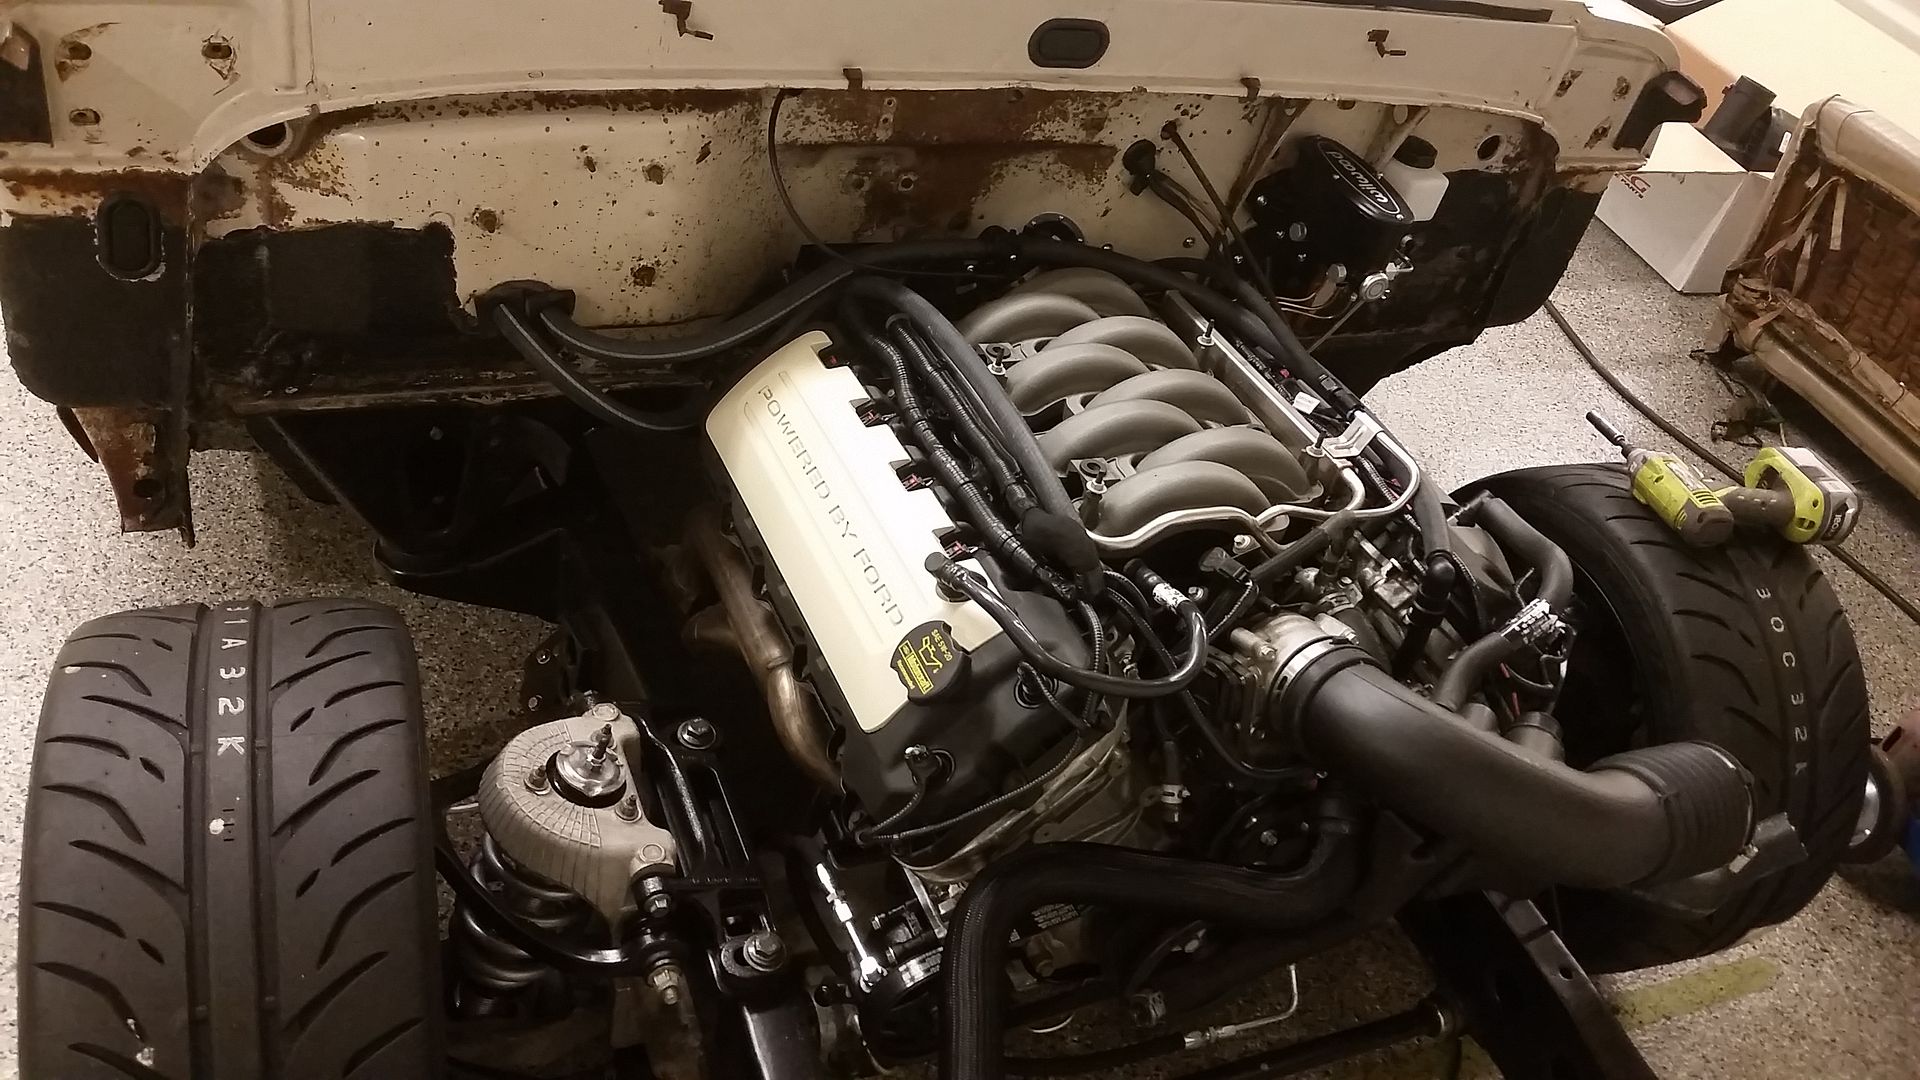
I am about to be at the point of setting the front clip back on......kind of scary.
Should be able to make a little more progress on the battery and wiring this weekend.
Sean
-
hackster
- Preferred User

- Posts: 317
- Joined: Fri Oct 18, 2013 11:21 am
Re: Hackster's F100 #2 CV Swap 6 speed manual and Coyote
Not that is was a lack of effort but only got about an hour or so out in the garage in the last few days.
I managed to get the battery box all finished up and let me tell you that thing was a ton of work.
You can see how I am mounting it on the top of the frame. The holes are offset so that I can keep the original vin number on the frame in tact.
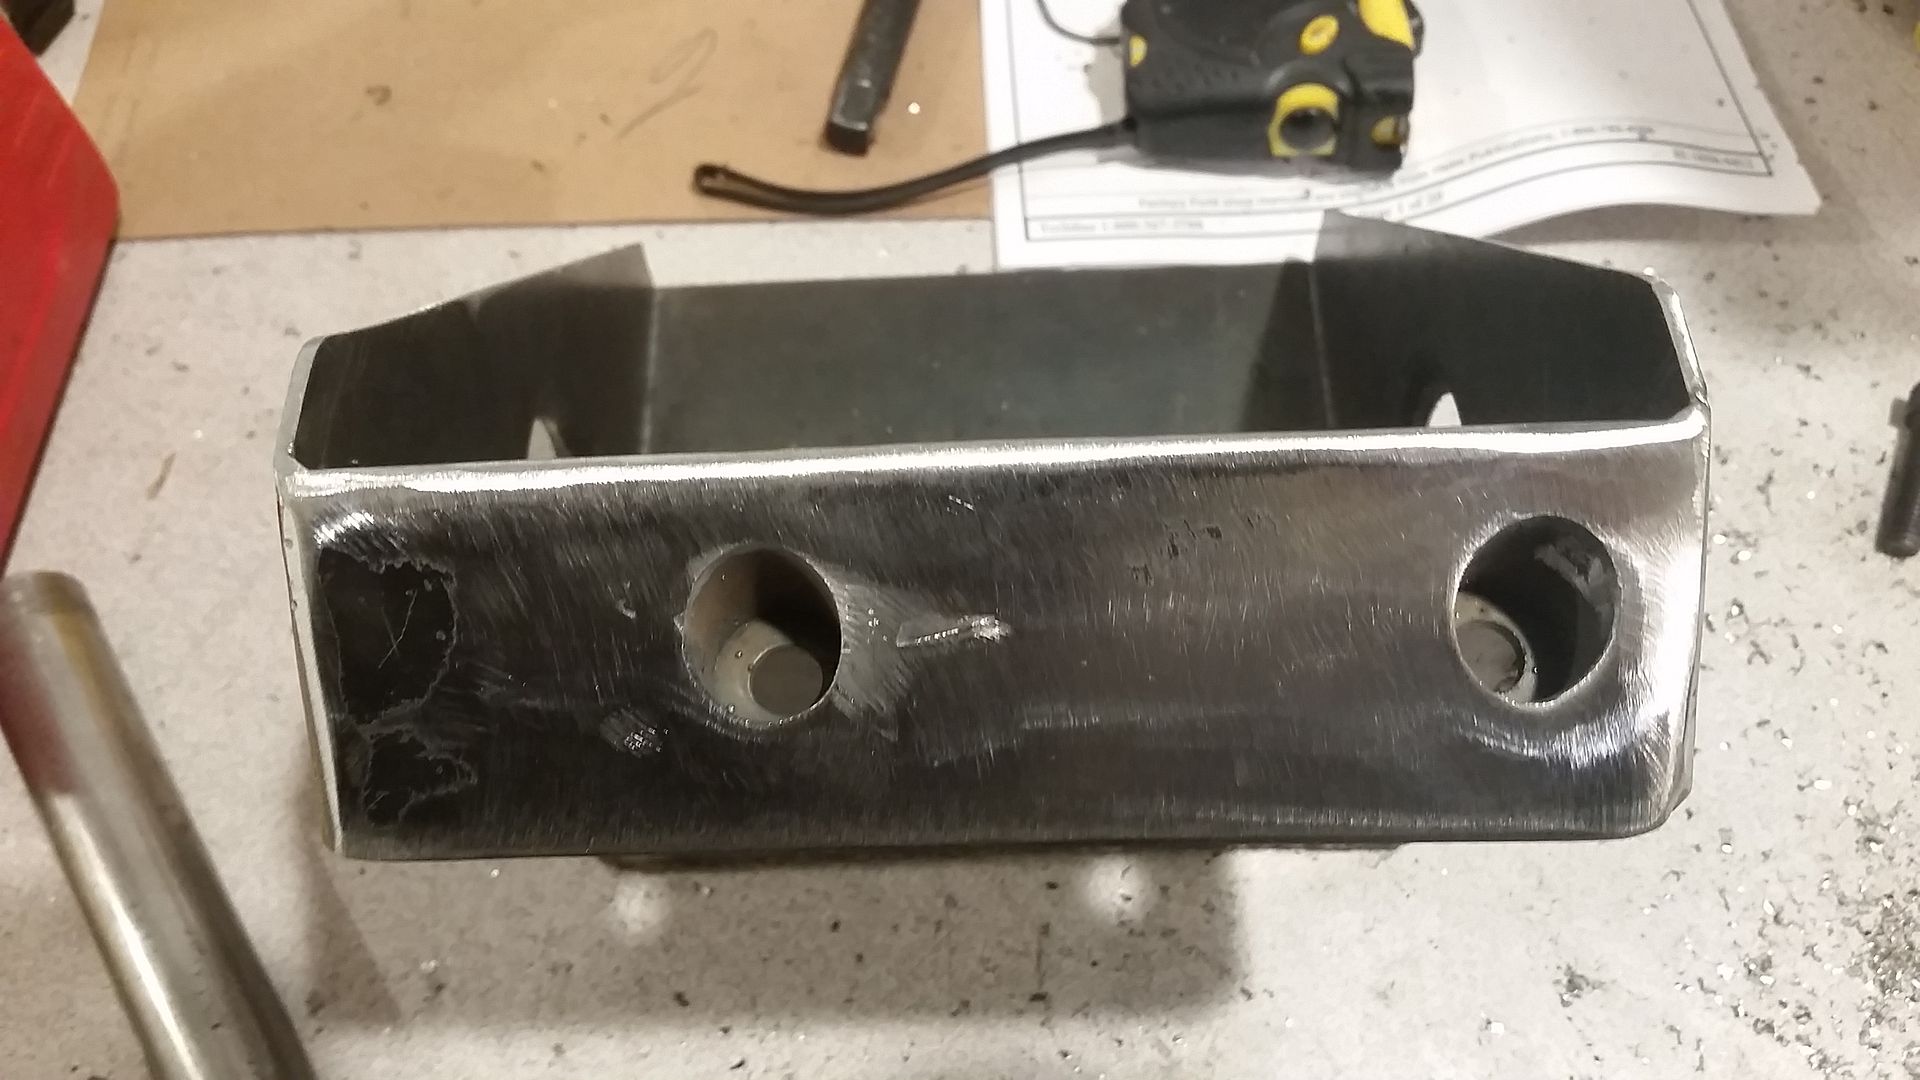
Painted and bolted to the the frame. There is also a 3/8" counter sunk screw in from the inside of the battery box into the boxing plate for the mount as well This third bolt should make it NHRA legal.
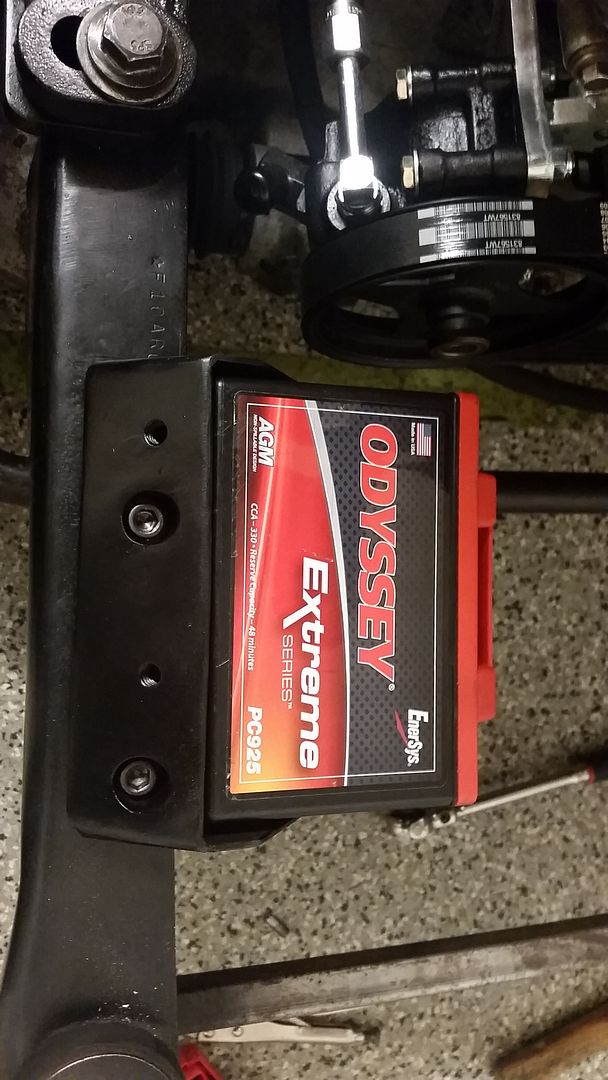
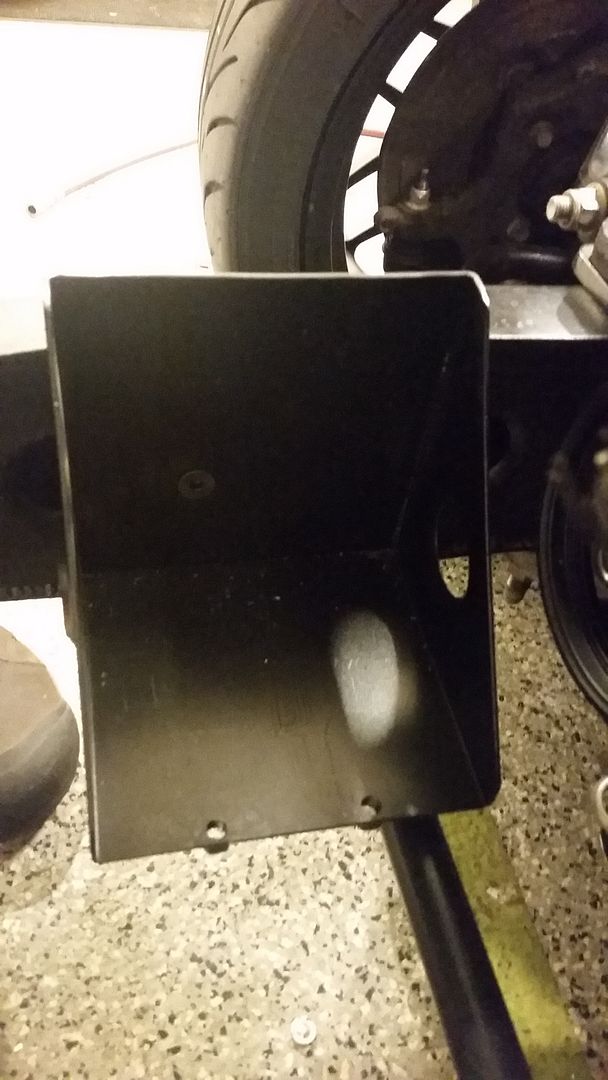
Top shot, also got some dimple dies done.
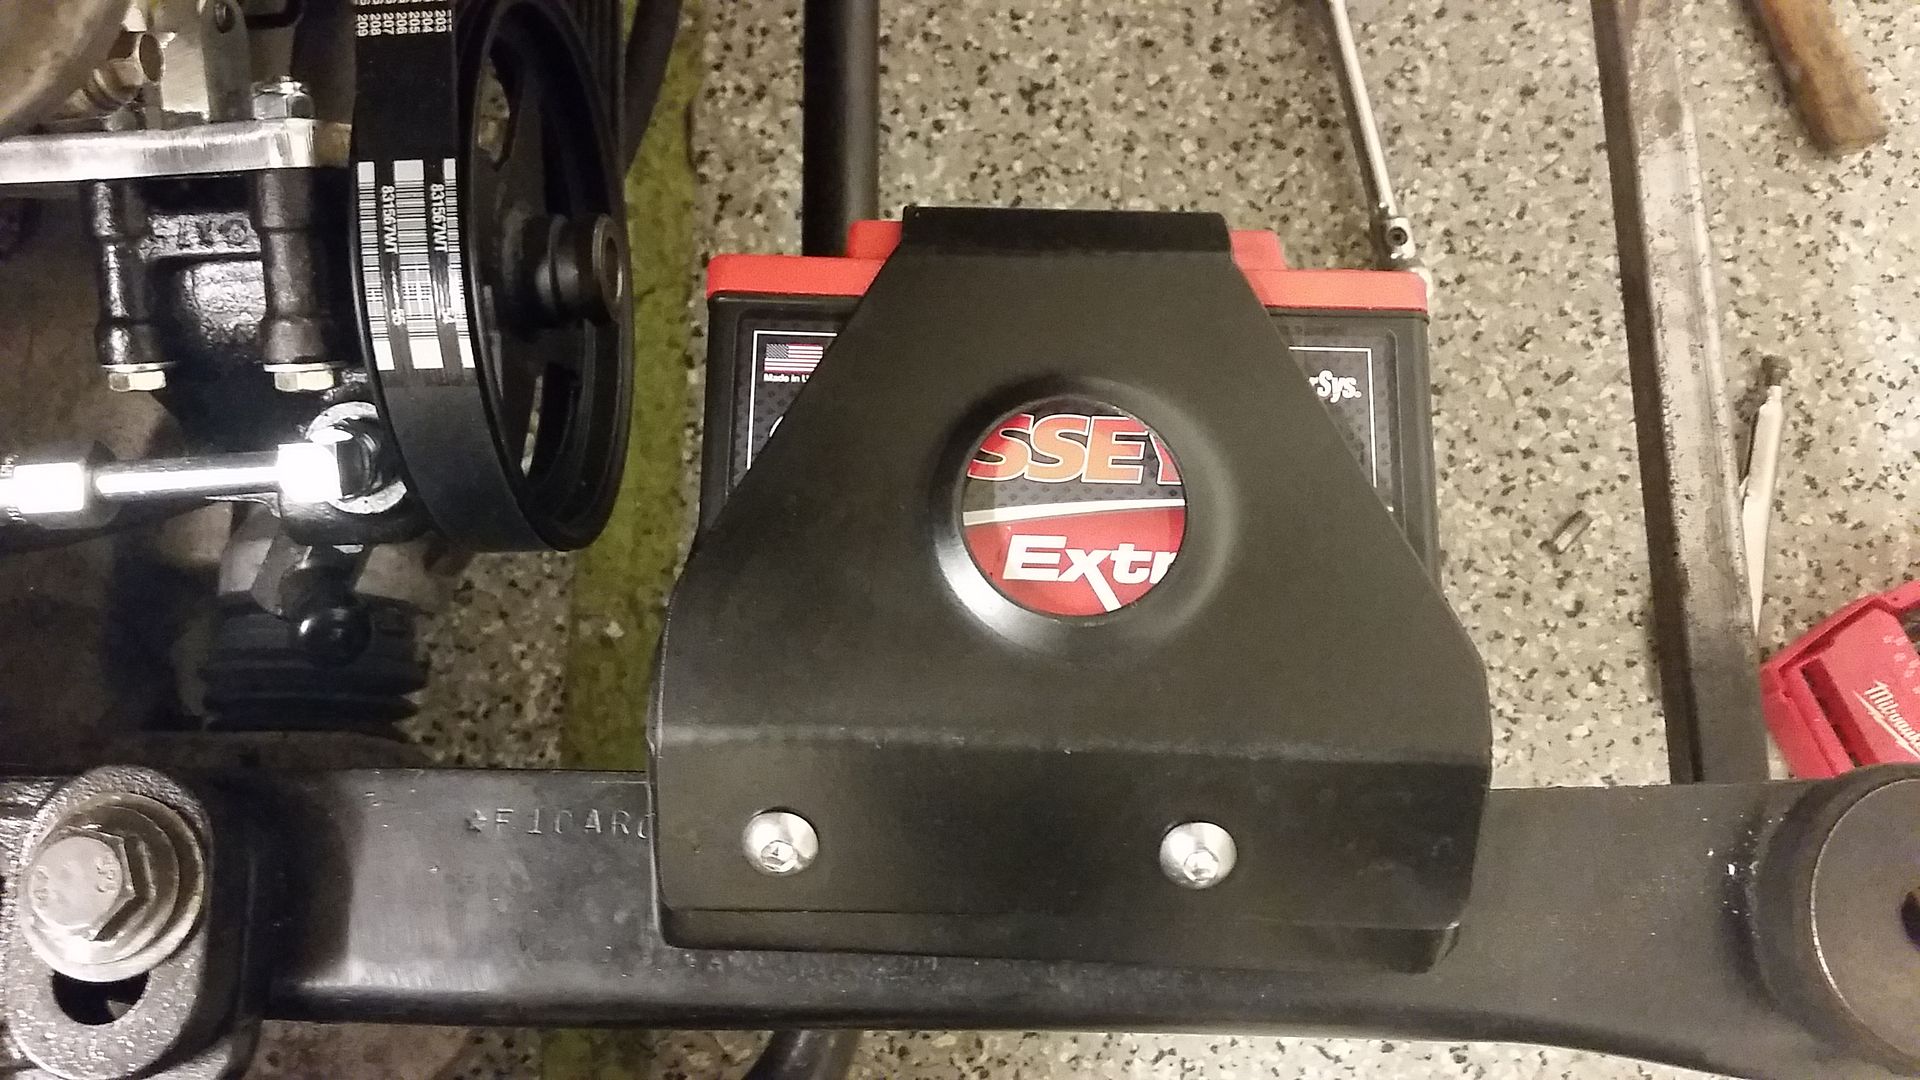
All bolted in.
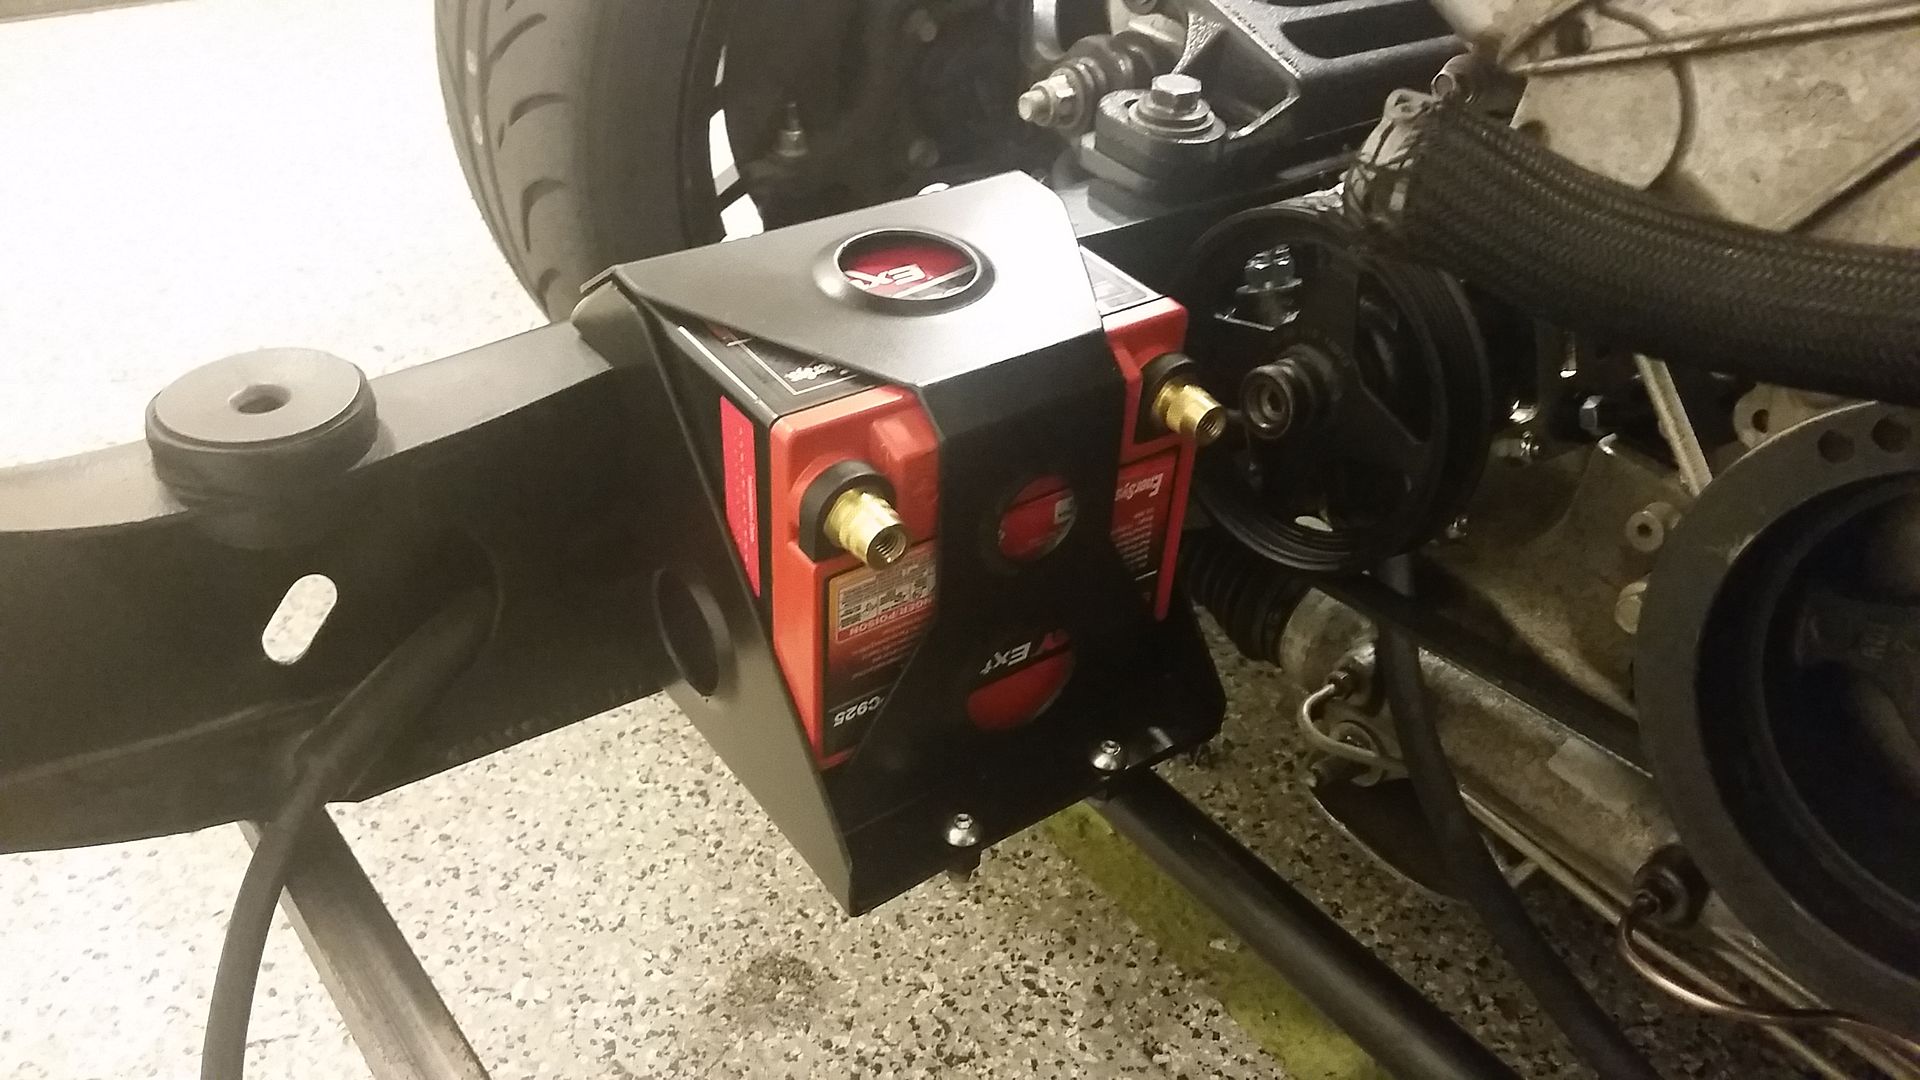
Got the positive wire built up and ran over to the positive terminal of the starter. Also reworked the charge cable from the alternator over to the starter.
Hoping to make a dent on the wiring stuff tomorrow, I have lots to do, that is for sure.
Sean
I managed to get the battery box all finished up and let me tell you that thing was a ton of work.
You can see how I am mounting it on the top of the frame. The holes are offset so that I can keep the original vin number on the frame in tact.

Painted and bolted to the the frame. There is also a 3/8" counter sunk screw in from the inside of the battery box into the boxing plate for the mount as well This third bolt should make it NHRA legal.


Top shot, also got some dimple dies done.

All bolted in.

Got the positive wire built up and ran over to the positive terminal of the starter. Also reworked the charge cable from the alternator over to the starter.
Hoping to make a dent on the wiring stuff tomorrow, I have lots to do, that is for sure.
Sean
-
michael9218
- New Member

- Posts: 35
- Joined: Tue Sep 29, 2015 8:07 pm
- Location: Woodstock, Ga
Re: Hackster's F100 #2 CV Swap 6 speed manual and Coyote
Interesting placement for the battery. I thought you were going to put it behind the cab under the bed for weight distribution. Although it looks like you went with a lighter small battery. Will this clear the radiator mounting and fender? How did you mount it on the other truck?
Outstanding execution, BTW...
Outstanding execution, BTW...
-
hackster
- Preferred User

- Posts: 317
- Joined: Fri Oct 18, 2013 11:21 am
Re: Hackster's F100 #2 CV Swap 6 speed manual and Coyote
There were a couple things that stopped it. NHRA requires that all rear mounted batteries need to have a shut off. That meant that I would be running both the battery and alternator cable right next to the exhaust all the way to the rear of the truck. Second, this battery is less than half what the optima is, so yes its still up front but its still half the weight.michael9218 wrote:Interesting placement for the battery. I thought you were going to put it behind the cab under the bed for weight distribution. Although it looks like you went with a lighter small battery. Will this clear the radiator mounting and fender? How did you mount it on the other truck?
Outstanding execution, BTW...
Yes, it will clear the inner fender, might need just a little bit of trimming so I can remove the battery mount if I ever need to. Battery is mounted out back on the other truck.....but I had way more room around the engine with the LS in there.
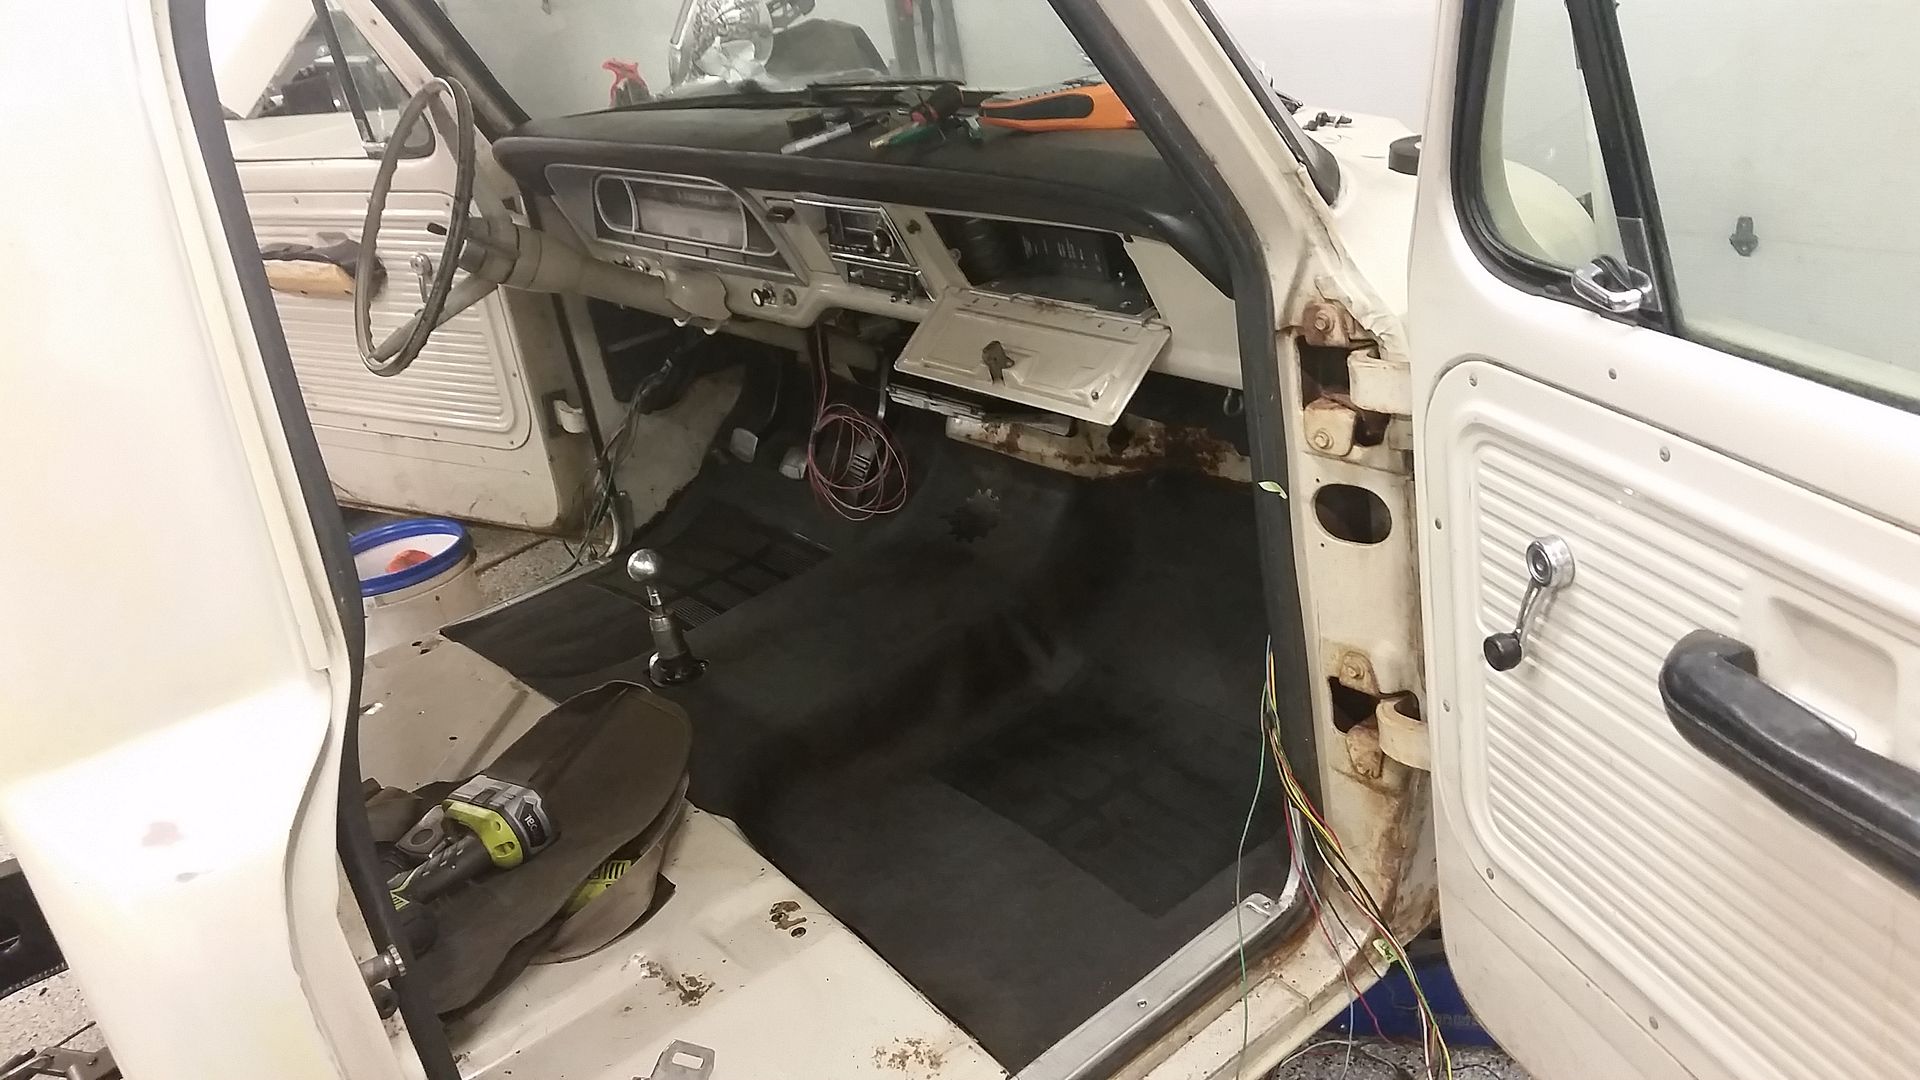
Not a ton of work done on the truck but a fair bit of research and wiring stuff.
Luckily I hung onto the wiring diagrams I used from the other truck. Stripped down the factory wiring that goes outside the cab. All wiring and connectors are in excellent condition, I was very suprised. I have all of those wires cleaned up and labeled and know where they all need to land. All of the old generator, voltage regulator and all that stuff is out of the picture and cleaned up.
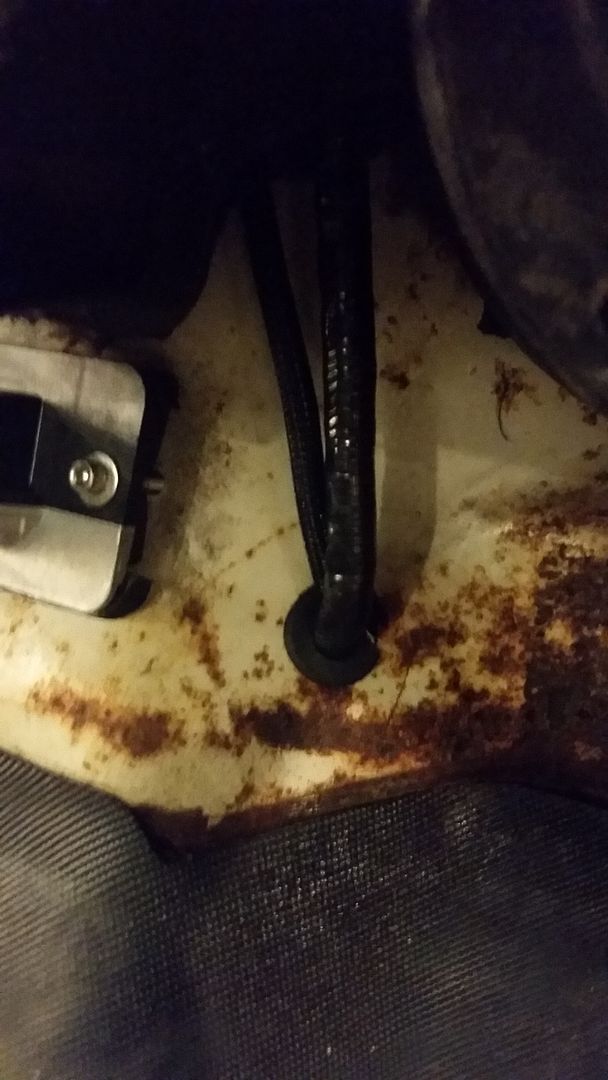
I got the ford racing harness actually installed in the truck and ran the o2 sensors out the firewall and grommeted. Dont mind the rust, its just a little surface rust
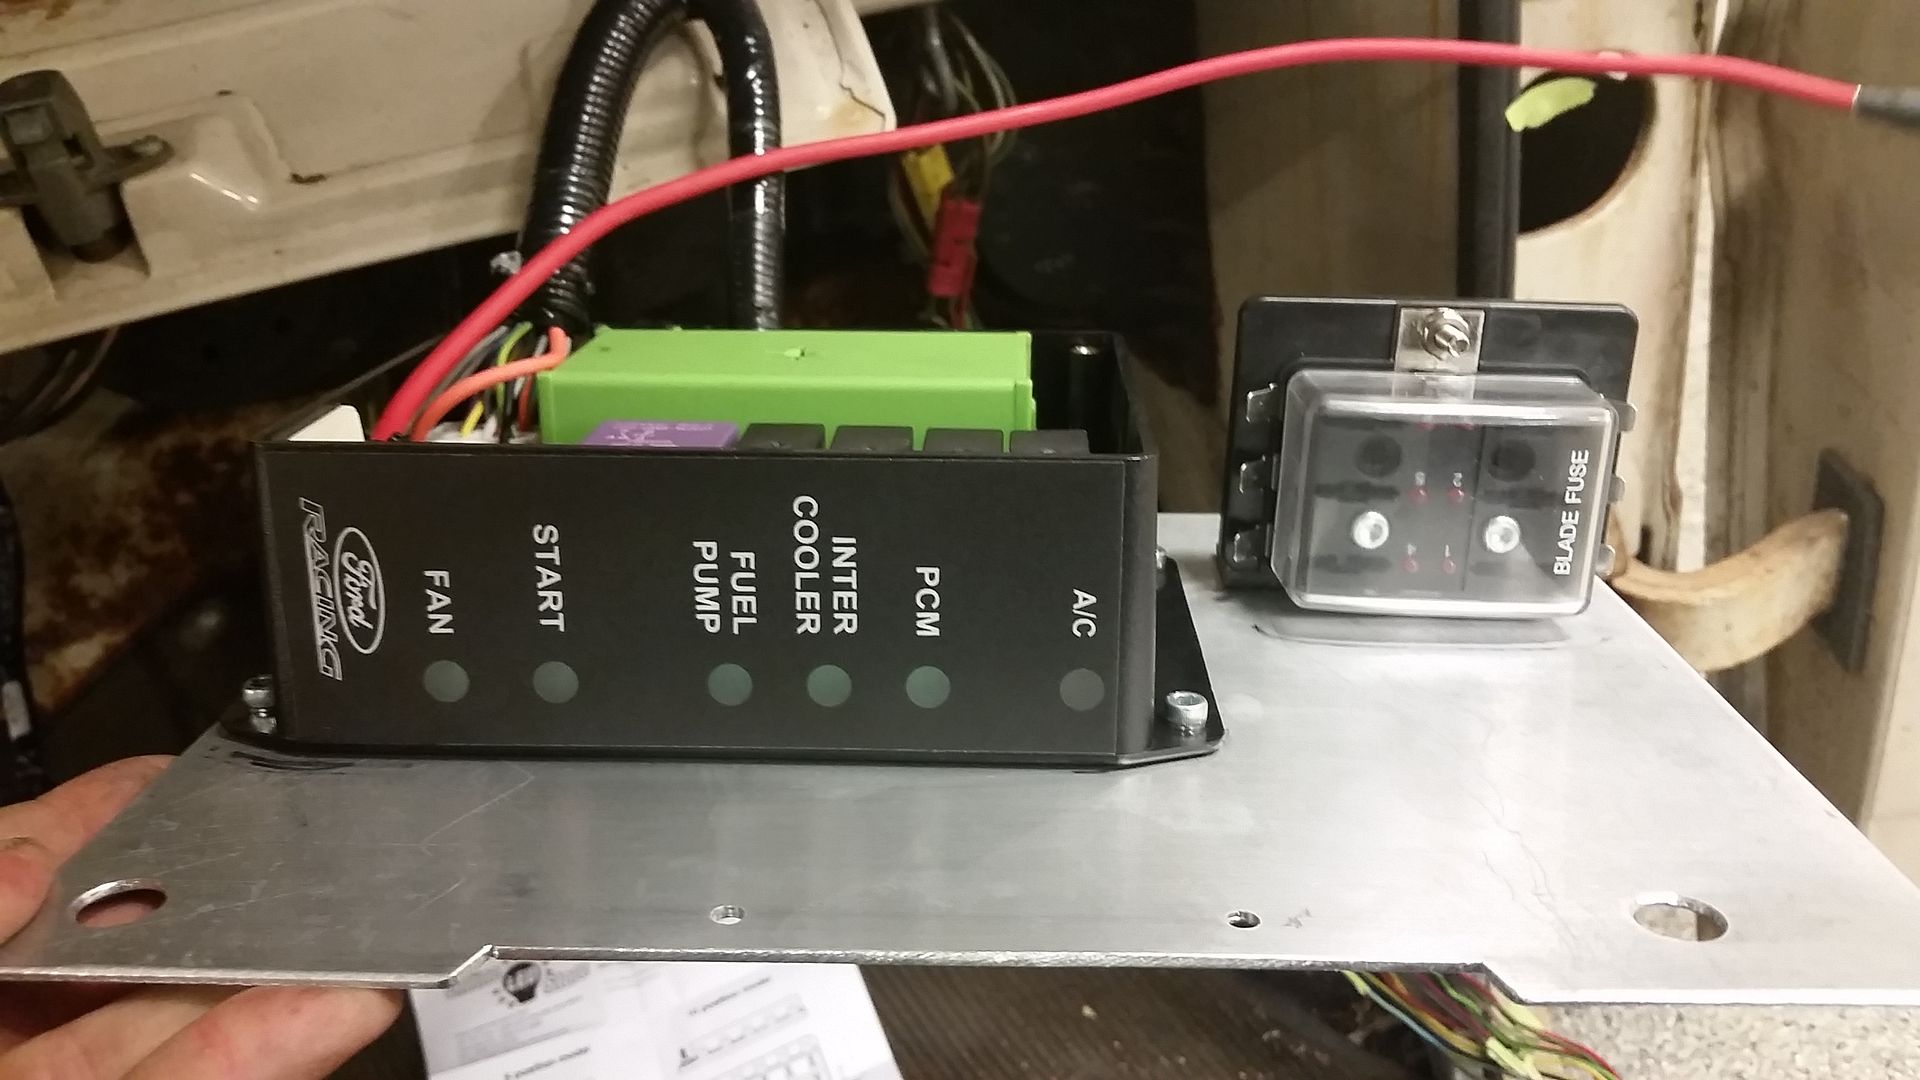
I then built this handy plate with a 6 gang fuse box and the FRPP control box. This goes in place of the glove box (It was hammered anyways)
Like I said, it doesnt seem like much but it was a lot of thinking going on today.
Made the decision on some gauges as well. Need to bottom out on a radiator.
Sean
-
my79f
- New Member

- Posts: 13
- Joined: Sun Jan 04, 2015 7:59 pm
Re: Hackster's F100 #2 CV Swap 6 speed manual and Coyote
Sean, your projects are the epitome of garage built. Not to mention the quality of many "professional" shops, and better. I suddenly feel the need to pay you lots of money and ship you my truck. haha
-
hackster
- Preferred User

- Posts: 317
- Joined: Fri Oct 18, 2013 11:21 am
Re: Hackster's F100 #2 CV Swap 6 speed manual and Coyote
Thanks for the kind wordsmy79f wrote:Sean, your projects are the epitome of garage built. Not to mention the quality of many "professional" shops, and better. I suddenly feel the need to pay you lots of money and ship you my truck. haha
I really enjoy the build but I tend to get so excited and head down that I sometimes forget to enjoy the moment.
I picked up a new box of the painless powerbraid chassis harness today. I stripped down the rest of the truck harness coming out of the firewall, running up to the lights, brake switch, reverse switch and everything at the back of the truck, removed all of the braided cloth protectant, inspected all the plugs and connectors.
I then cleaned the exterior of all the harnesses, wiped down all of the wires and cleaned the connectors.
I also soldered in the connector to mate up the mustang tranny to the old ford harness as well as soldered in the new lead to run to the rear of the truck for the fuel sender.
Once I was at a good point, I got to wrapping up the harness with the powerbraid. I got a fair bit done in just a couple hours. Need to get a little more wire tomorrow but I had a great evening out in the shop. Dont laugh....had some christmas music going, it was pouring outside and I was a pretty happy camper.
Got the radiator, its about as ideal as I can get just need to build my own brackets but need to get the front clip hung back on there before I can do that.
Back to the grind....
Sean
-
hackster
- Preferred User

- Posts: 317
- Joined: Fri Oct 18, 2013 11:21 am
Re: Hackster's F100 #2 CV Swap 6 speed manual and Coyote
Nothing exciting to report really from an outsiders point of view but great progress for me.
Got ahold of Roy at Ford Racing the other day and inquired about wiring in the mt-82 into the coyote control pack so that it will not only run properly but also so that I will be able to have a properly working speedometer in this thing.
He was awesome. We emailed back and forth a few times and he sent me a couple of PDF's on how to splice them into the ECU and where they needed to go.
So I messed around a little but tonight and measured that out and got it pinned into the 50pin connector. I was a little frustrated that ford does not pin these into the harness and make a couple of blunt leads that you can just hook up. It would be way easier. Of course this needs to be done in the truck since I put the harness in already.....idiot.
Apparently no photos of that..
Also pulled out the rear crossmember, drilled the lower holes in the frame and got that rear crossmember painted and back installed tonight. This was one of those hold up's that I was putting off.
Ran the DOT airbrake line in 1/8" from the fuel pressure regulator up front from the rear and ran the other harness back inside the framerails to the rear and got the rear harness assembled as well.
Got the rear suspension permanent bolts installed and tightened up Adjusted the pinion angle to where the big books tell me to.
Also got the fuel pump all wired up as well, you can kind of see the fuel level sender wired lengthened from in the cab to back in the mustang tank. OCD much?
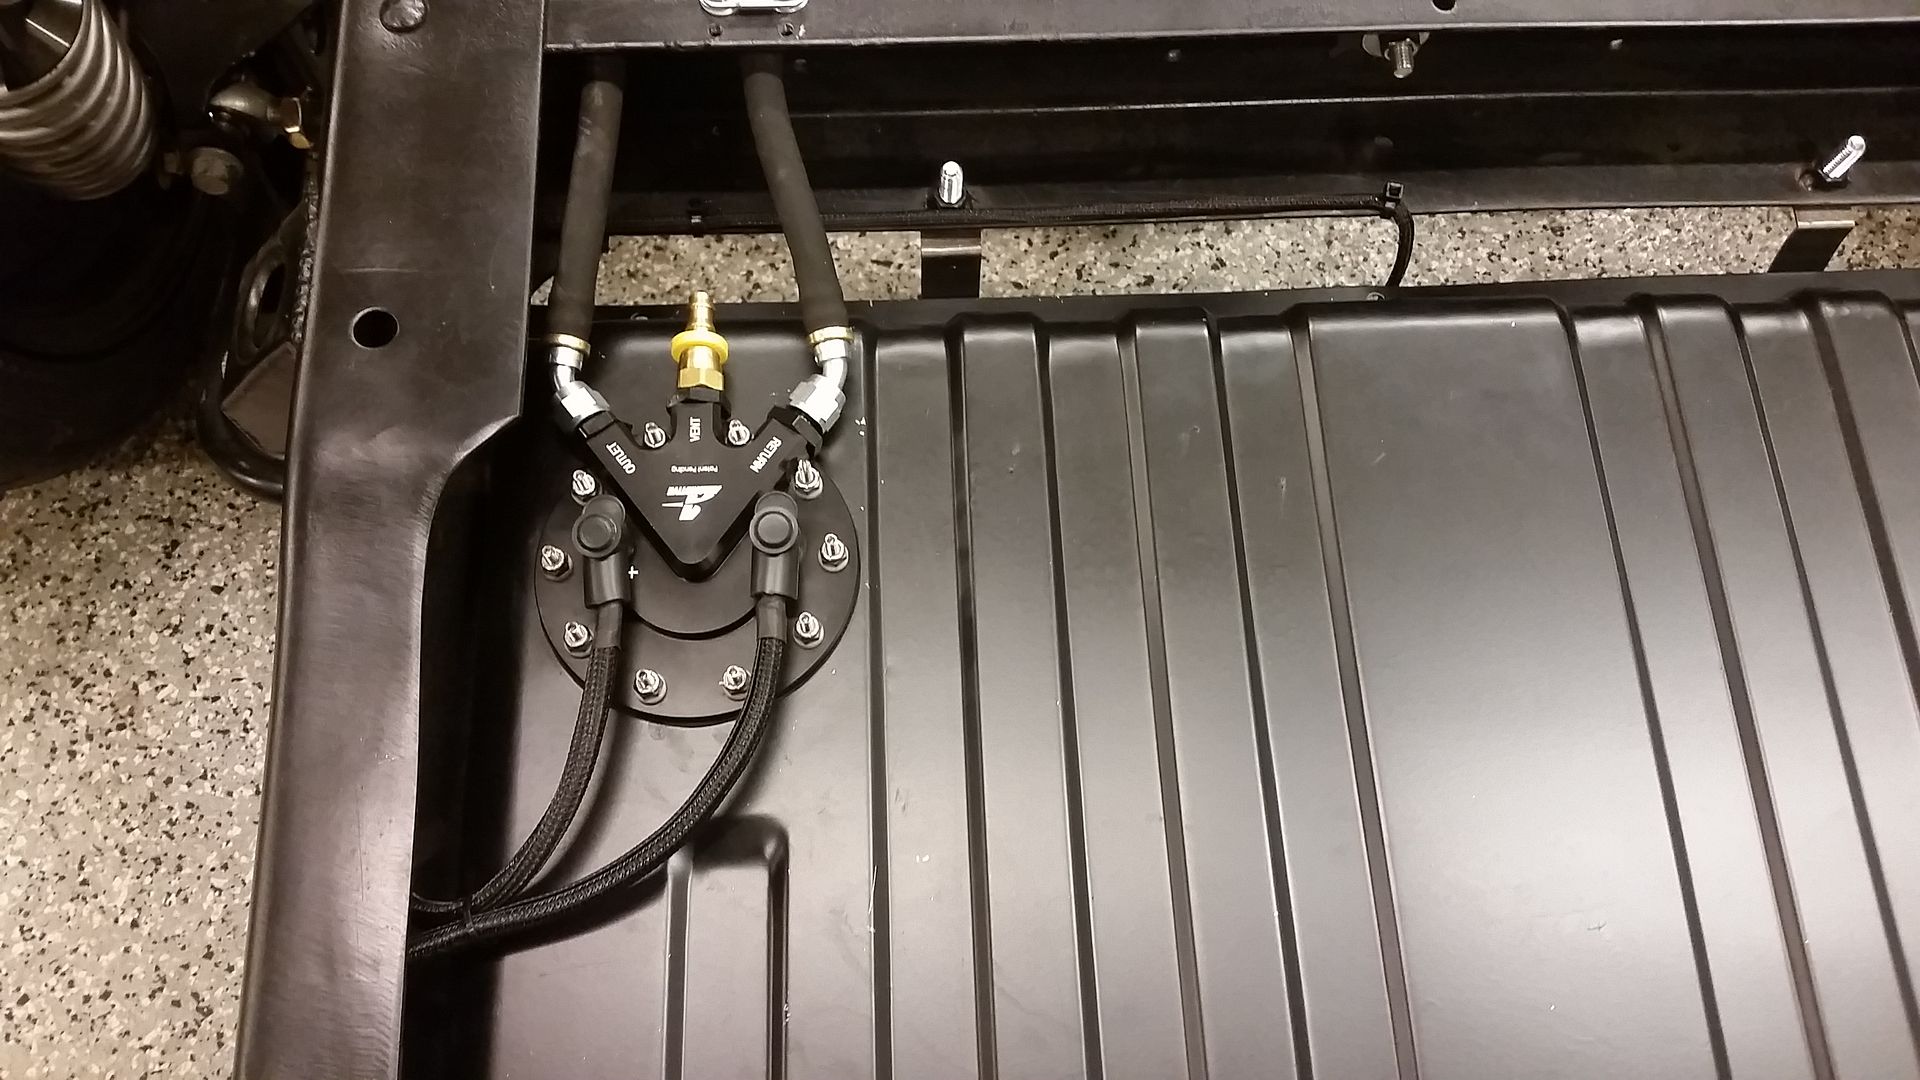
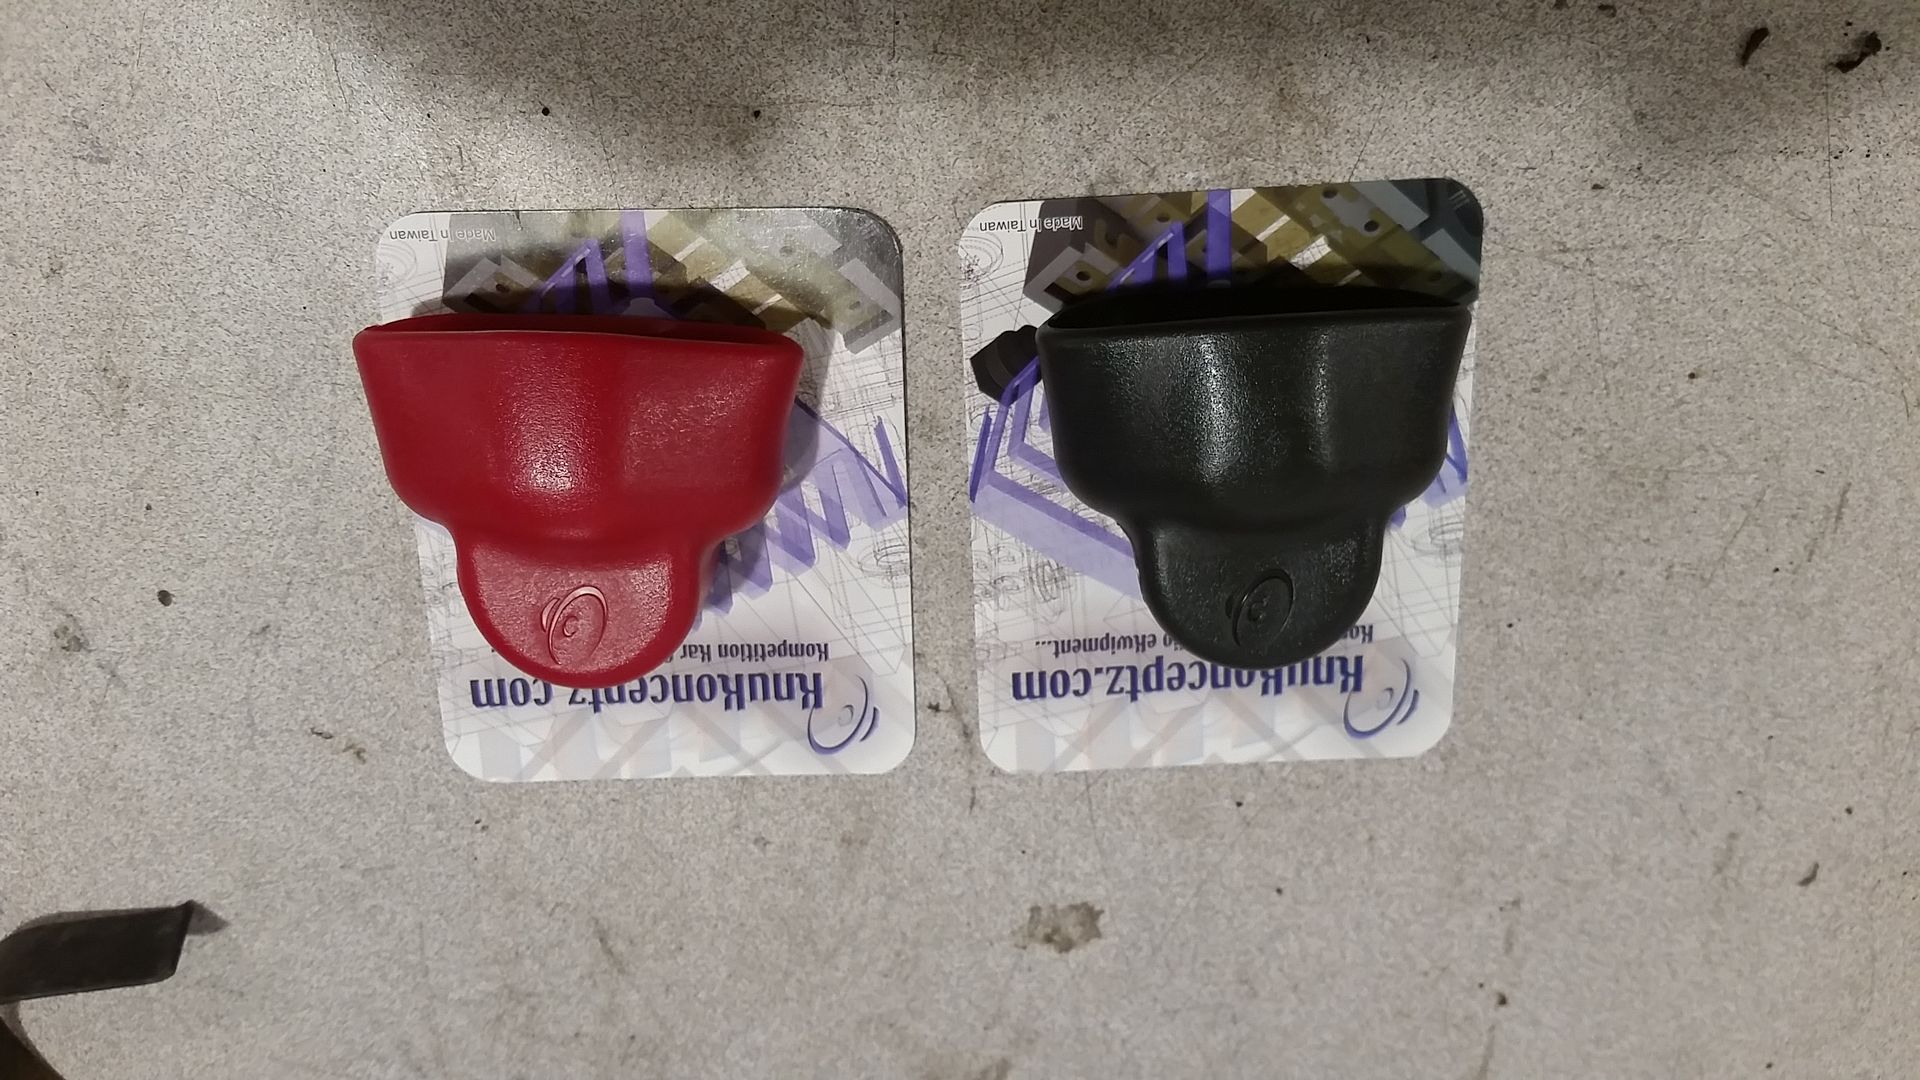
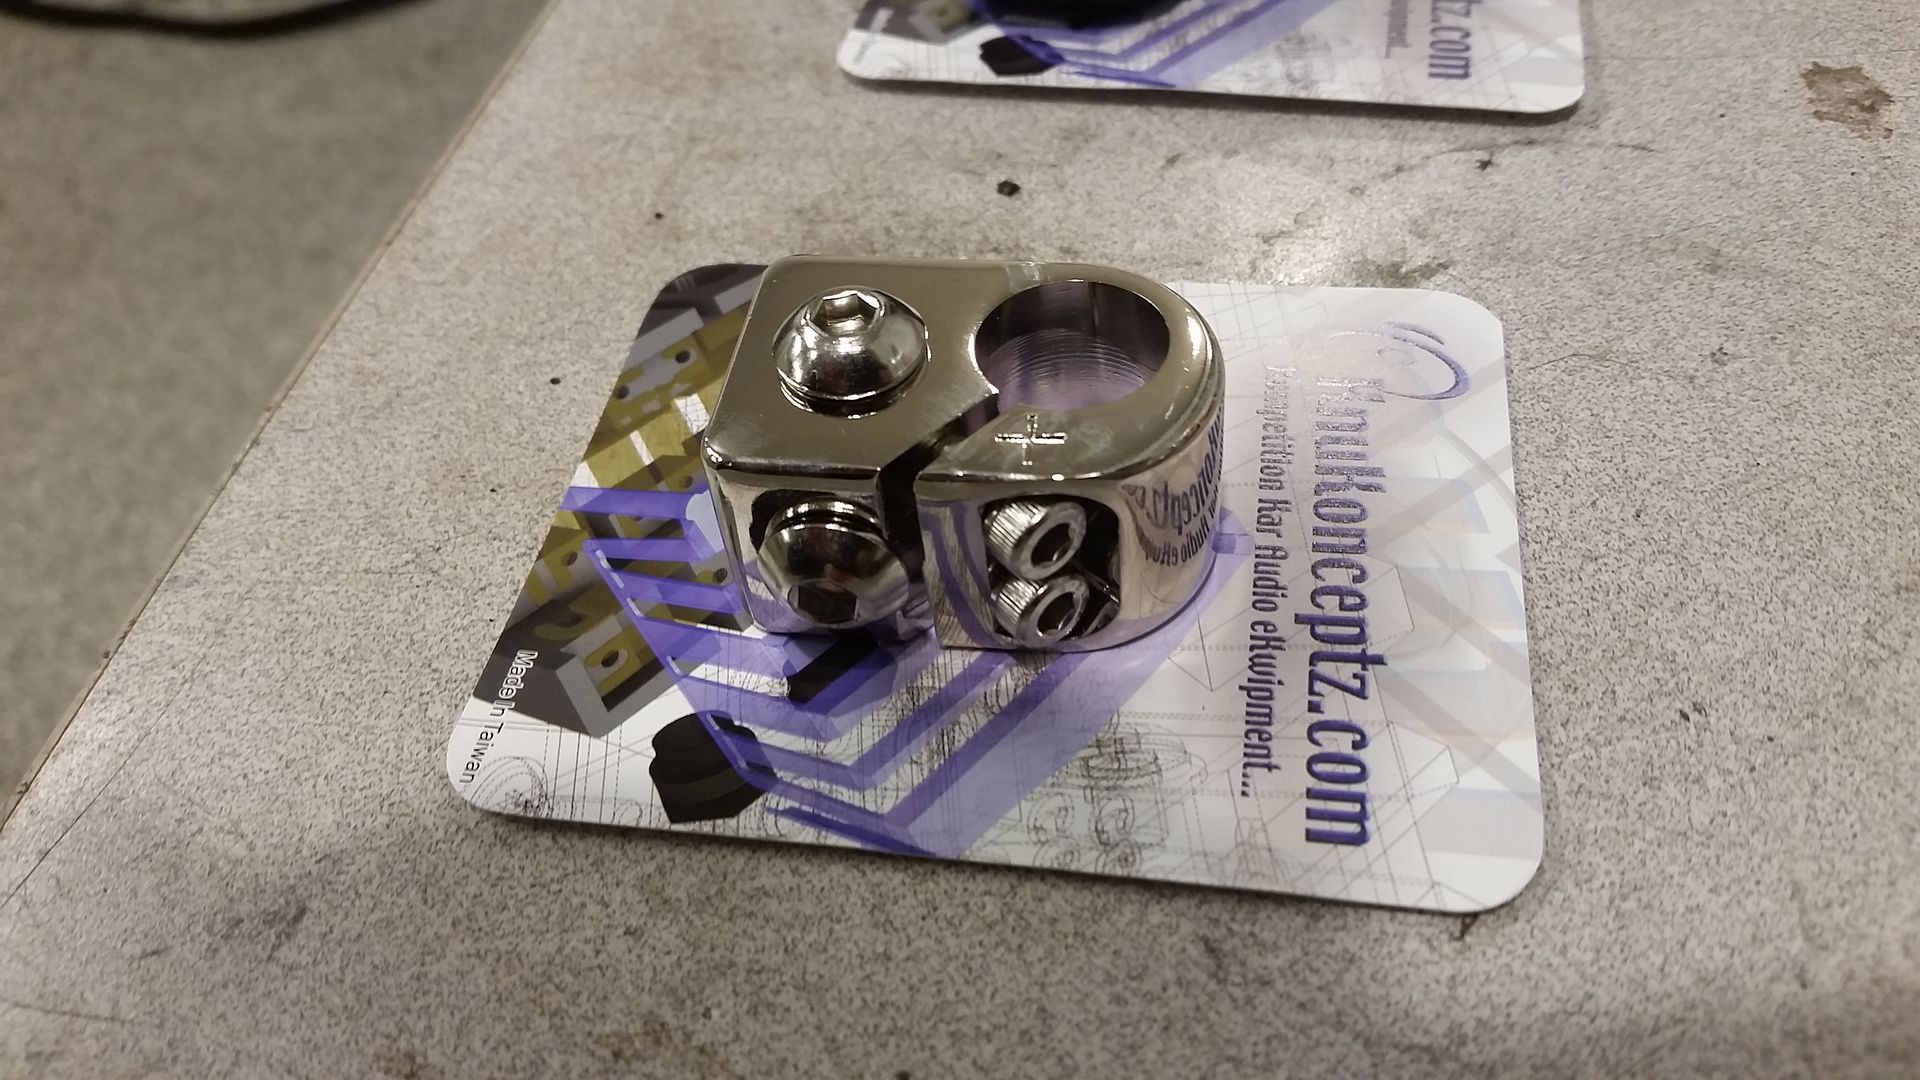
Also my battery terminals finally showed up. I wanted them to be insulated and these are awesome quality.
Moved the front clip back in front of the garage so I can hopefully get some of the holes patched up this weekend but I am nervous about how bad of shape its in....Ill snap a pic tomorrow. Fender, core support and inner fender are pretty hammered.....
Sean
Got ahold of Roy at Ford Racing the other day and inquired about wiring in the mt-82 into the coyote control pack so that it will not only run properly but also so that I will be able to have a properly working speedometer in this thing.
He was awesome. We emailed back and forth a few times and he sent me a couple of PDF's on how to splice them into the ECU and where they needed to go.
So I messed around a little but tonight and measured that out and got it pinned into the 50pin connector. I was a little frustrated that ford does not pin these into the harness and make a couple of blunt leads that you can just hook up. It would be way easier. Of course this needs to be done in the truck since I put the harness in already.....idiot.
Apparently no photos of that..
Also pulled out the rear crossmember, drilled the lower holes in the frame and got that rear crossmember painted and back installed tonight. This was one of those hold up's that I was putting off.
Ran the DOT airbrake line in 1/8" from the fuel pressure regulator up front from the rear and ran the other harness back inside the framerails to the rear and got the rear harness assembled as well.
Got the rear suspension permanent bolts installed and tightened up Adjusted the pinion angle to where the big books tell me to.
Also got the fuel pump all wired up as well, you can kind of see the fuel level sender wired lengthened from in the cab to back in the mustang tank. OCD much?

Also my battery terminals finally showed up. I wanted them to be insulated and these are awesome quality.


Moved the front clip back in front of the garage so I can hopefully get some of the holes patched up this weekend but I am nervous about how bad of shape its in....Ill snap a pic tomorrow. Fender, core support and inner fender are pretty hammered.....
Sean
-
hackster
- Preferred User

- Posts: 317
- Joined: Fri Oct 18, 2013 11:21 am
Re: Hackster's F100 #2 CV Swap 6 speed manual and Coyote
Well, not too sure how I got started on this project tonight but I did.
Have been doing so much wiring and mechanical stuff it was kind of fun. Stripped back a little bit of paint and got the patch panel welded in. I am not a body man by any stretch of the imagination.
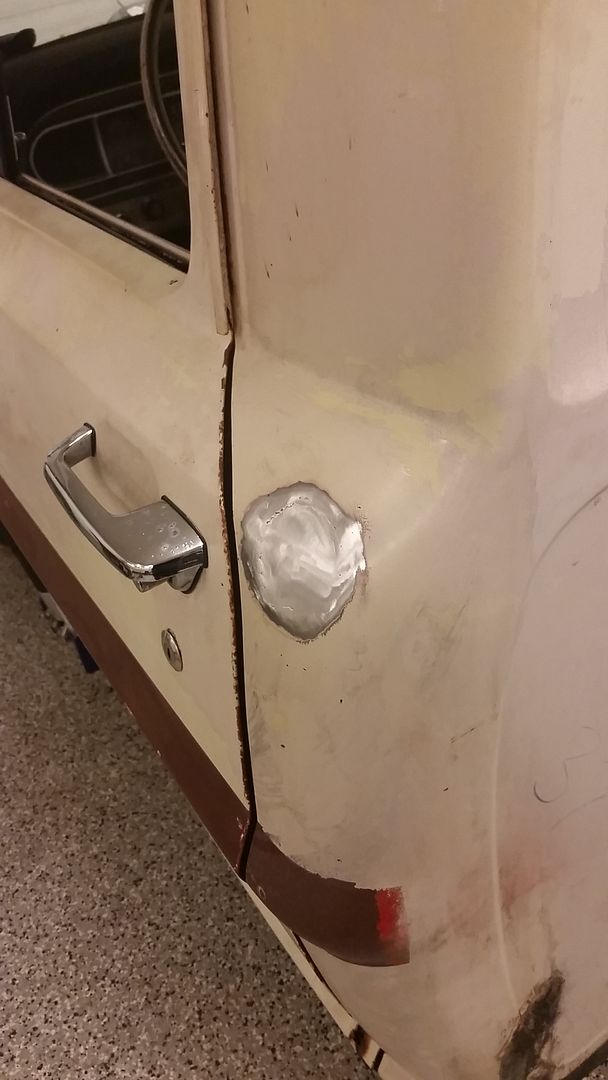
I laid down a couple coats of body filler and got it close.....its not perfect by any means but neither is the rest of the truck. I am hoping I can make it kind of blend in with the rest of the truck.
So I laid down a couple coats of primer, then a little red like the factory and the tan on top of that.
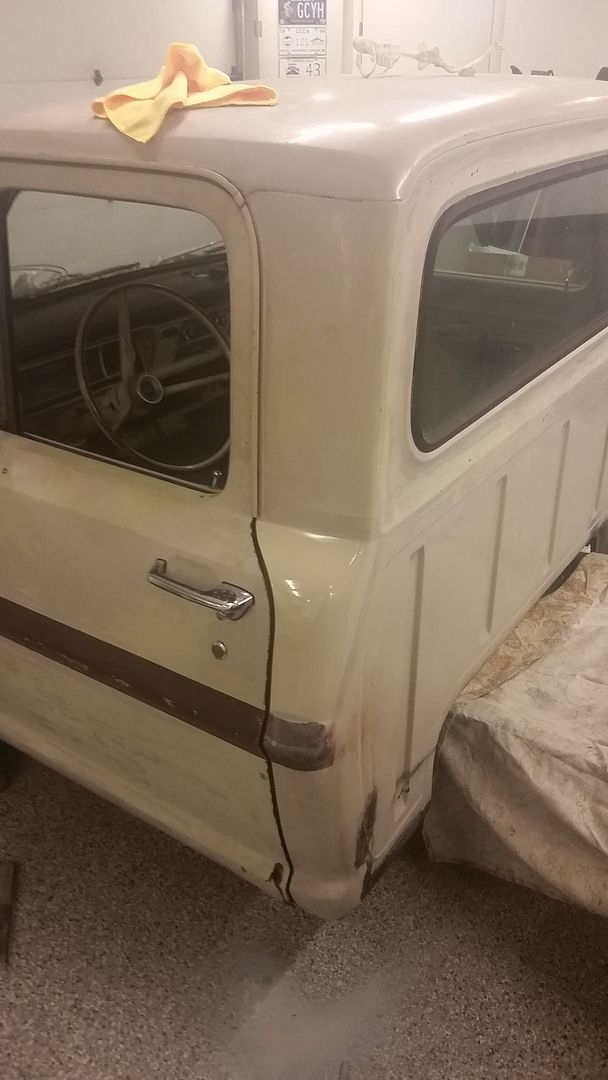
I think I will be able to make it match pretty good and look old and weathered.
On a less stellar note. I got to looking at the front sheetmetal last night and its hammered. The insides of the hood are totally rusted, the core support is bent back on the drivers side and the drivers fender is too far gone to be usable.
I think I found a truck that will donate a bunch of parts to the good cause of keeping this one on the road. And its two tone Pebble Beige and white. Not perfect, but it will get me close enough and a much better start to the finish.
Heading to look at it in the morning. Anyone need a good truck? its a 250 with a good runner and a rebuilt tranny.
Sean
Have been doing so much wiring and mechanical stuff it was kind of fun. Stripped back a little bit of paint and got the patch panel welded in. I am not a body man by any stretch of the imagination.

I laid down a couple coats of body filler and got it close.....its not perfect by any means but neither is the rest of the truck. I am hoping I can make it kind of blend in with the rest of the truck.
So I laid down a couple coats of primer, then a little red like the factory and the tan on top of that.

I think I will be able to make it match pretty good and look old and weathered.
On a less stellar note. I got to looking at the front sheetmetal last night and its hammered. The insides of the hood are totally rusted, the core support is bent back on the drivers side and the drivers fender is too far gone to be usable.
I think I found a truck that will donate a bunch of parts to the good cause of keeping this one on the road. And its two tone Pebble Beige and white. Not perfect, but it will get me close enough and a much better start to the finish.
Heading to look at it in the morning. Anyone need a good truck? its a 250 with a good runner and a rebuilt tranny.
Sean
-
hackster
- Preferred User

- Posts: 317
- Joined: Fri Oct 18, 2013 11:21 am
Re: Hackster's F100 #2 CV Swap 6 speed manual and Coyote
Well I got up at the crack of dawn today and picked up my buddy Scott and his trailer cause the mustang is still on mine =)
We headed out into the country about an hour east of here and took a look at the 68 f250 I had found on craigslist. Other than the hood being kind of a turd as it has flown open on the freeway it had the parts that I desperately need. Good (non rusted) hood, straight core support, straight fenders left and right, good working door locks and a passenger door latch. Also it came with a working ignition switch that i do not currently have. Lots of good parts I can use.
The cab is rust free as well. Anyone need a cab?
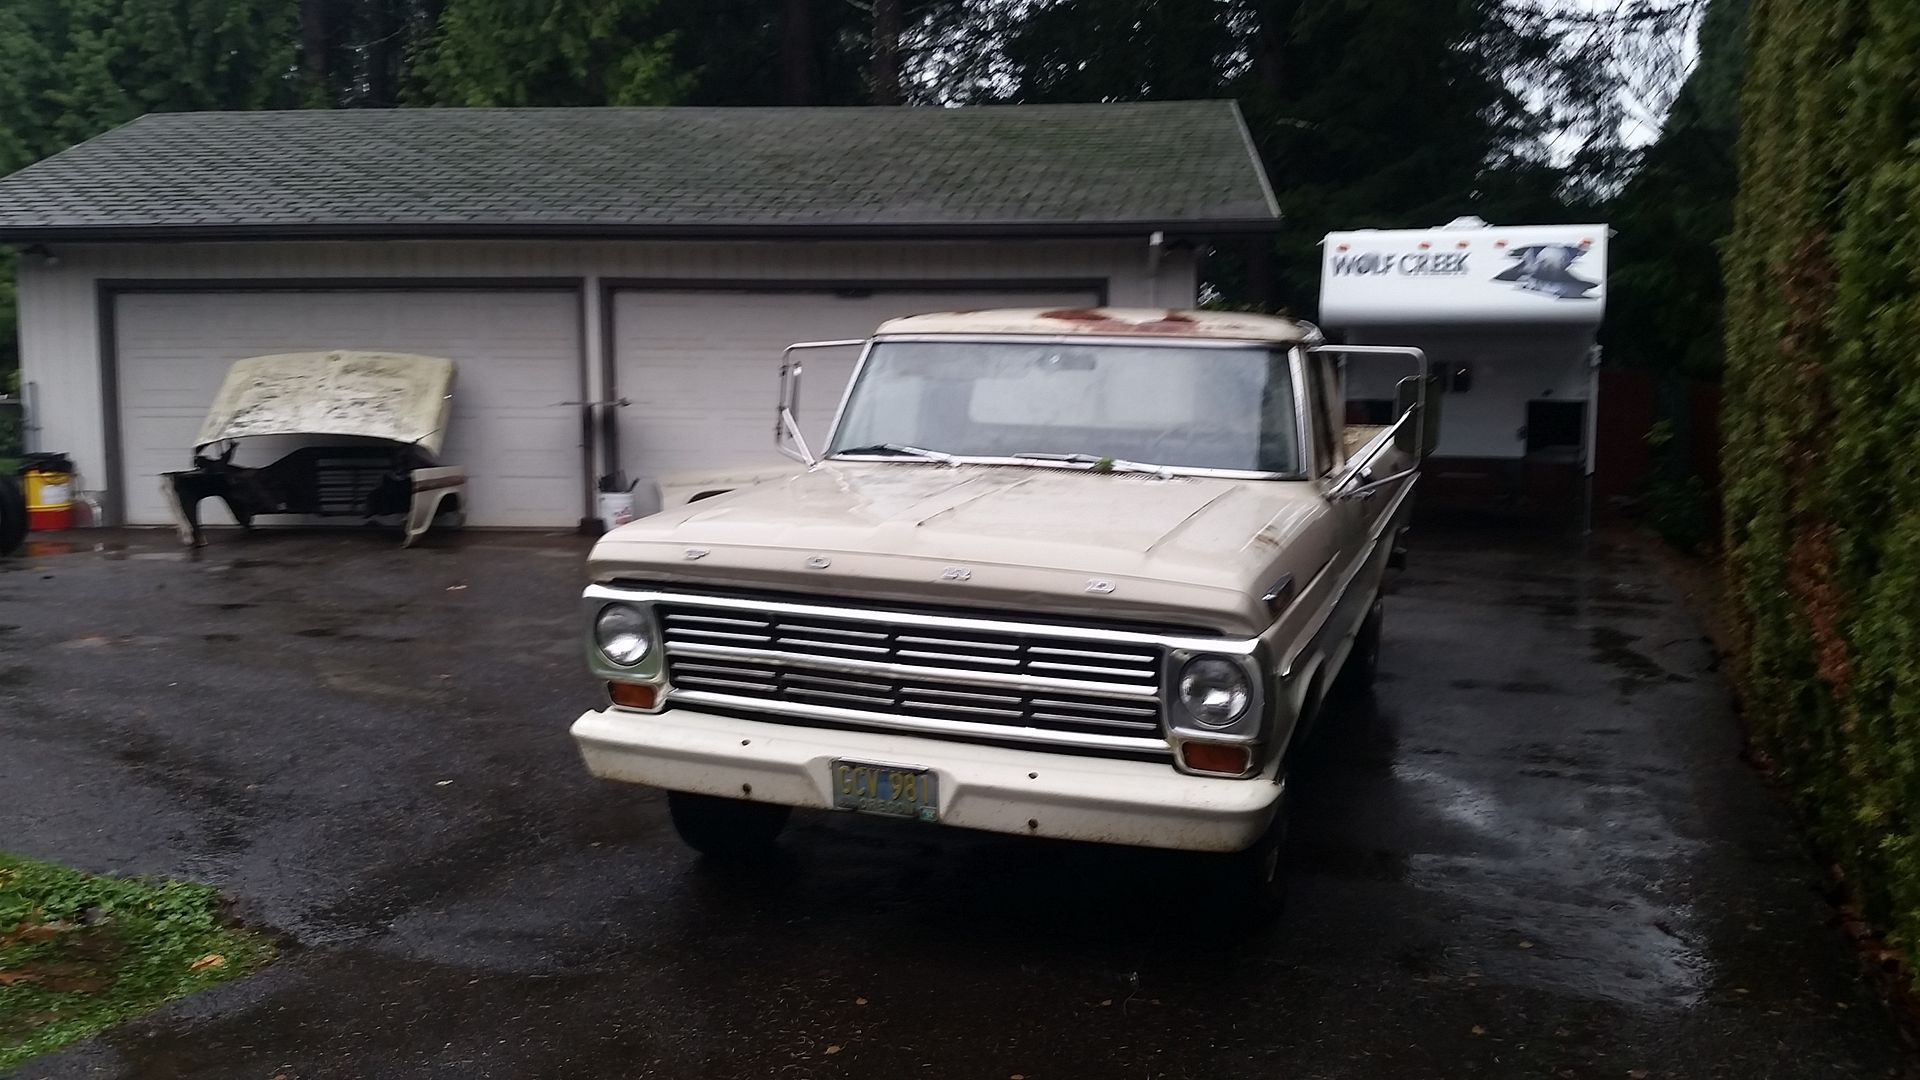
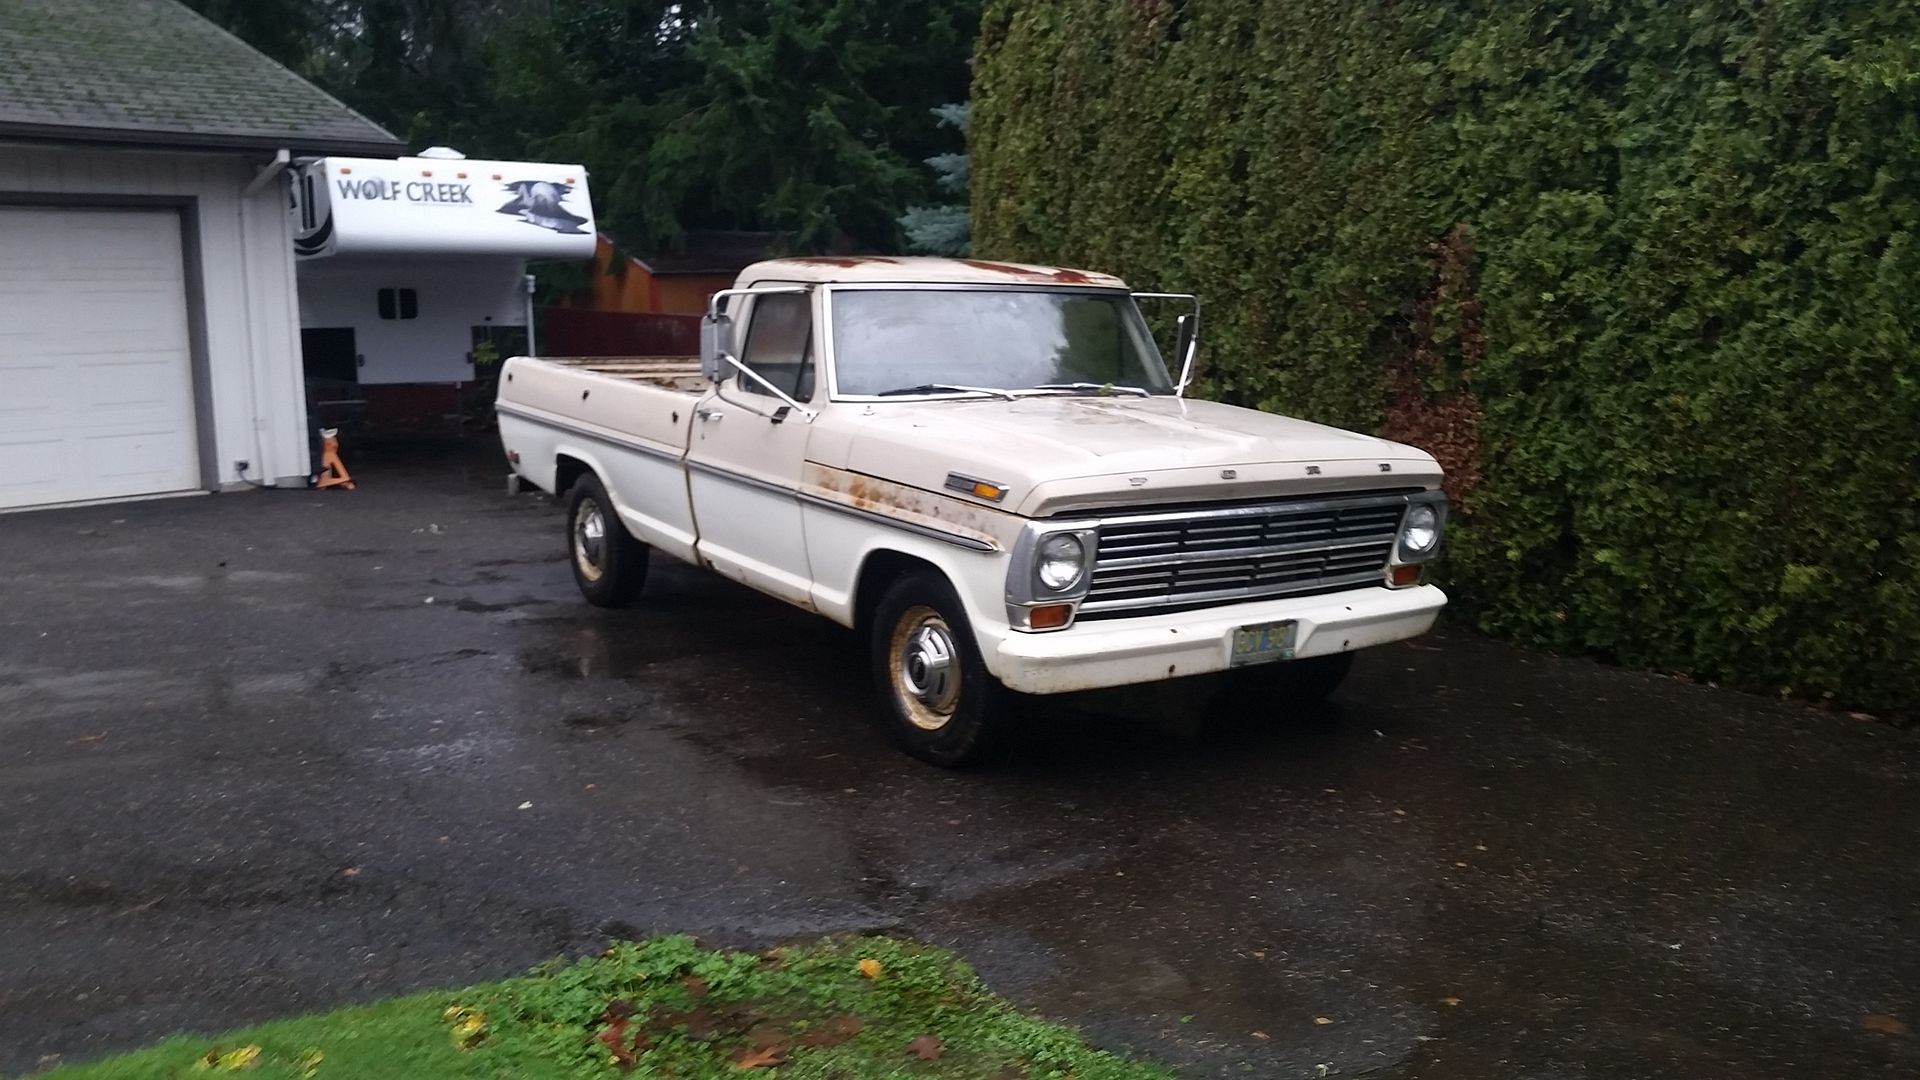
Got that thing home and unloaded and got back to work.
Hit the spot I shot with some color last night with some 1000 grit to see how it was going to look. Not perfect and I think Ill get some proper color matched up and shoot it with that and some grit to look right.
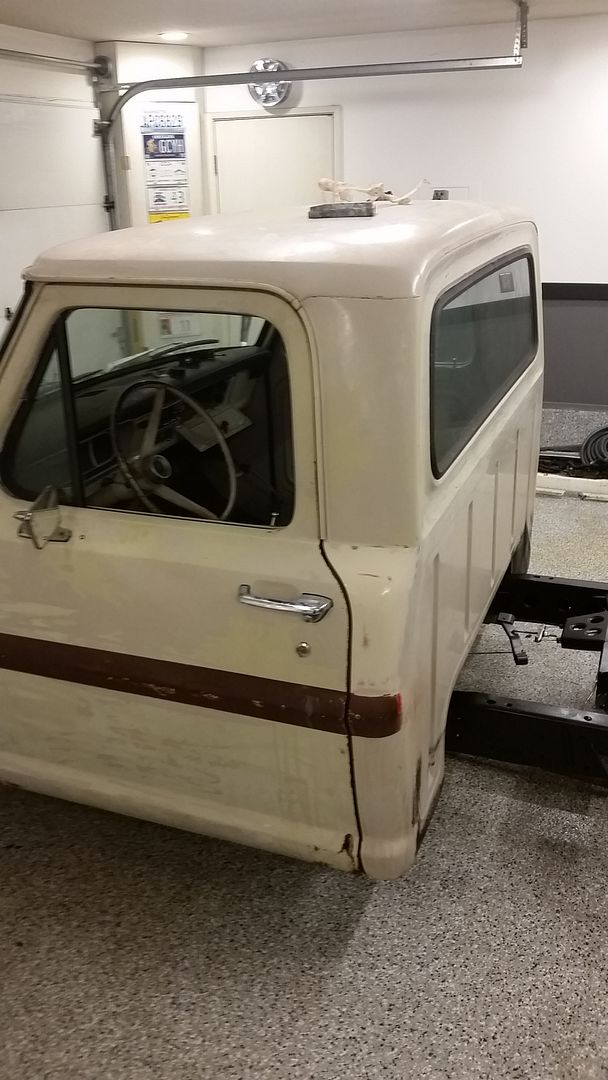
Better than a big ass hole in the cab.
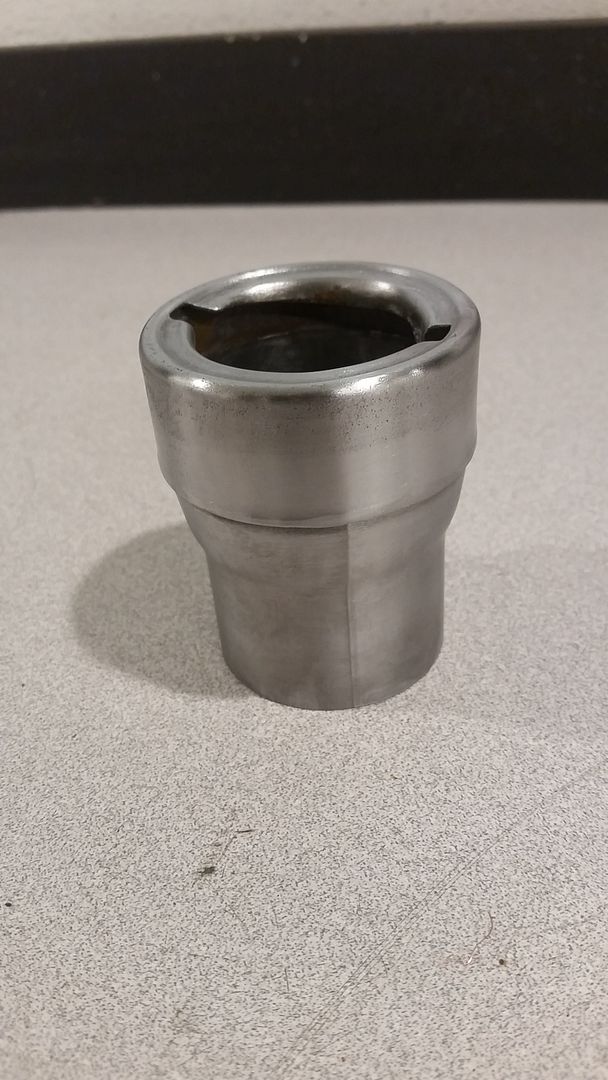
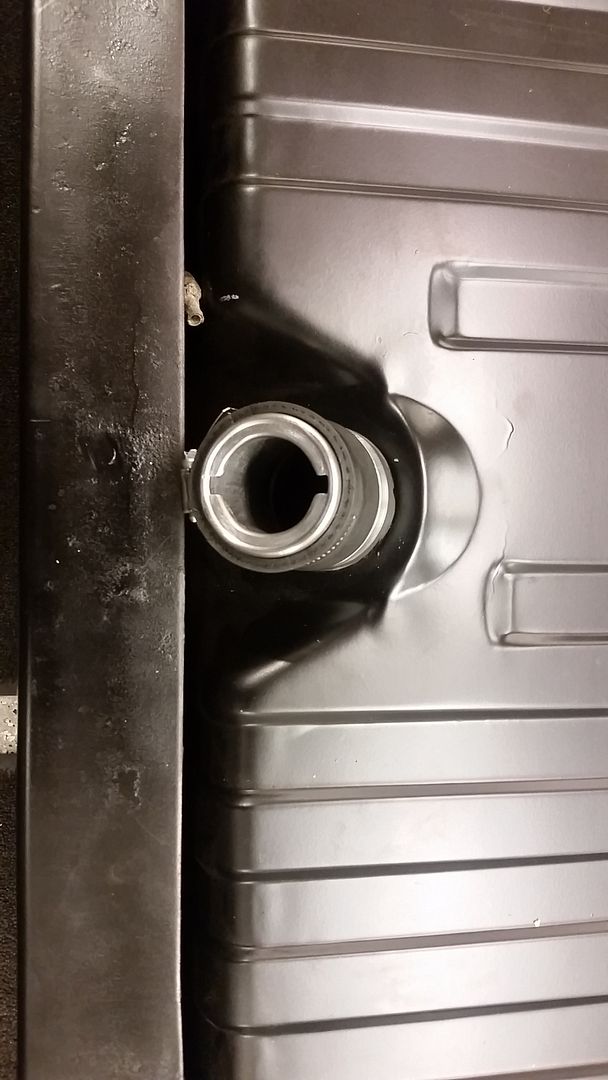
Needed to get this little chore done before I could get the bed on. Got the locking gas cap off of it first of all, cut it down to a length that would work and cleaned it all up and got it installed. I totally dig it.
Had a hand in the garage for a few hours and got a bunch of little stuff done on the wiring. Thanks for the help Ole.
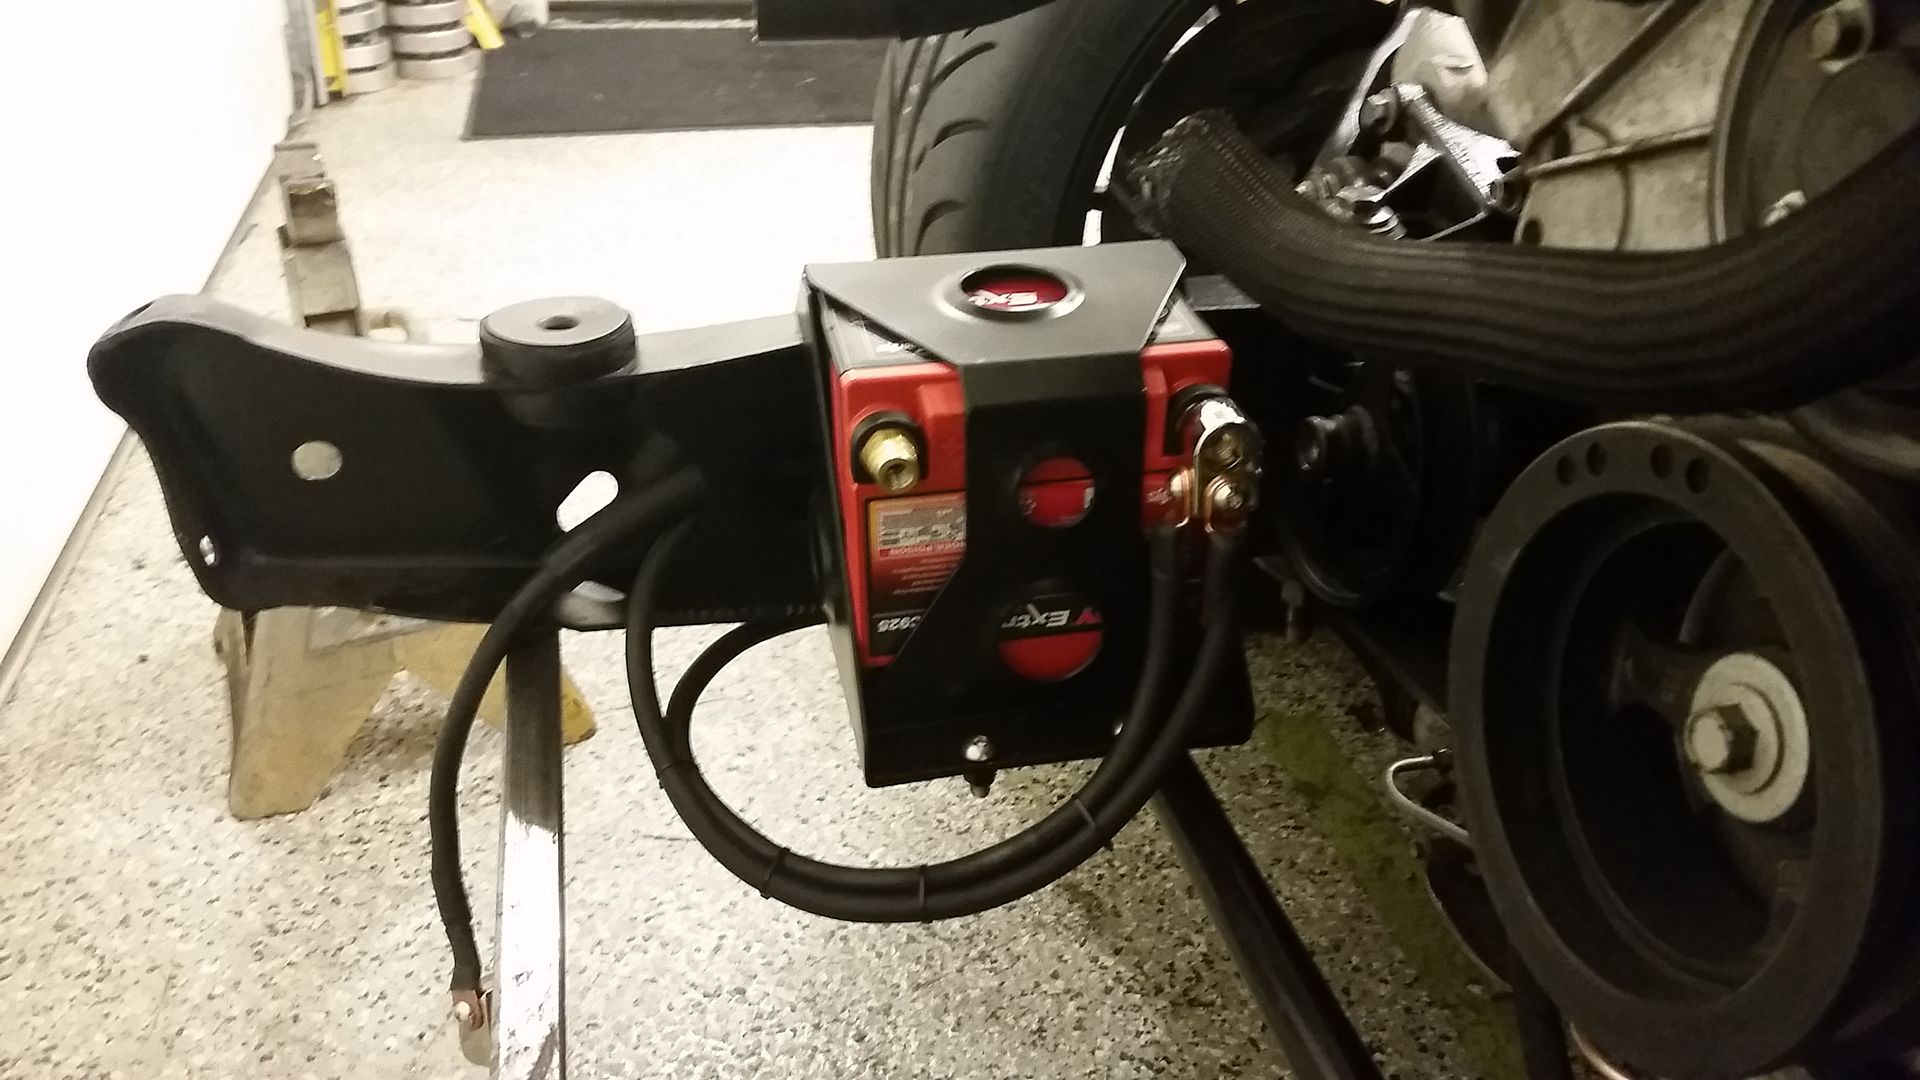
Starter solenoid wired up, ground from the battery to the chassis built and installed. Ground from battery to engine built and installed. Negative battery terminal made up and ready to go on. Ground from engine to cab rebuilt and the grounds for the harness attached to the stud on the back of the head.
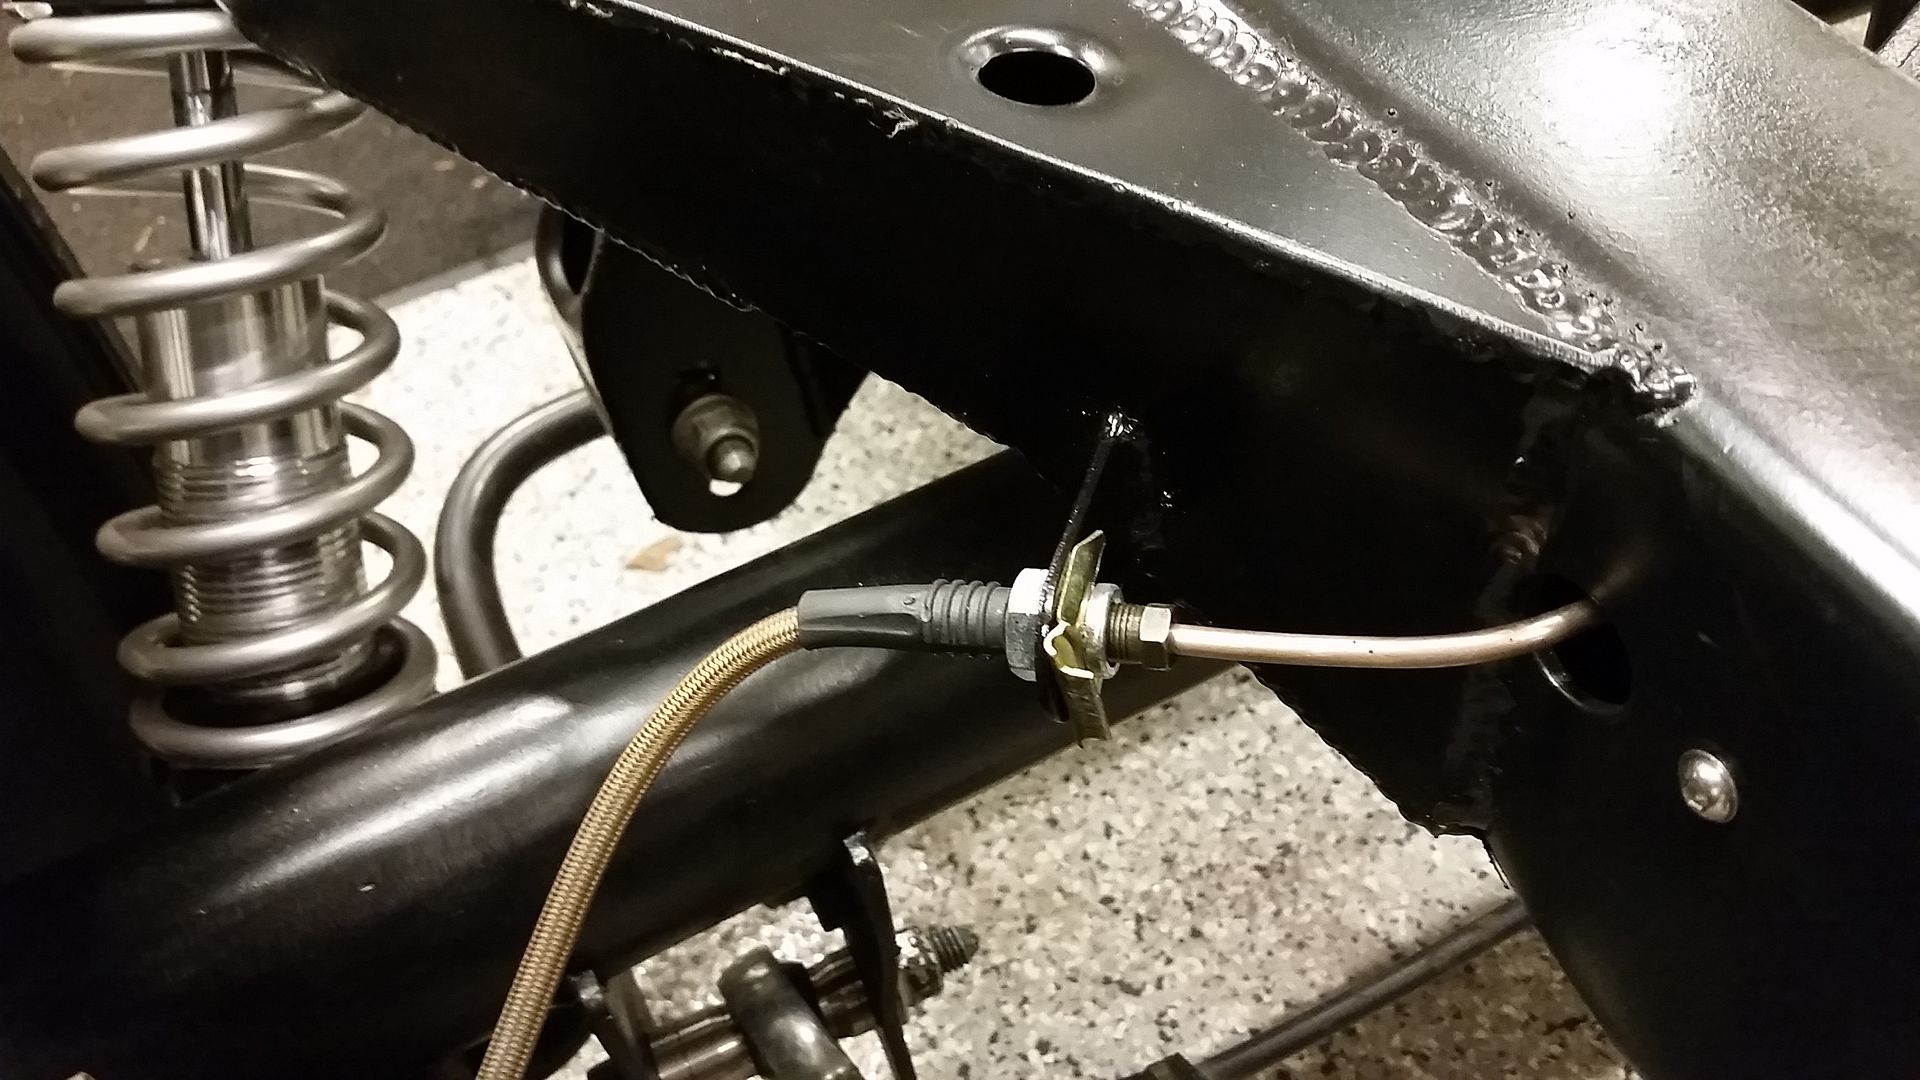
Also managed to get a pic of this. Got this done last night.
It has been pouring for days up here in Oregon. Today is no exception. I need to get the frontend off the donor truck but an waiting until I can either get it in the garage for a day or the weather dries out.......Hopefully one of those tomorrow.
Sean
We headed out into the country about an hour east of here and took a look at the 68 f250 I had found on craigslist. Other than the hood being kind of a turd as it has flown open on the freeway it had the parts that I desperately need. Good (non rusted) hood, straight core support, straight fenders left and right, good working door locks and a passenger door latch. Also it came with a working ignition switch that i do not currently have. Lots of good parts I can use.
The cab is rust free as well. Anyone need a cab?


Got that thing home and unloaded and got back to work.
Hit the spot I shot with some color last night with some 1000 grit to see how it was going to look. Not perfect and I think Ill get some proper color matched up and shoot it with that and some grit to look right.

Better than a big ass hole in the cab.
Needed to get this little chore done before I could get the bed on. Got the locking gas cap off of it first of all, cut it down to a length that would work and cleaned it all up and got it installed. I totally dig it.


Had a hand in the garage for a few hours and got a bunch of little stuff done on the wiring. Thanks for the help Ole.
Starter solenoid wired up, ground from the battery to the chassis built and installed. Ground from battery to engine built and installed. Negative battery terminal made up and ready to go on. Ground from engine to cab rebuilt and the grounds for the harness attached to the stud on the back of the head.

Also managed to get a pic of this. Got this done last night.

It has been pouring for days up here in Oregon. Today is no exception. I need to get the frontend off the donor truck but an waiting until I can either get it in the garage for a day or the weather dries out.......Hopefully one of those tomorrow.
Sean
-
IN2FORD
- Preferred User

- Posts: 345
- Joined: Sun Apr 27, 2014 3:54 pm
- Location: Cookeville TN
Re: Hackster's F100 #2 CV Swap 6 speed manual and Coyote
Good score Sean!!
Barry
Barry
-
hackster
- Preferred User

- Posts: 317
- Joined: Fri Oct 18, 2013 11:21 am
Re: Hackster's F100 #2 CV Swap 6 speed manual and Coyote
Well, it might not have been so perfect afterall but it provided me with a lot of parts.
Had a hand for a couple hours and got all the crap I needed off the ford. Also found a few suprises......rust.
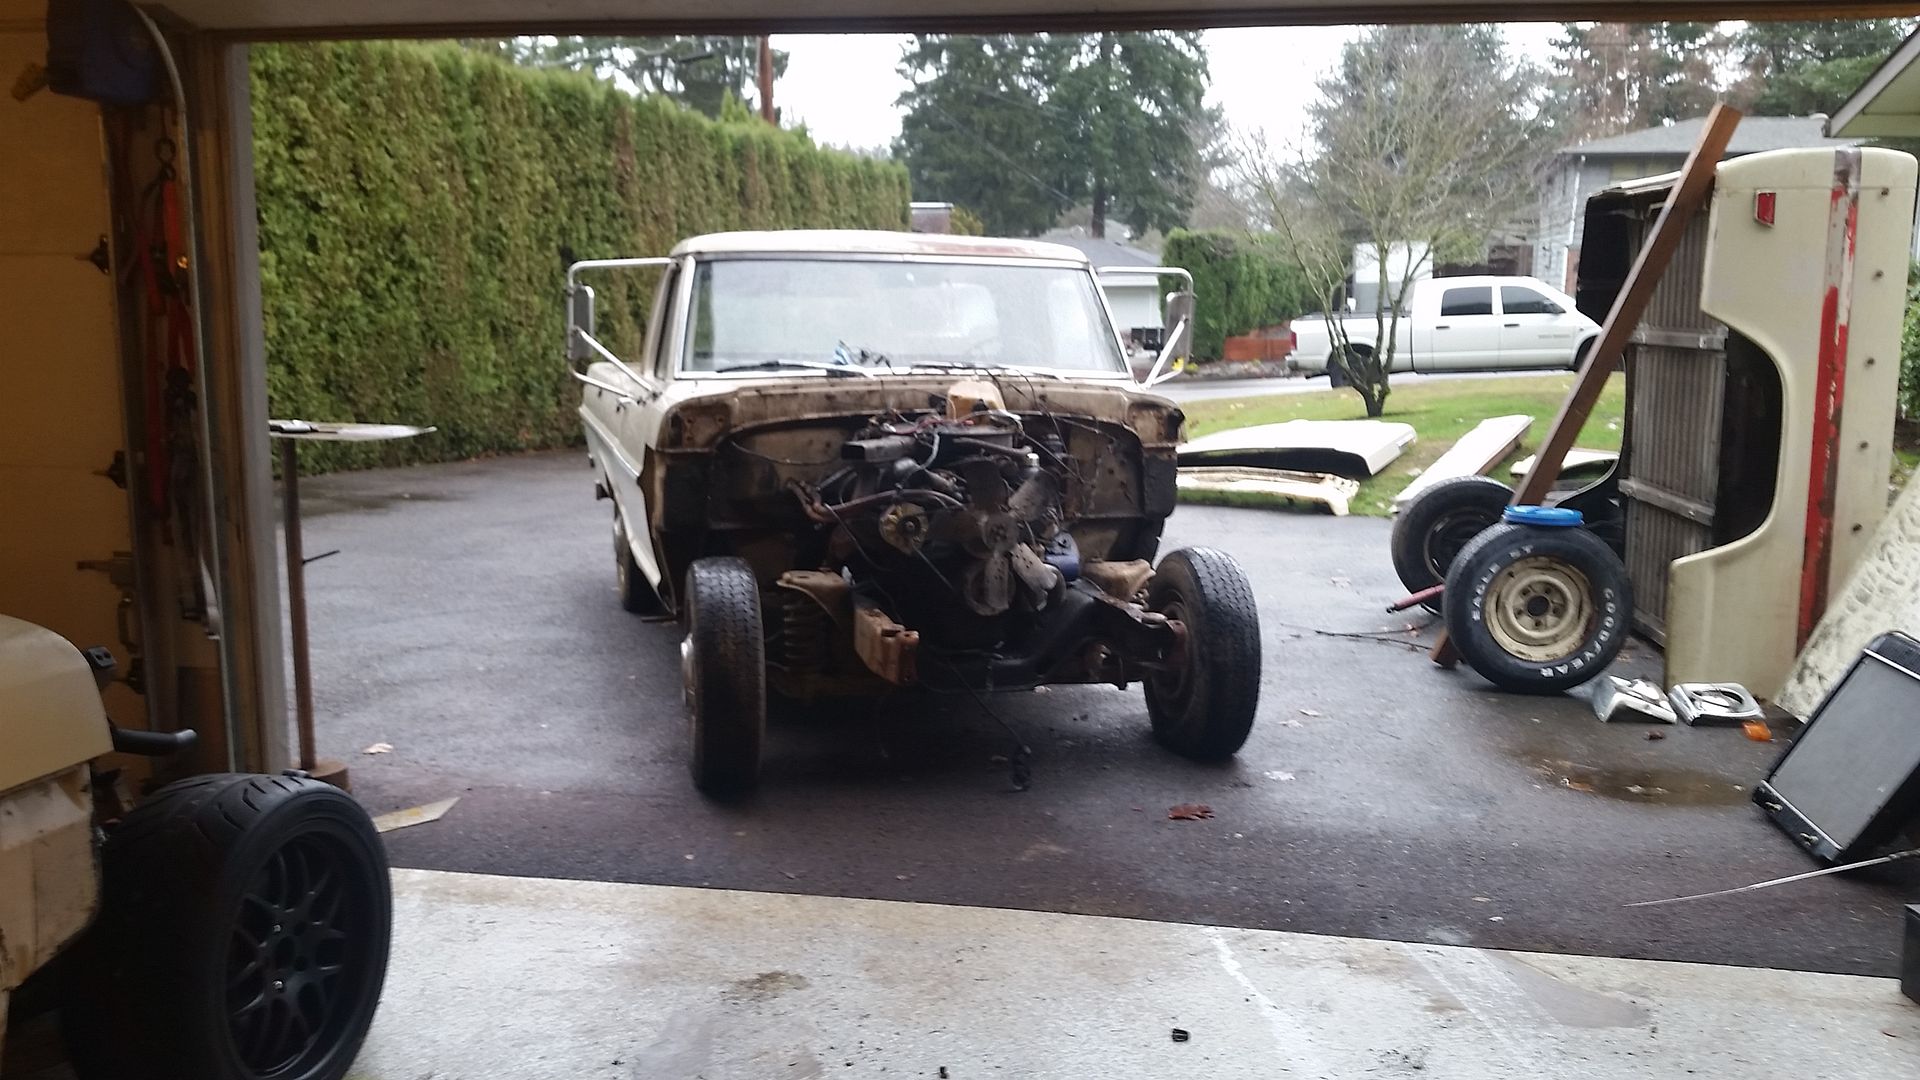
On top of getting the bumper and front clip off the truck, we also got the doors gutted and pulled the locks, interior door panels, latch mechanisms as well as the ignition switch and the nicer than mine gauge cluster, all in all a pretty good chunk of stuff. Still need to pull off the kind of cool rear step bumper.
So this is not the only rust, but it was the worst of it. Hit the core support with a wire wheel where I needed to and some rust mort to stop it. Cut and patched this spot as it was the only spot that kind of held something. The other spots are kind of superficial so I am not too worried about them.
The inner fender on the other hand, it was pretty hammered around the battery.
Here is what I ended up cutting out....of the old inner fender from the original truck.
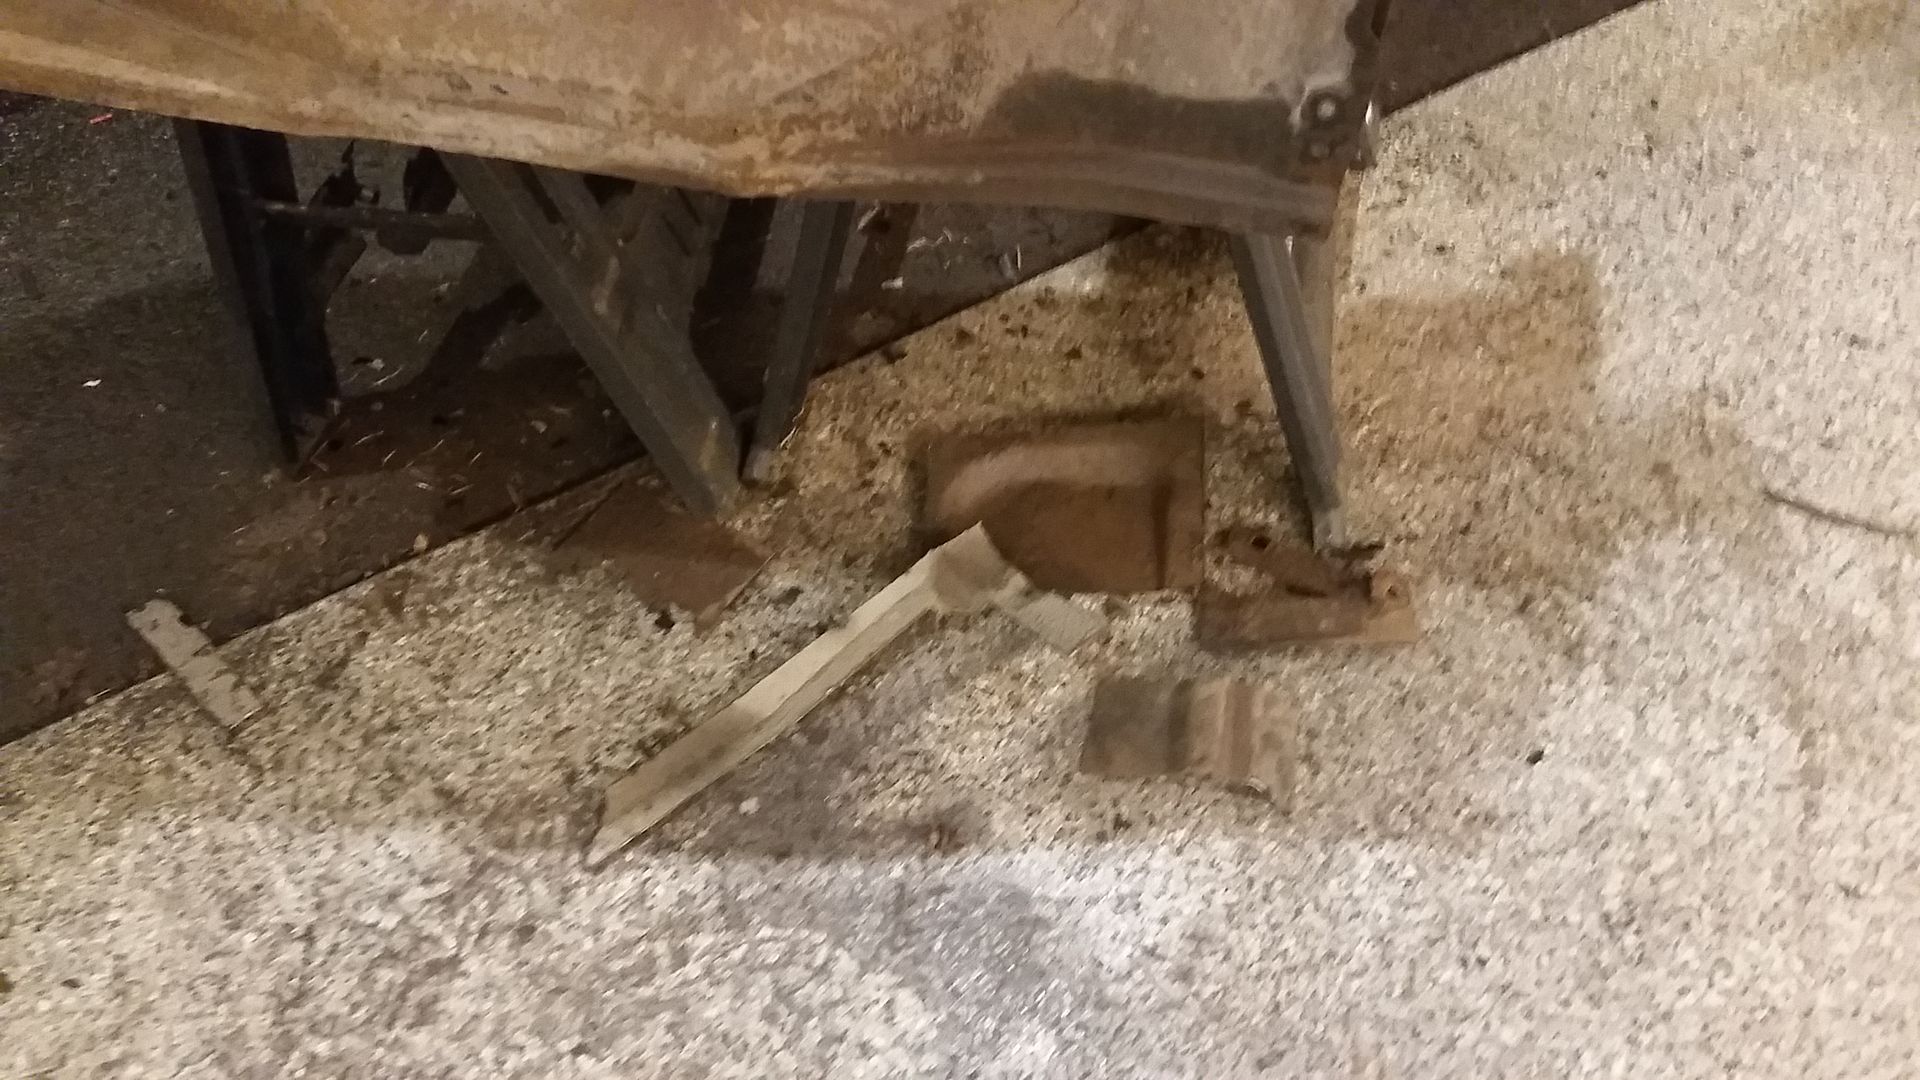
Against my better judgement I started doing typical "Sean" stuff and decided that I could make things better and this happened.
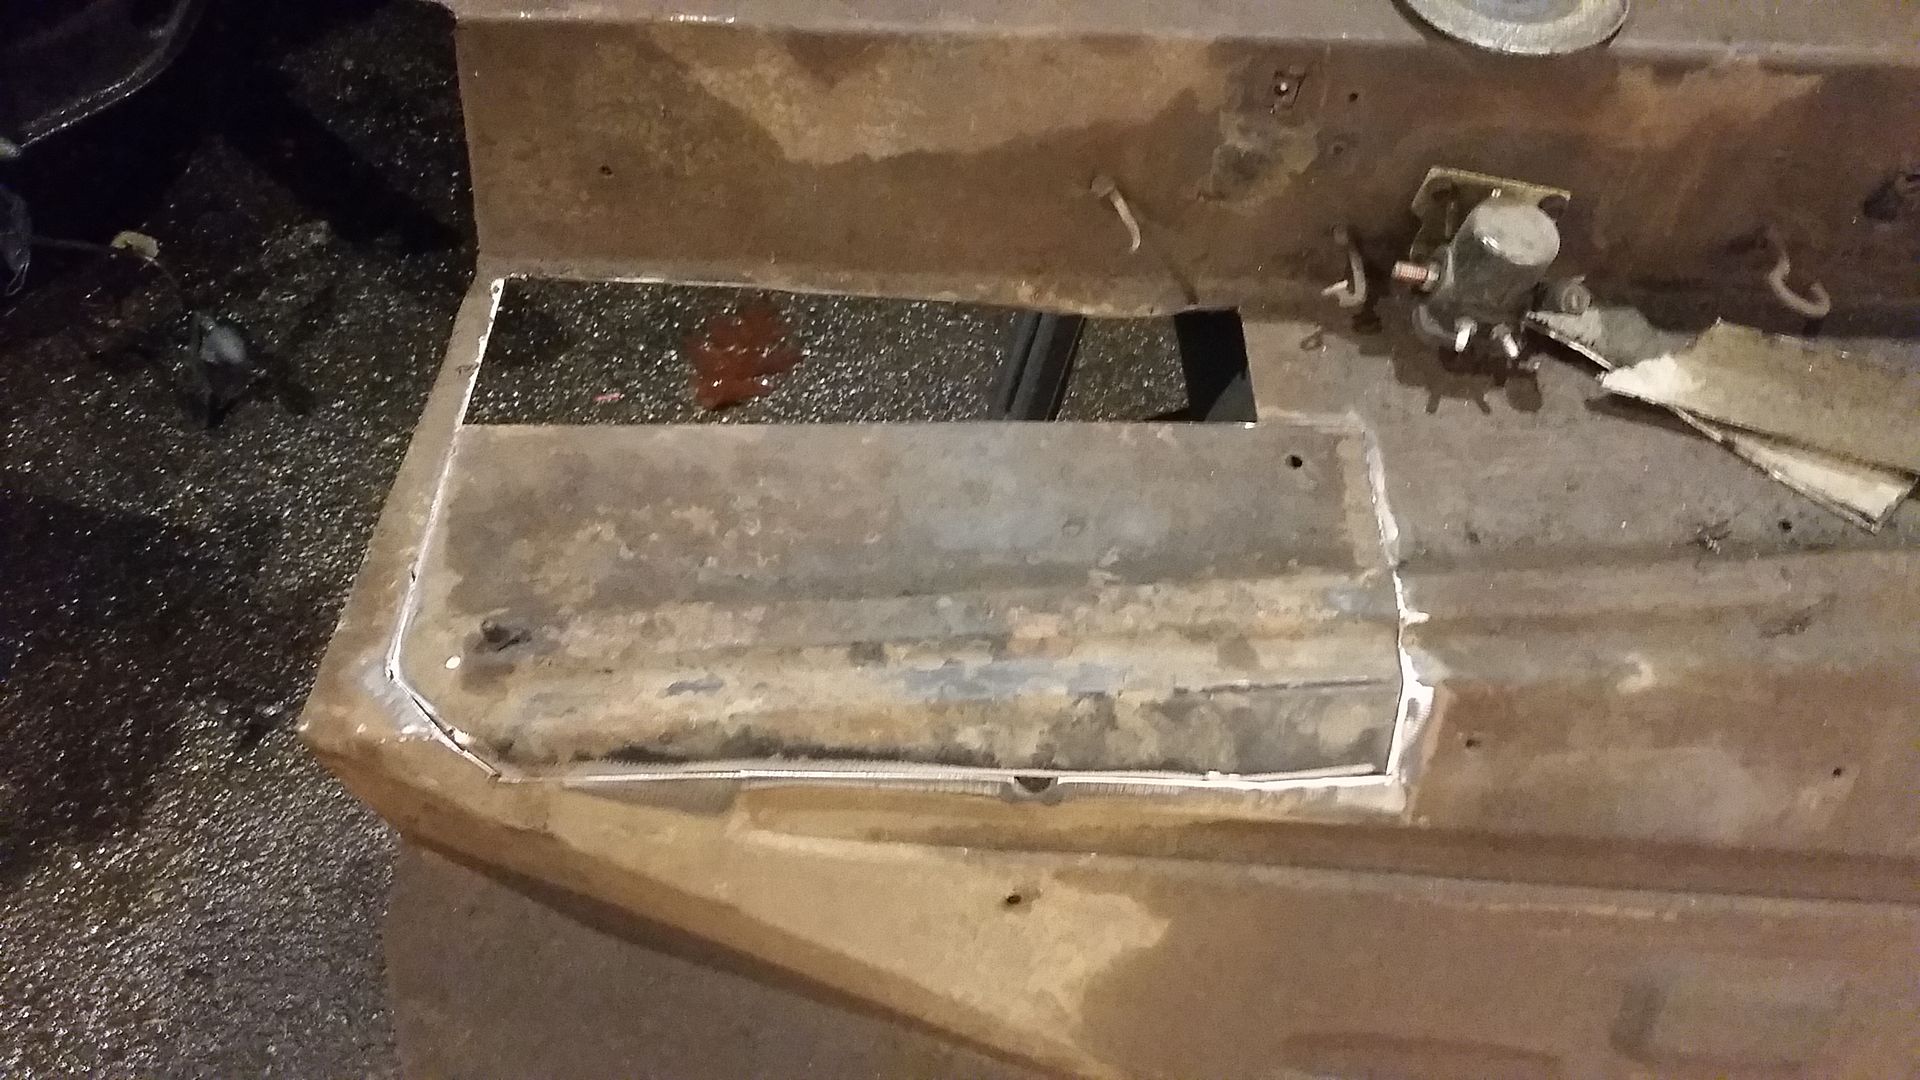
I took the back part of the ***** inner fender and chopped it up to fit in the spot where the battery tray was.
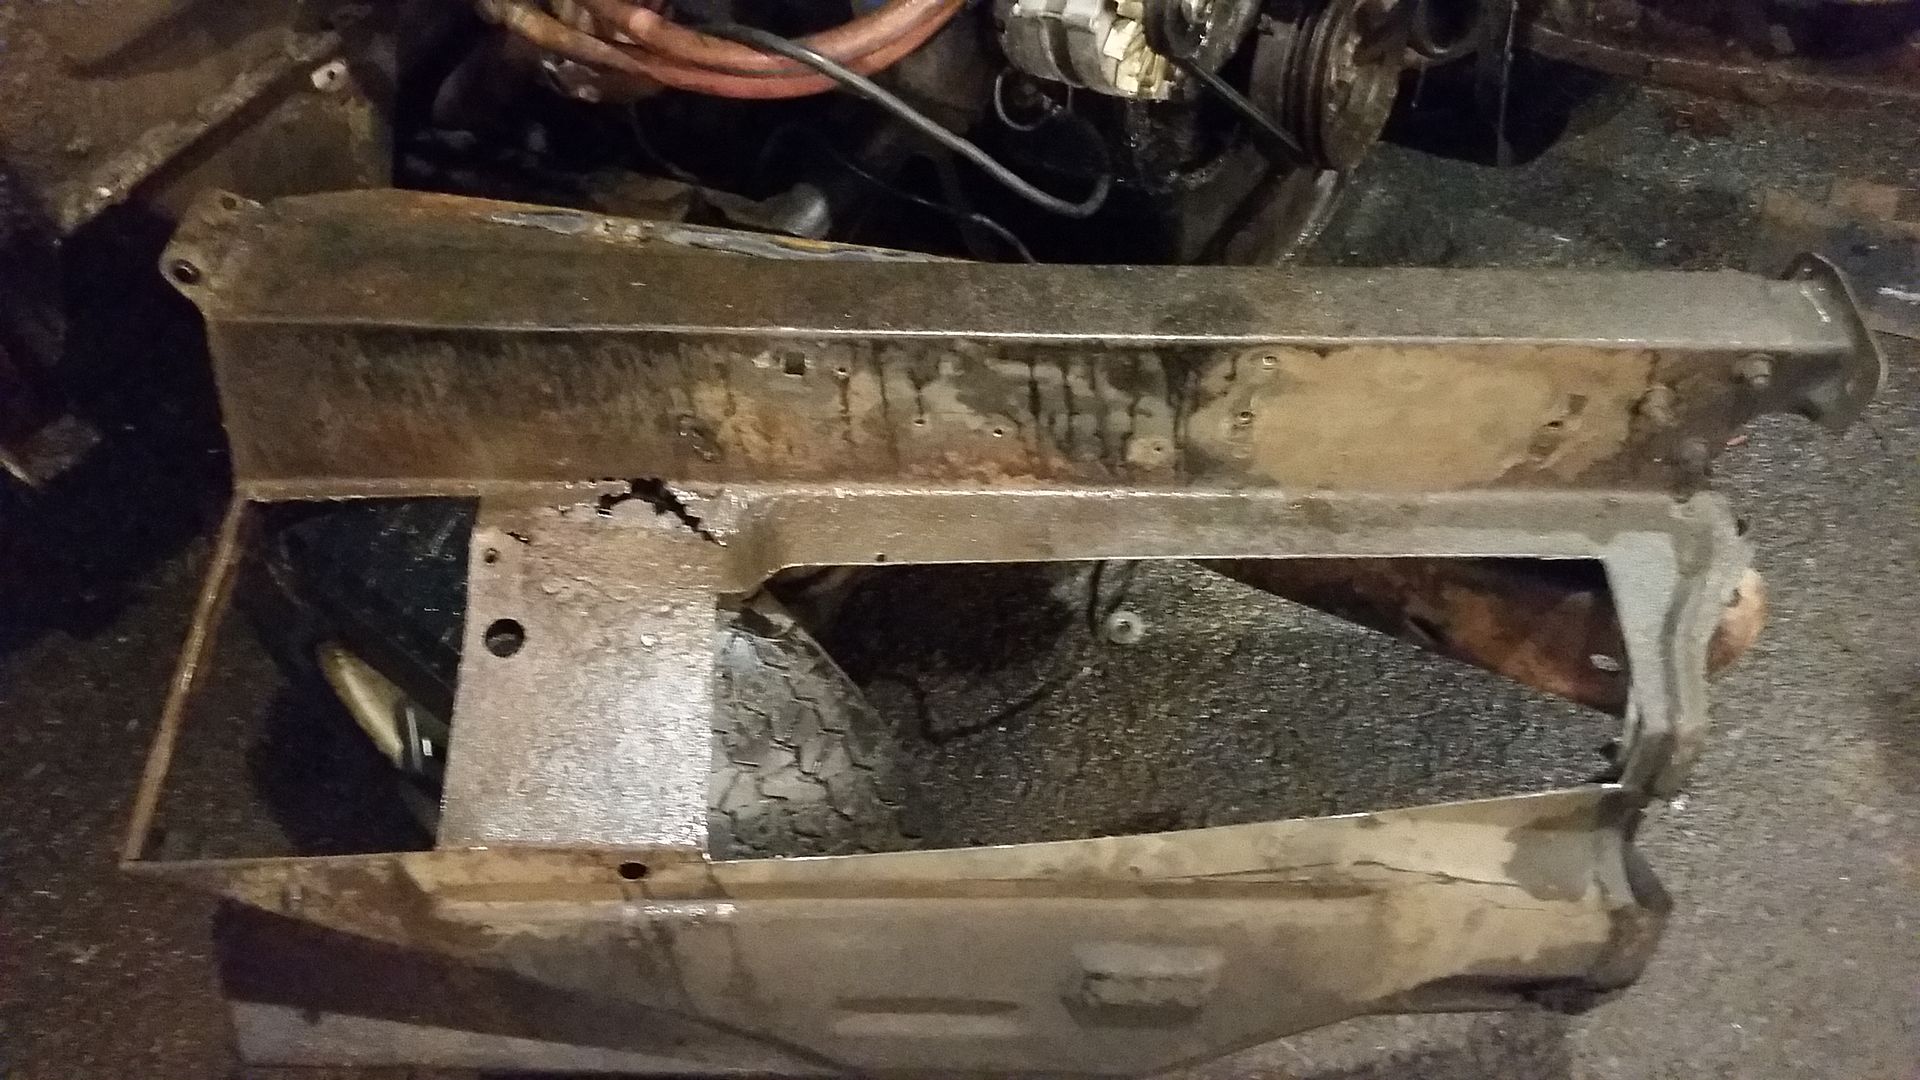
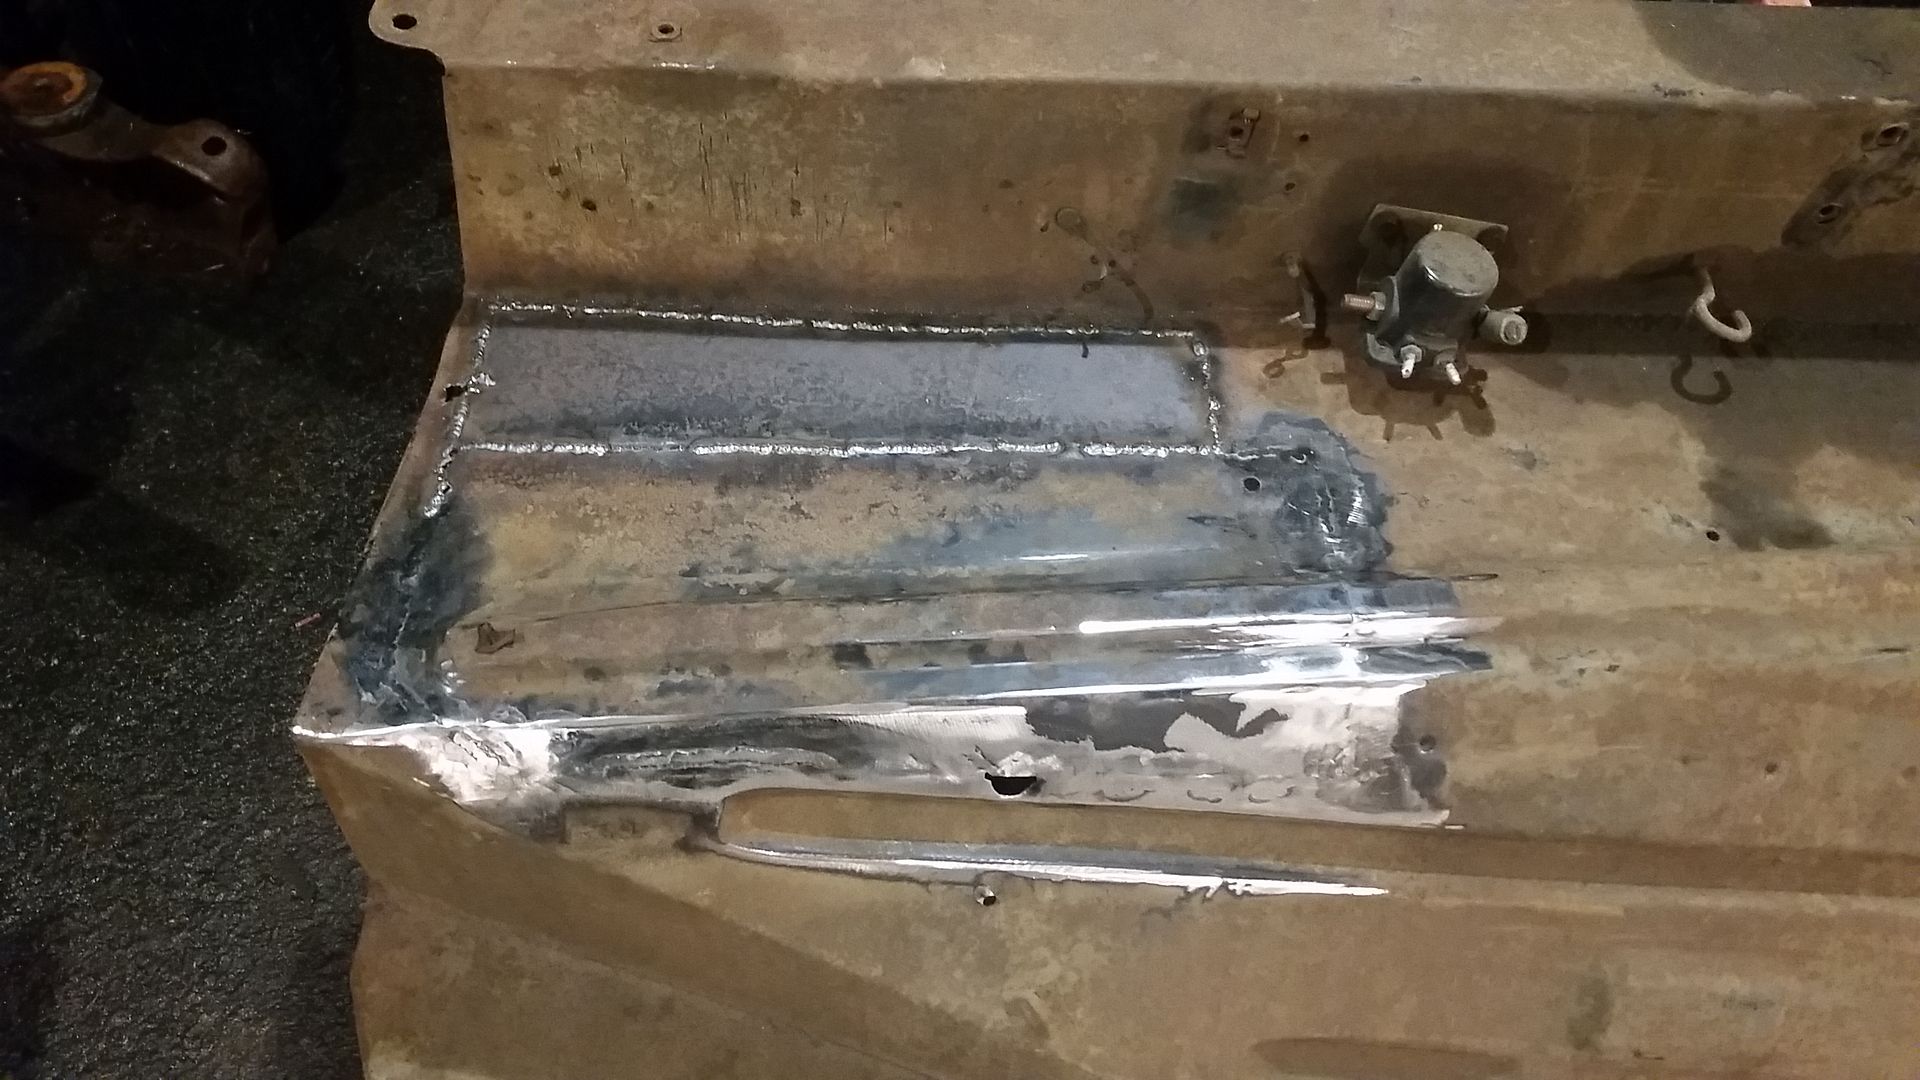
Its far from perfect and has a little oil canning that I need to figure out but all in all I think it looks a hell of a lot better than the old battery tray. Kind of wondering if I am going to tackle the other side as its proving to be a lot of work
I think I am going to get these close, do a light coat of bodywork and shoot them with truckbed liner.
Sean
Had a hand for a couple hours and got all the crap I needed off the ford. Also found a few suprises......rust.

On top of getting the bumper and front clip off the truck, we also got the doors gutted and pulled the locks, interior door panels, latch mechanisms as well as the ignition switch and the nicer than mine gauge cluster, all in all a pretty good chunk of stuff. Still need to pull off the kind of cool rear step bumper.
So this is not the only rust, but it was the worst of it. Hit the core support with a wire wheel where I needed to and some rust mort to stop it. Cut and patched this spot as it was the only spot that kind of held something. The other spots are kind of superficial so I am not too worried about them.
The inner fender on the other hand, it was pretty hammered around the battery.
Here is what I ended up cutting out....of the old inner fender from the original truck.

Against my better judgement I started doing typical "Sean" stuff and decided that I could make things better and this happened.

I took the back part of the ***** inner fender and chopped it up to fit in the spot where the battery tray was.

Its far from perfect and has a little oil canning that I need to figure out but all in all I think it looks a hell of a lot better than the old battery tray. Kind of wondering if I am going to tackle the other side as its proving to be a lot of work

I think I am going to get these close, do a light coat of bodywork and shoot them with truckbed liner.
Sean
-
hackster
- Preferred User

- Posts: 317
- Joined: Fri Oct 18, 2013 11:21 am
Re: Hackster's F100 #2 CV Swap 6 speed manual and Coyote
Well, sometimes you need a little eye opener to realize you need to go a different direction.
I got the patch panels cleaned up on the inner fender this evening, then went to welding up a couple of holes in the apron and found a little more rust so I got to looking and it was outside the fender and just generally not what I wanted.
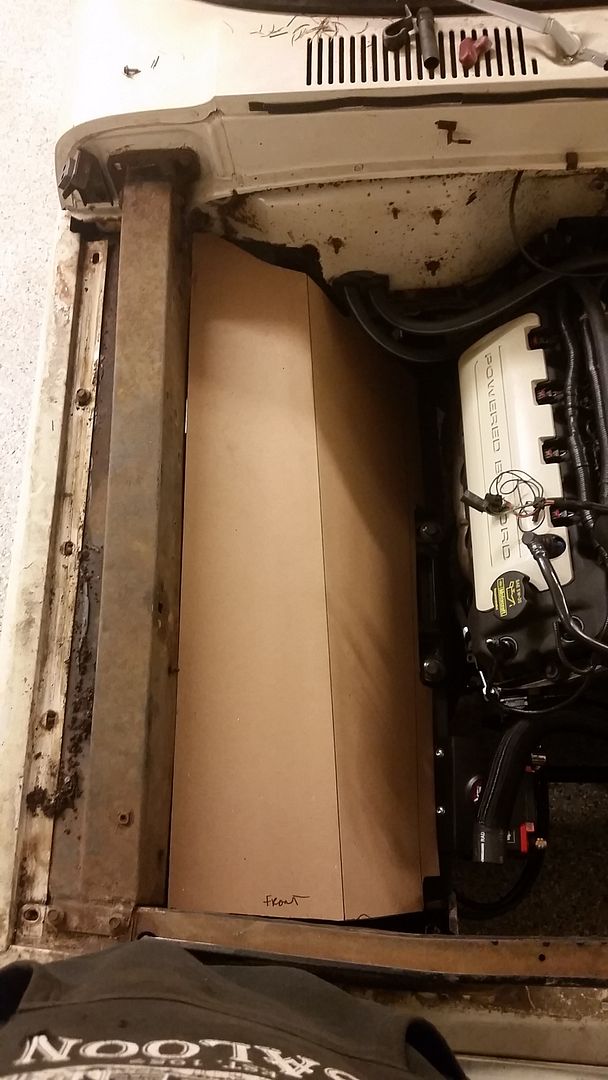
SO I eyeballed the other fender and took the cut off wheel to it cutting off from where the hood hinge mounts down off of it. **** needed to go,
So I am just going to rebuild a new inner fender and weld it to that. It will look better, be easier and have a much better rust free finished product.
Here is what I am going to do......I do not have a sheetmetal brake, so I am going to get some steel tomorrow and try and get these bent up at a buddies shop and get it put together.
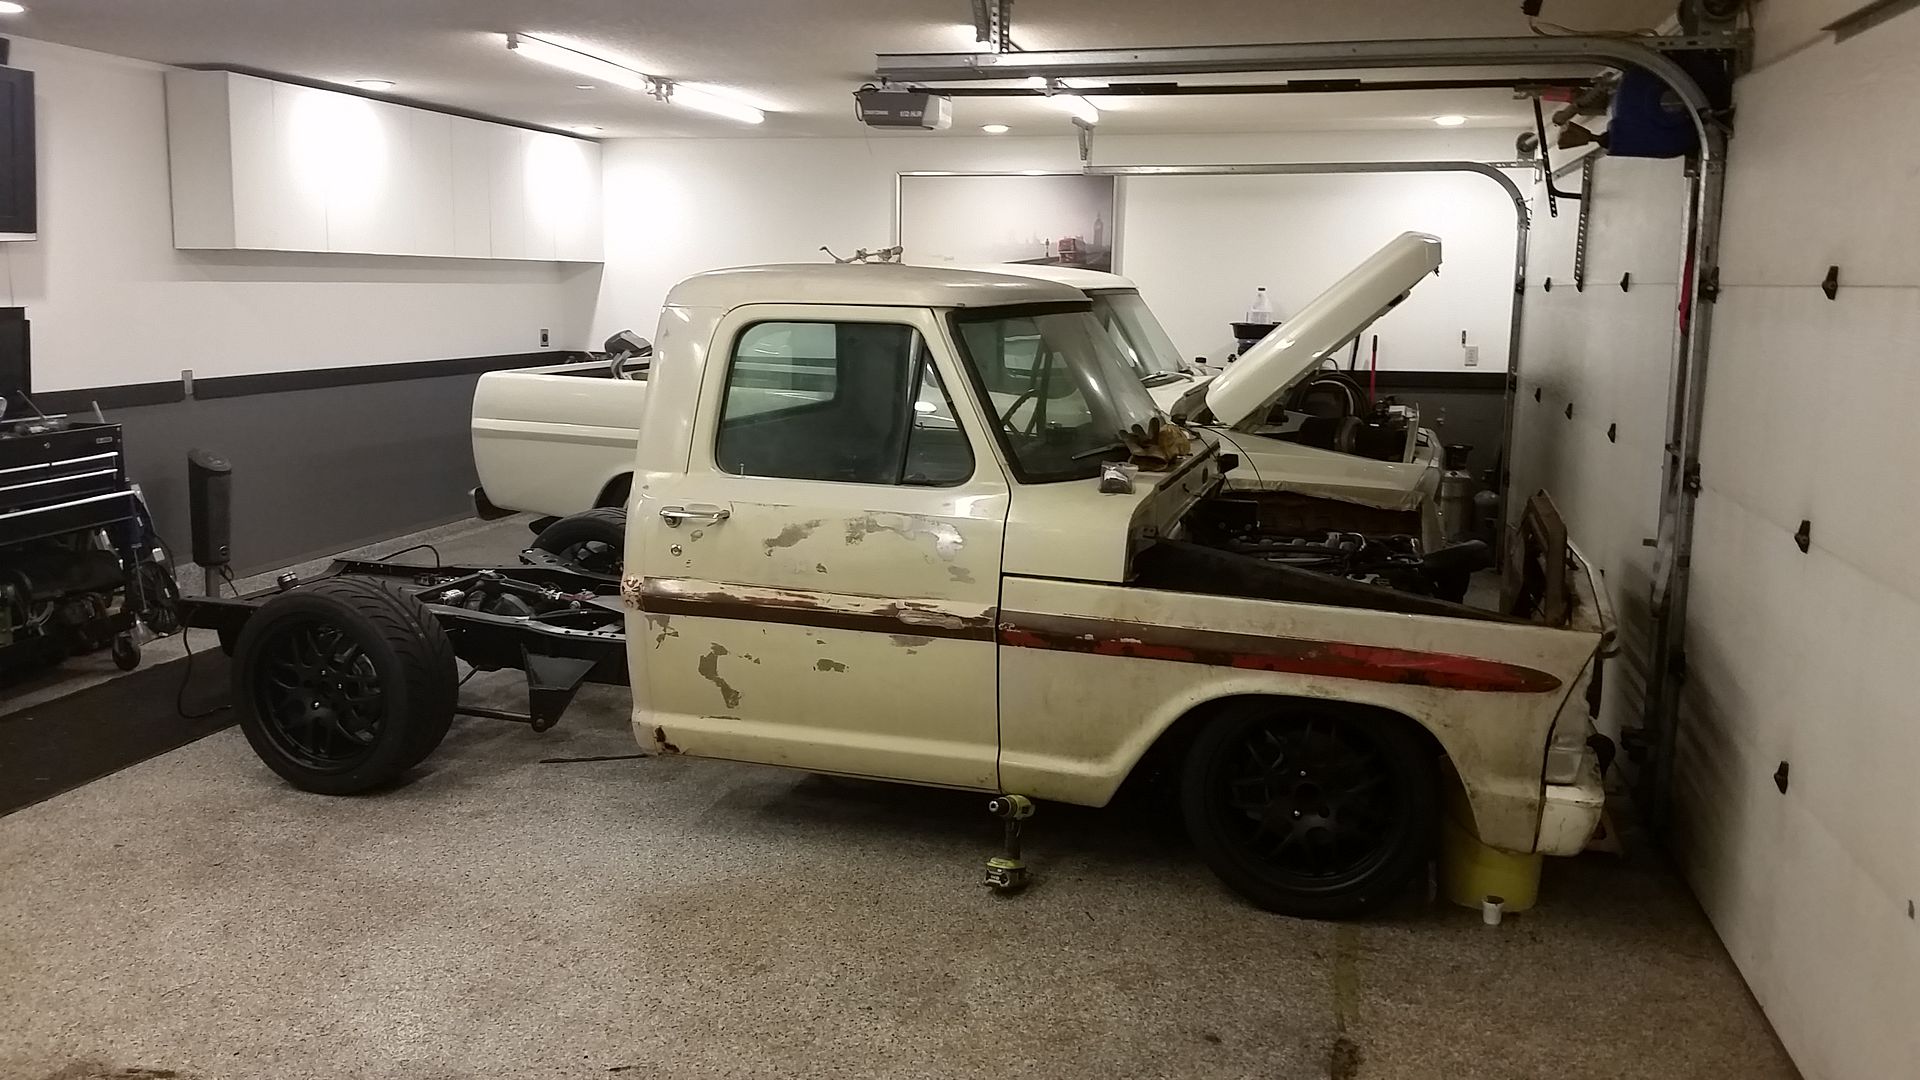
Set the front core support and fender on.
Looks cool low..
I took tomorrow off originally to get rid of the other truck, but have not managed to get the rear bumper or high hump trans tunnel cover off of it yet so I am going to mess with the fenders tomorrow a bit and try to get the welder fixed.
Sean
I got the patch panels cleaned up on the inner fender this evening, then went to welding up a couple of holes in the apron and found a little more rust so I got to looking and it was outside the fender and just generally not what I wanted.
SO I eyeballed the other fender and took the cut off wheel to it cutting off from where the hood hinge mounts down off of it. **** needed to go,
So I am just going to rebuild a new inner fender and weld it to that. It will look better, be easier and have a much better rust free finished product.
Here is what I am going to do......I do not have a sheetmetal brake, so I am going to get some steel tomorrow and try and get these bent up at a buddies shop and get it put together.

Set the front core support and fender on.
Looks cool low..

I took tomorrow off originally to get rid of the other truck, but have not managed to get the rear bumper or high hump trans tunnel cover off of it yet so I am going to mess with the fenders tomorrow a bit and try to get the welder fixed.
Sean
-
hackster
- Preferred User

- Posts: 317
- Joined: Fri Oct 18, 2013 11:21 am
Re: Hackster's F100 #2 CV Swap 6 speed manual and Coyote
Having a tough time with photobucket or my phone tonight, so limited photos...sorry.
Excellent day today. Picked up some flat stock and got to work Ironed out the templates for both sides as close as I can get. Cut out the templates into the 18ga sheetmetal.
Since I dont have a brake here at the house, I loaded up my template and headed over to a buddies shop to bend them up. Their bender is more of a press brake than a standard pan brake but it worked really well..... a lot better than I could do here.
Got them home and drilled out the holes for mounting an the hood hinge and got it all clamped up and welded out.
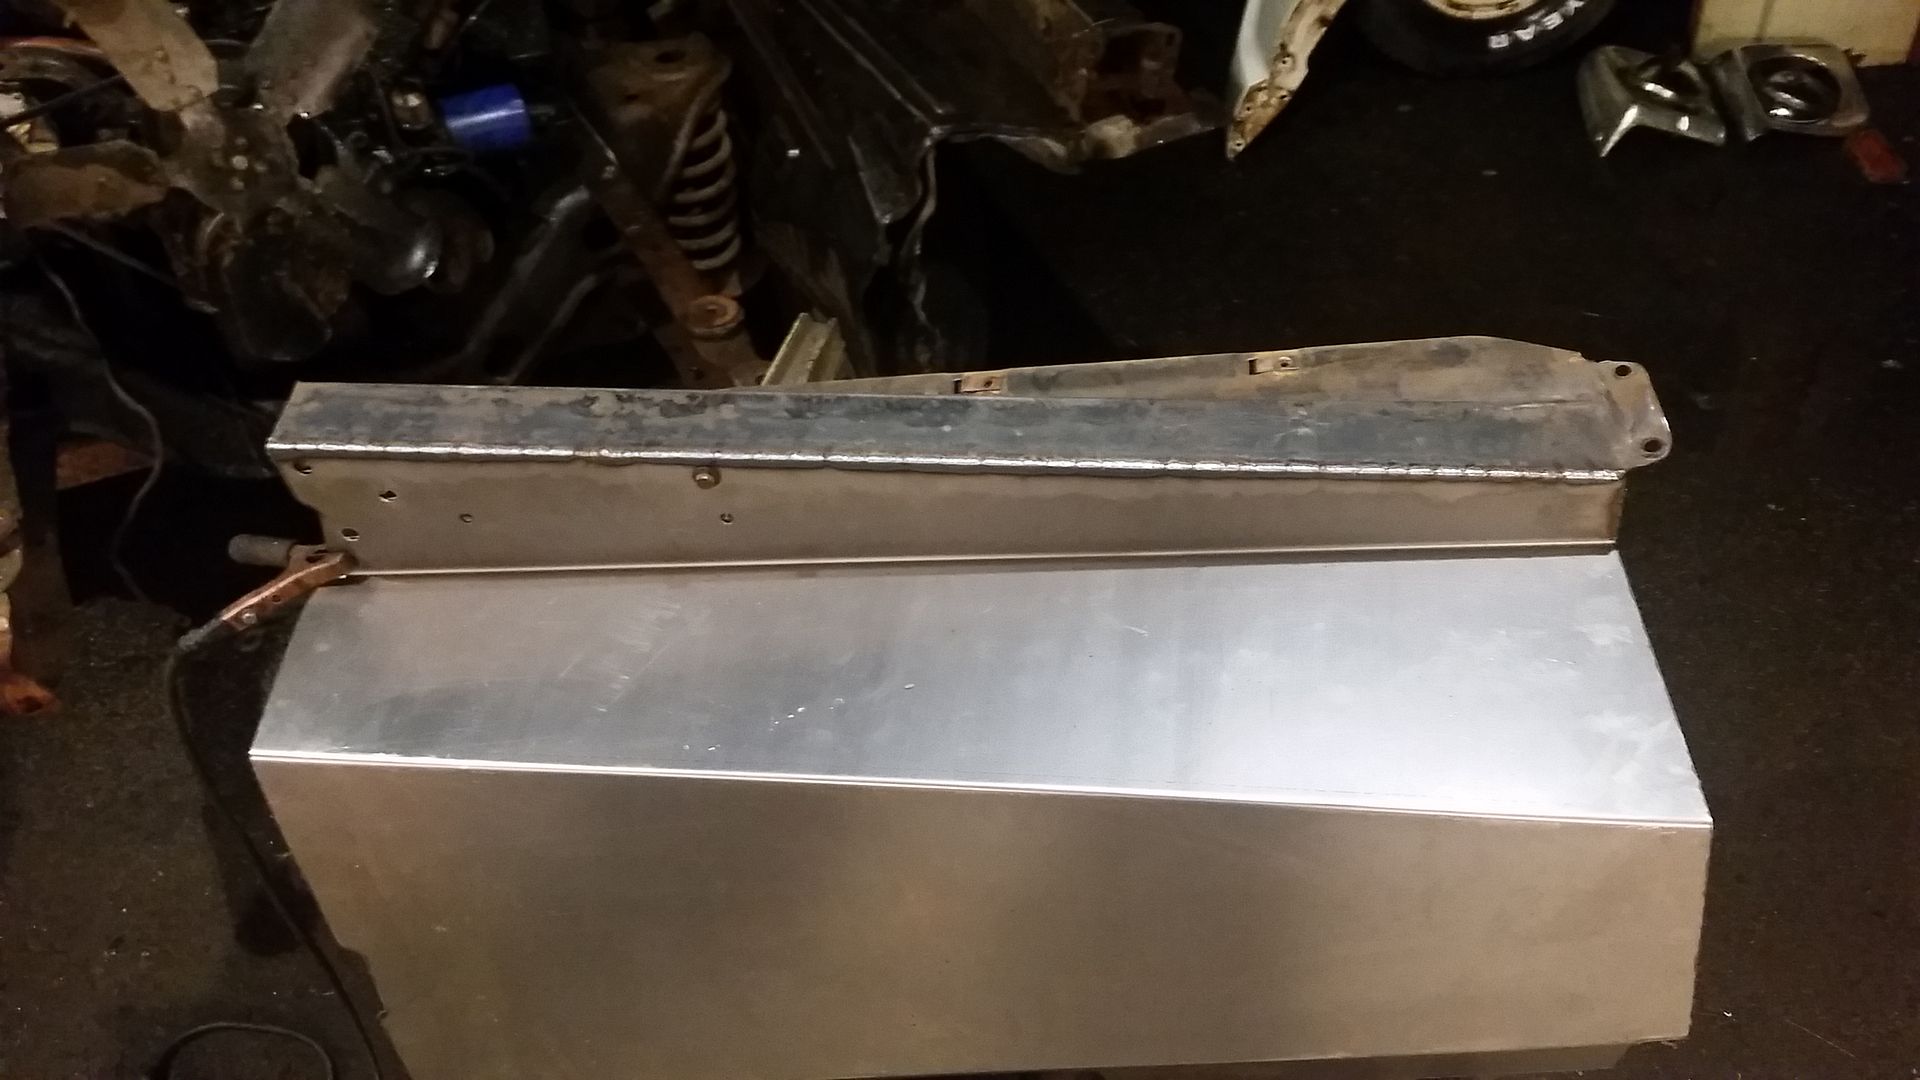
By doing it this way I had a nice outside seam to work with and got rid of almost all the factory holes to boot!!!!
Welder was working today. It is having some issues with the trigger, probably time for a new lead and trigger by now. Its a good feeling though to wear out a welder
Just about ready to go back on the truck for the first test fit. Edge is all metalwork and turned out really well in my very limited sheetmetal work.

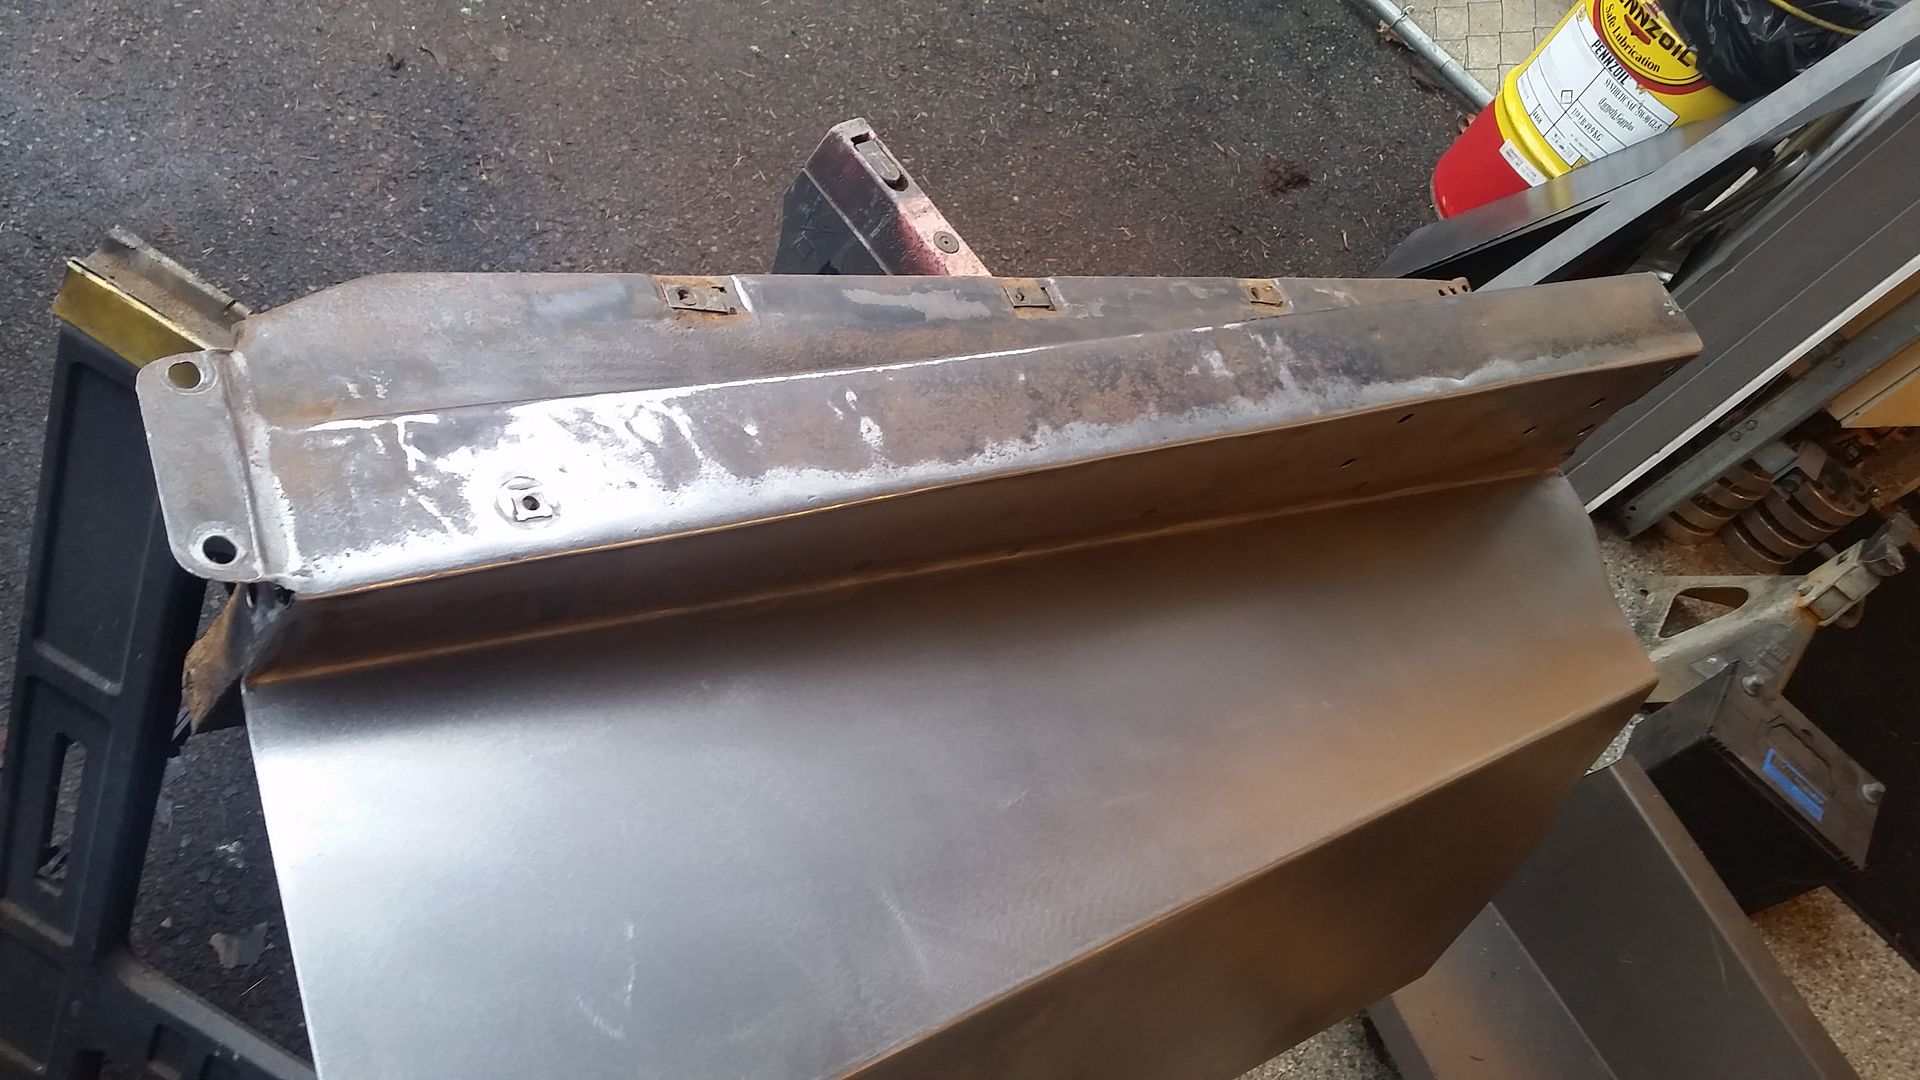
First fender fit up. Fit is really good, I am happy. I also got the brake welded in from the inner fender near the radiator up to the core support. I just need to drill a hole for the back mount and it will be ready for finish work.
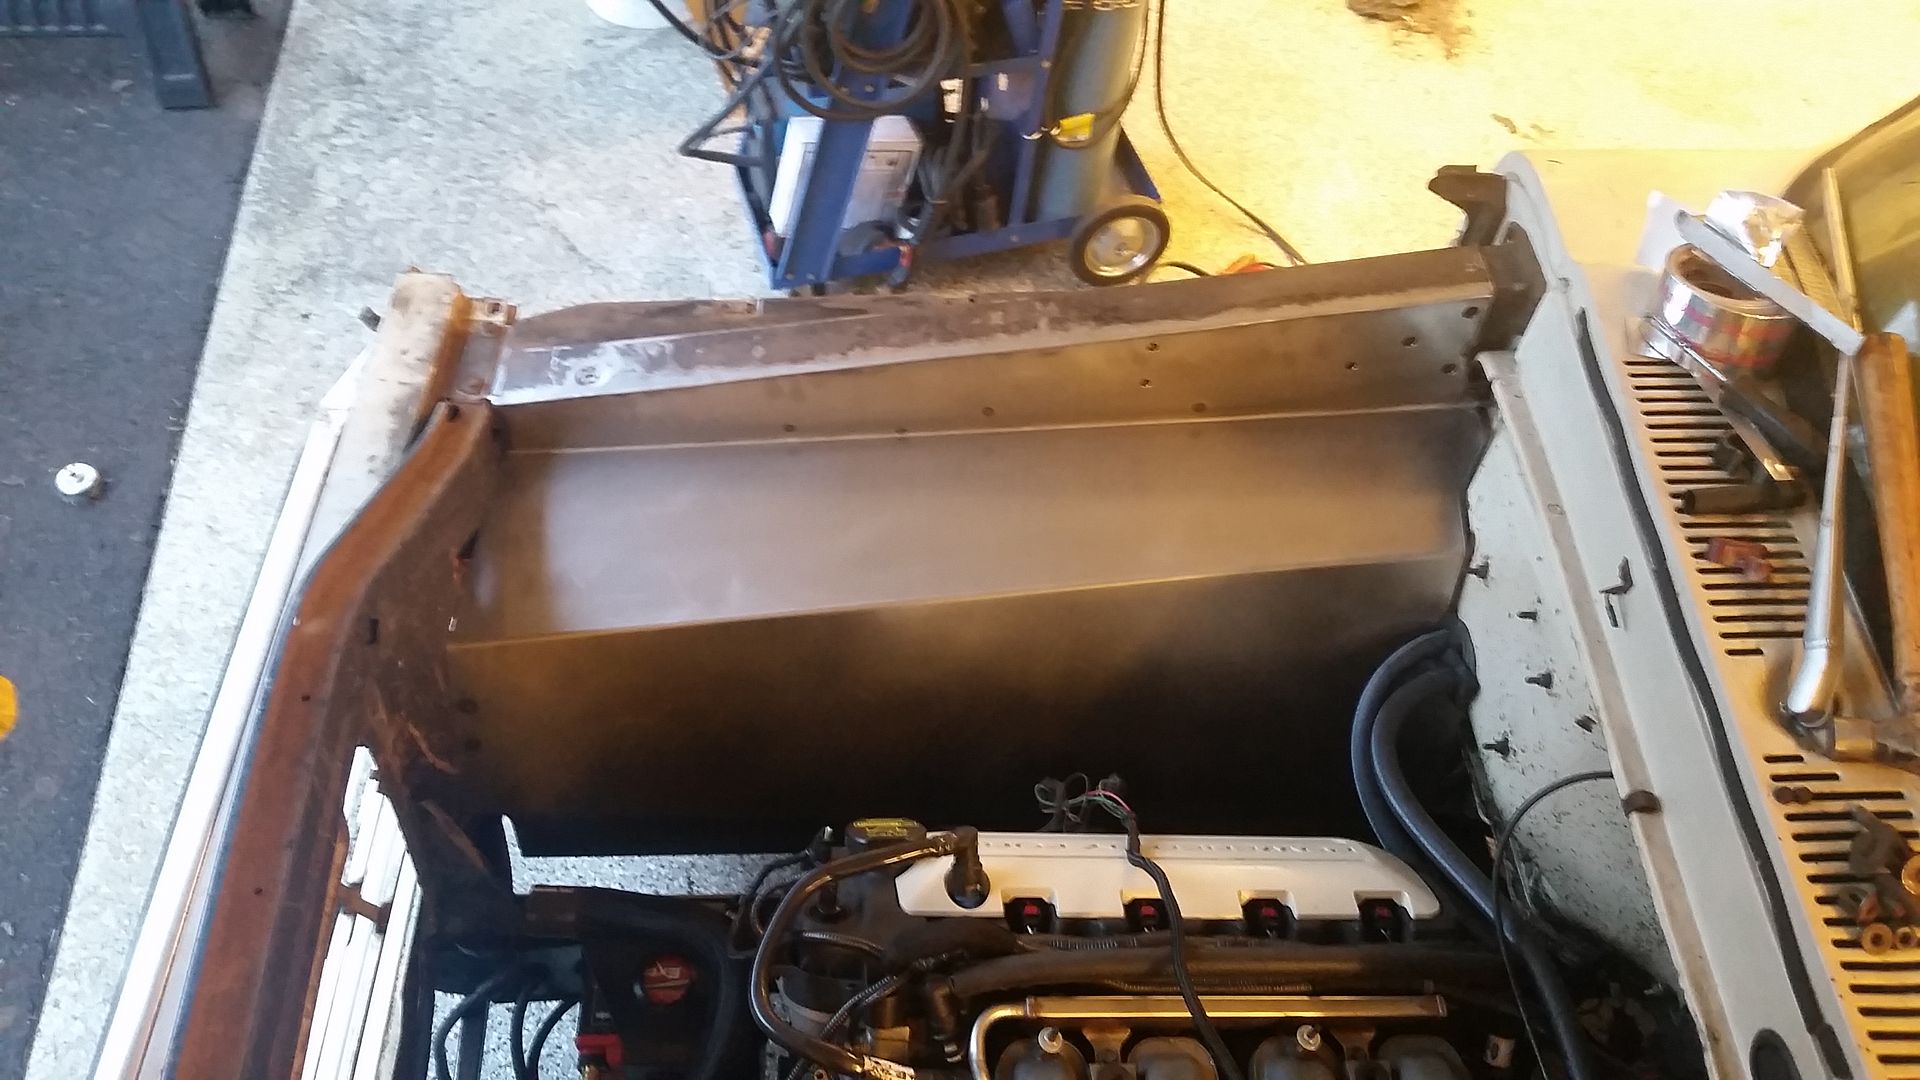
Not the best photo and they look like they are super easy but I gotta say they were a lot of work. My hat is off to the guys that are really skilled at the tin work.
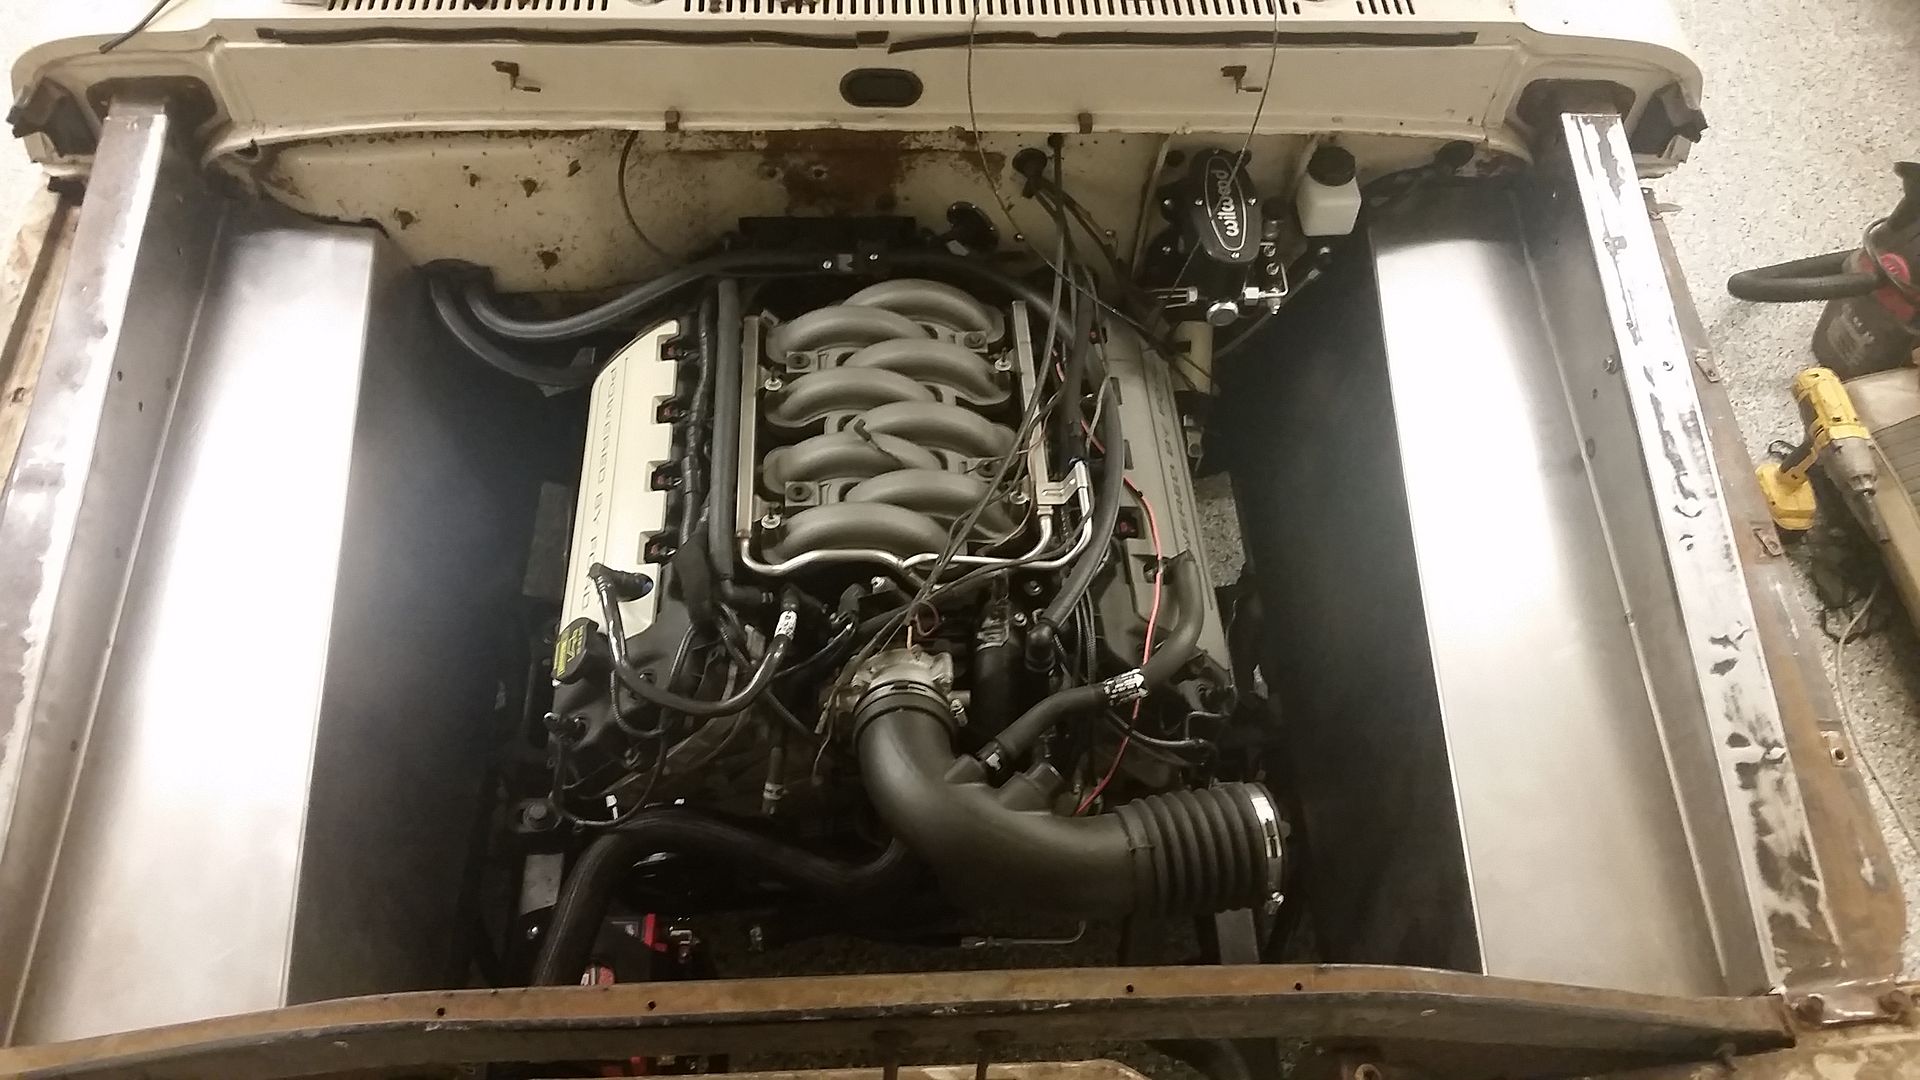
First time I have seen the truck with a core support and inner fenders since I tore it down, looking like a car again instead of just an engine and frame.
I also mocked up the radiator, its going to fit perfect. Need to come up with a mount for it and the power steering reservoir and the expansion tank as well. They will also fit next to the rad on either side. So far, so good.
Sean
Excellent day today. Picked up some flat stock and got to work Ironed out the templates for both sides as close as I can get. Cut out the templates into the 18ga sheetmetal.
Since I dont have a brake here at the house, I loaded up my template and headed over to a buddies shop to bend them up. Their bender is more of a press brake than a standard pan brake but it worked really well..... a lot better than I could do here.
Got them home and drilled out the holes for mounting an the hood hinge and got it all clamped up and welded out.

By doing it this way I had a nice outside seam to work with and got rid of almost all the factory holes to boot!!!!
Welder was working today. It is having some issues with the trigger, probably time for a new lead and trigger by now. Its a good feeling though to wear out a welder
Just about ready to go back on the truck for the first test fit. Edge is all metalwork and turned out really well in my very limited sheetmetal work.


First fender fit up. Fit is really good, I am happy. I also got the brake welded in from the inner fender near the radiator up to the core support. I just need to drill a hole for the back mount and it will be ready for finish work.

Not the best photo and they look like they are super easy but I gotta say they were a lot of work. My hat is off to the guys that are really skilled at the tin work.

First time I have seen the truck with a core support and inner fenders since I tore it down, looking like a car again instead of just an engine and frame.
I also mocked up the radiator, its going to fit perfect. Need to come up with a mount for it and the power steering reservoir and the expansion tank as well. They will also fit next to the rad on either side. So far, so good.
Sean